Table of Contents
Introduction
Dynamics 365 Portal Add-On is an application which is provided by Microsoft to configure a Dynamics 365 portal for an instance. By default, Microsoft provides one add-on for an instance to configure a portal of any type you want i.e. Customer Self Service portal or Custom portal or Community portal. So, in this blog I will explain how we can configure portal while using Microsoft Dynamics 365 Add-on.
Learn more about: Dynamics 365 Services
Dynamics 365 portal provides great customization options to:
- Configure site settings for portals to modify the behavior.
- Add dynamics contents to pages and create a wide variety of custom templates.
- Associate an authenticated portal user with either a Dynamics 365 contact or system user.
- Define entity forms and custom logic within the Dynamics 365 portal and so on.
So, let’s start and use the below steps to configure Dynamics 365 portal.
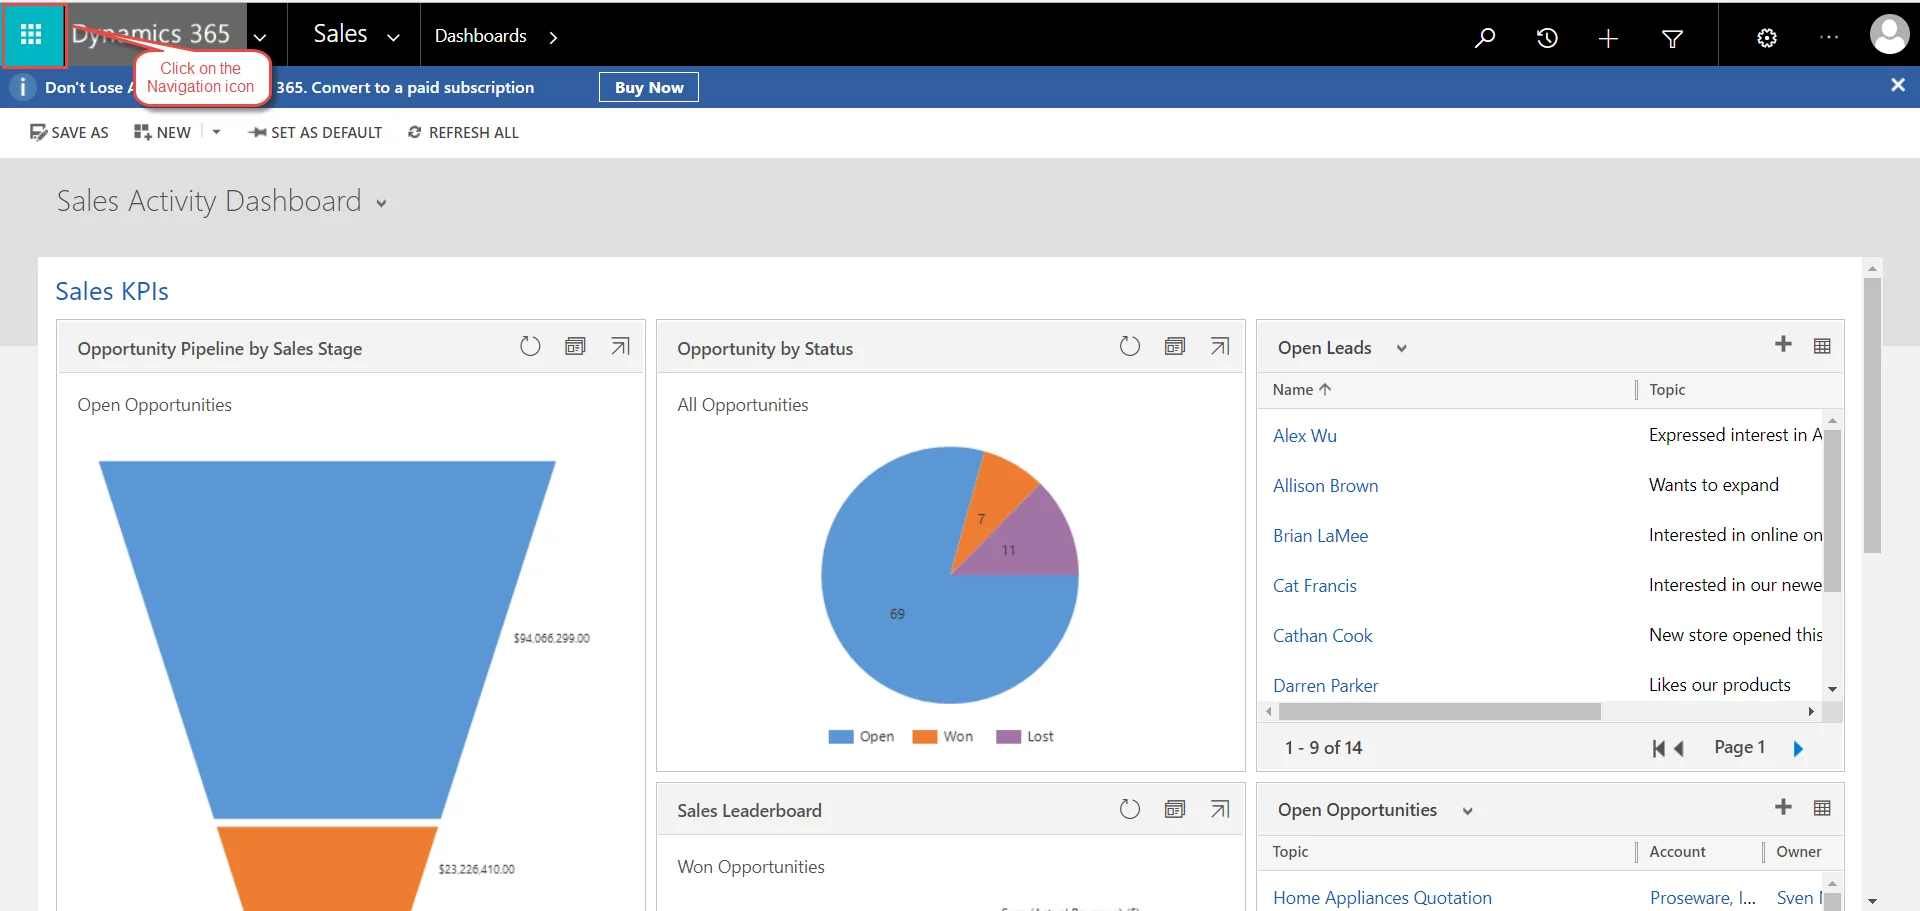
- Login to your Dynamics 365 instance and click on the Navigation Menu.
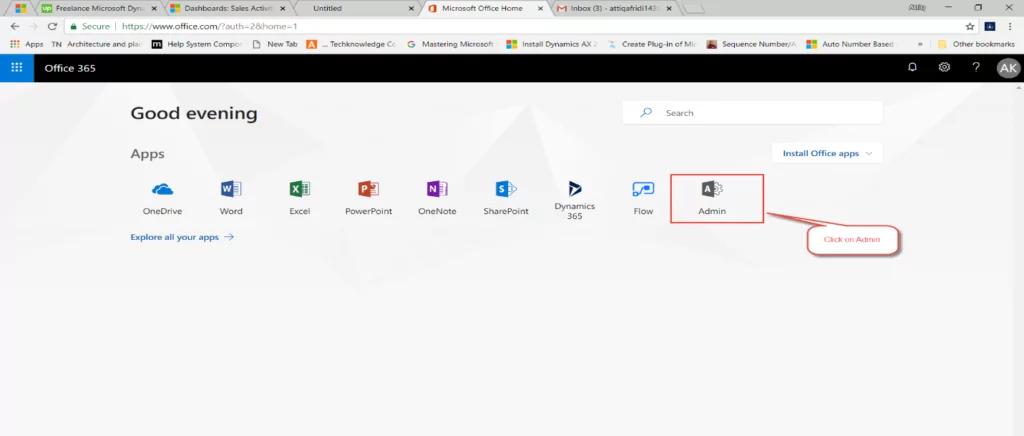
2. Click on Admin.
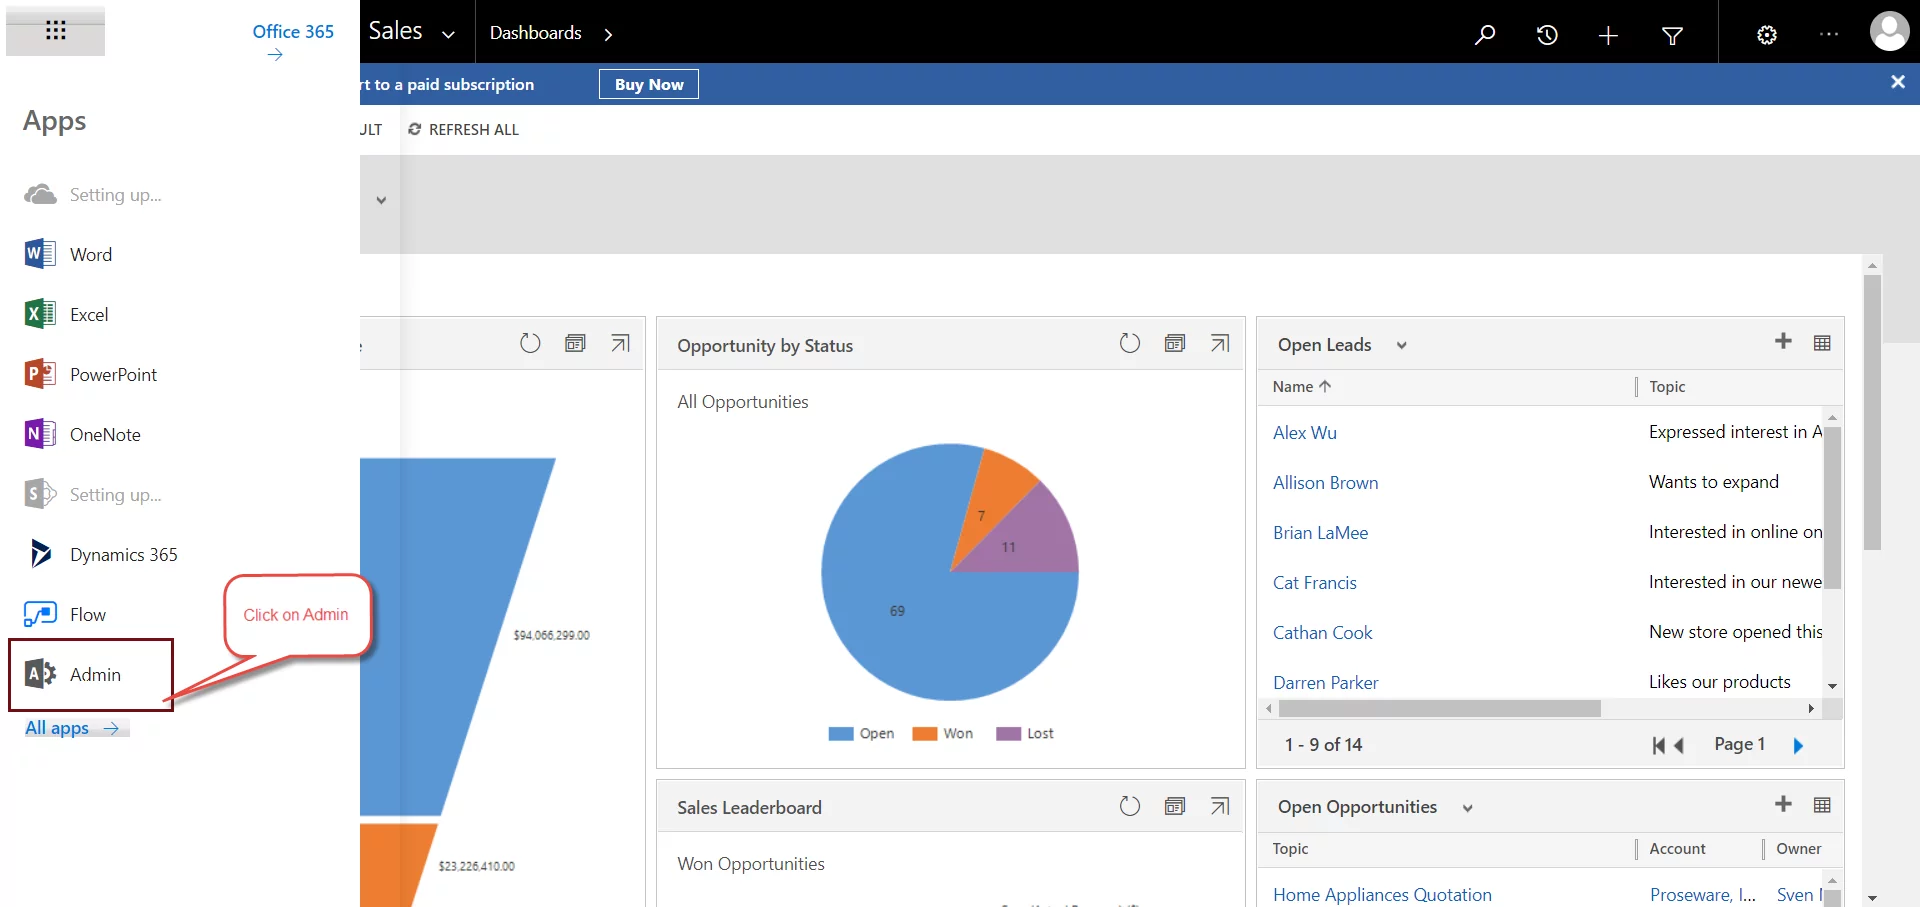
OR go to the https://portal.office.com/, provide your credentials if required and then click on Admin.
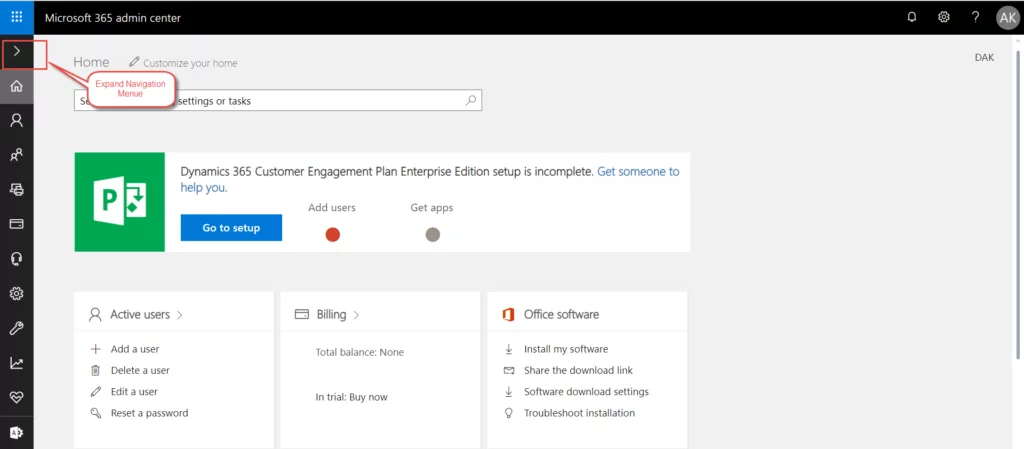
3. Expand the Navigation Menu.
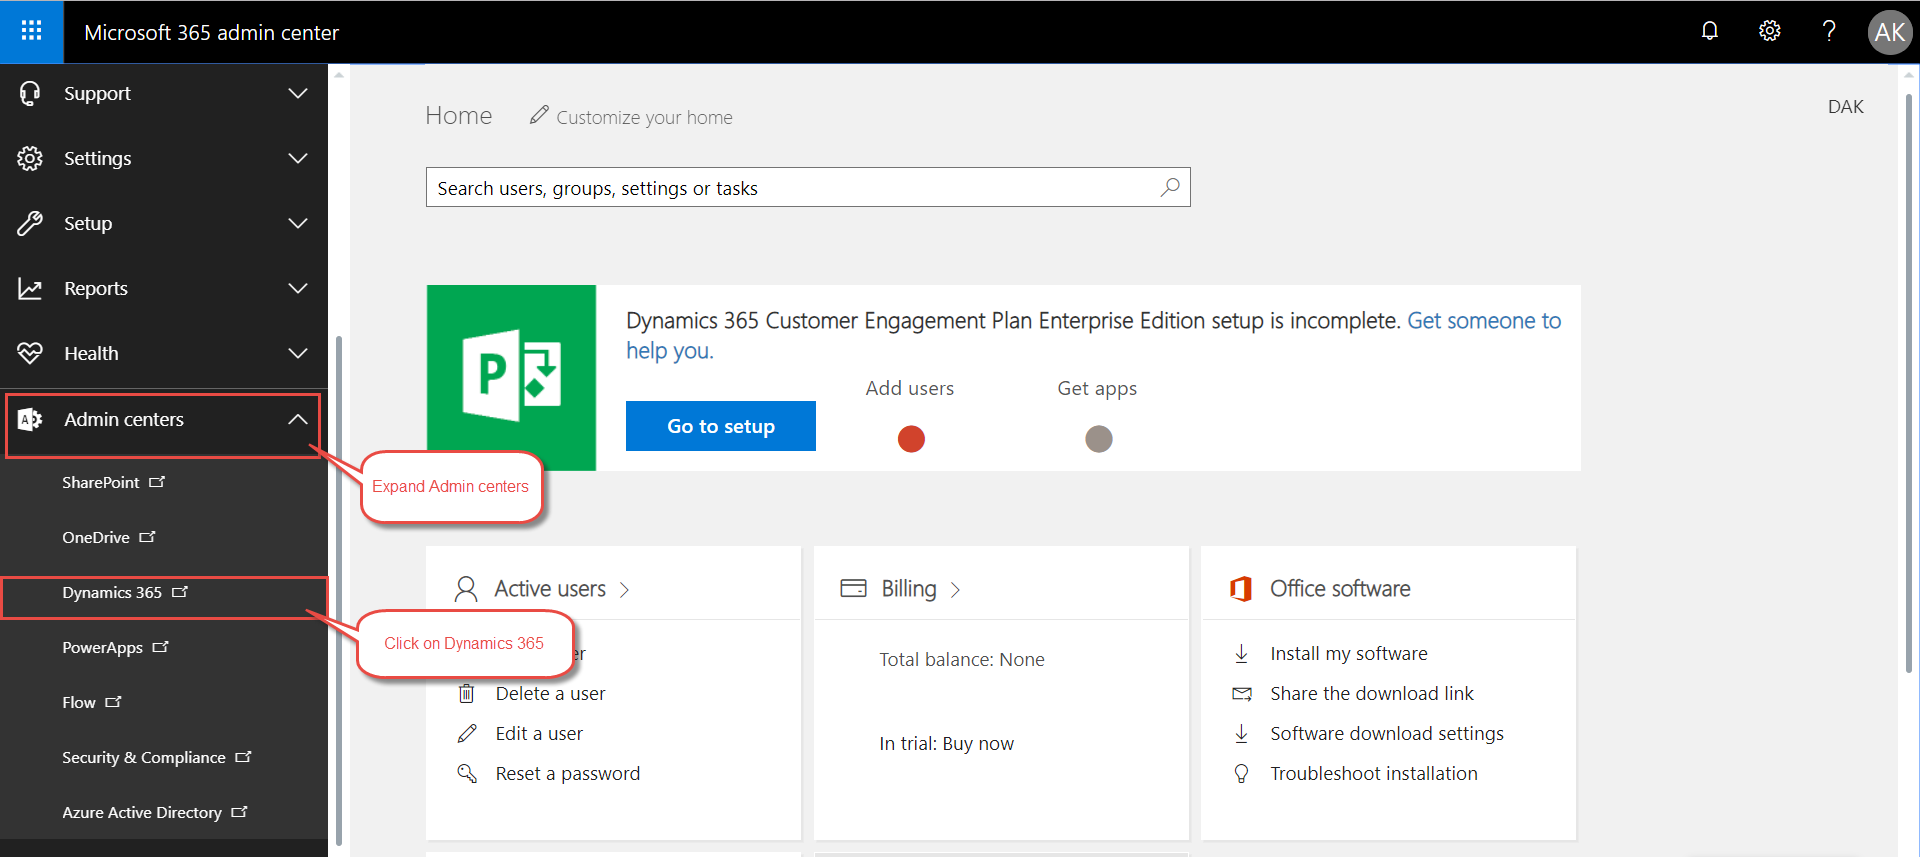
4. Expand Admin Centers and then click on Dynamics 365.
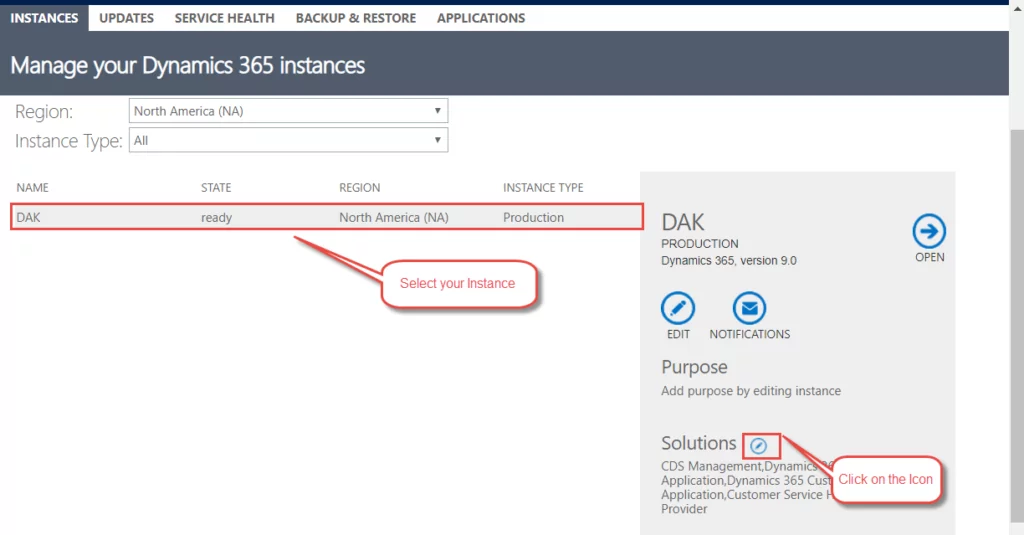
5. It will navigate you to the instances page where all the instances are available. Select your instance and click on Solution icon.
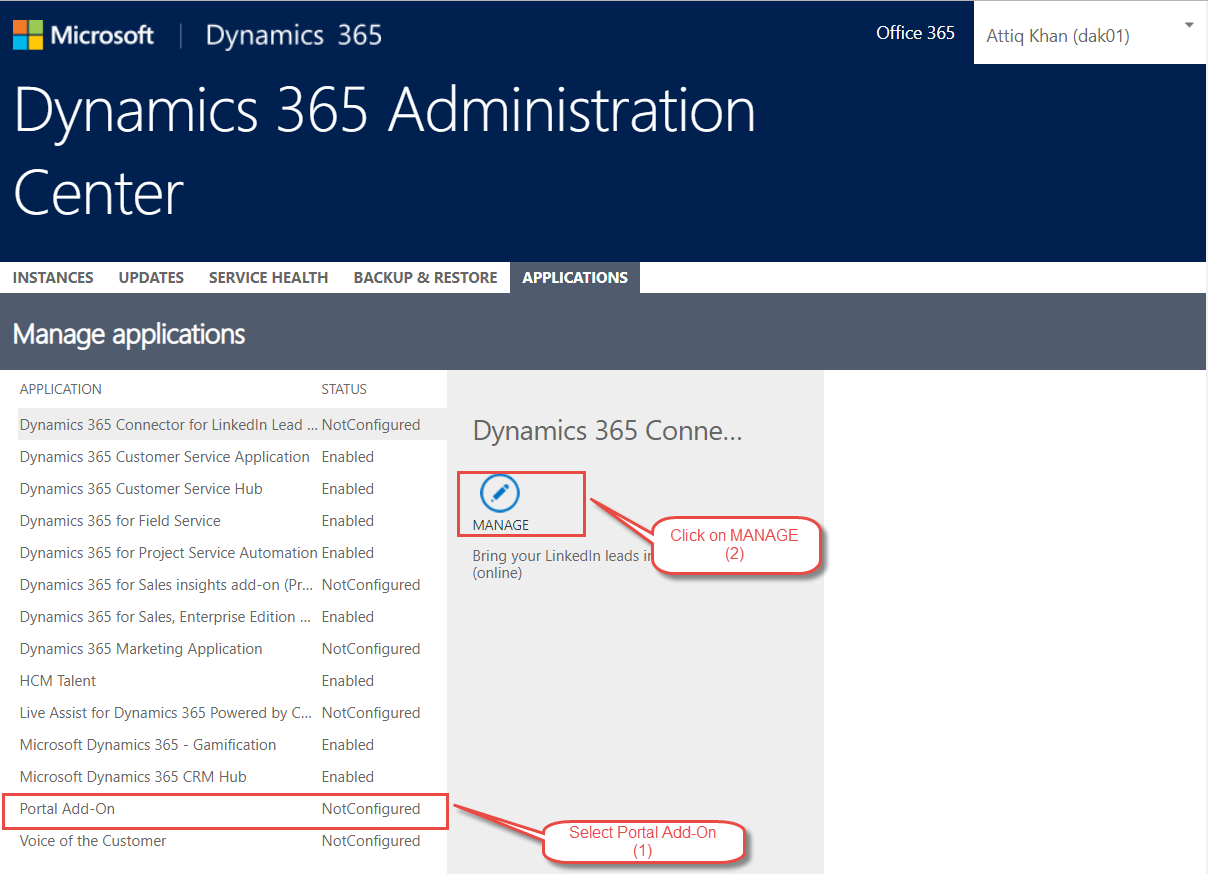
6. After clicking on icon, you will be navigated to the Application tab where you will see different applications and their statuses. Select on Portal Add-On and then click Manage.
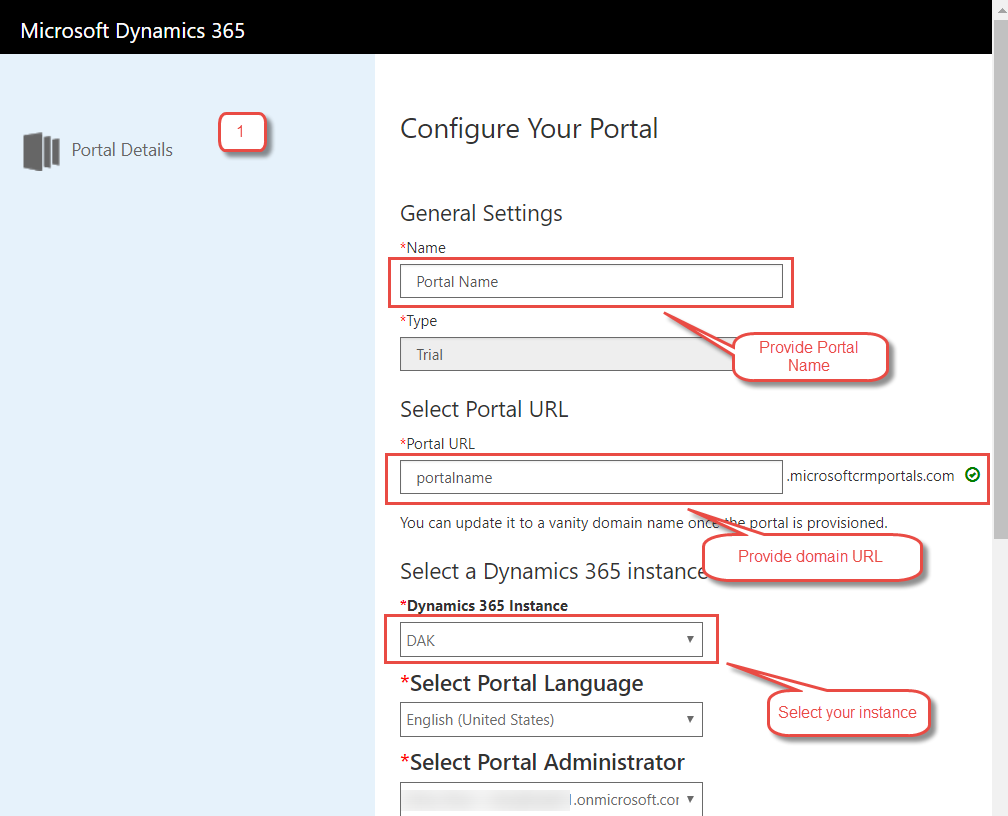
7. After clicking on Manage, it will navigate you to the Portal Details where you can Configure Your Portal.
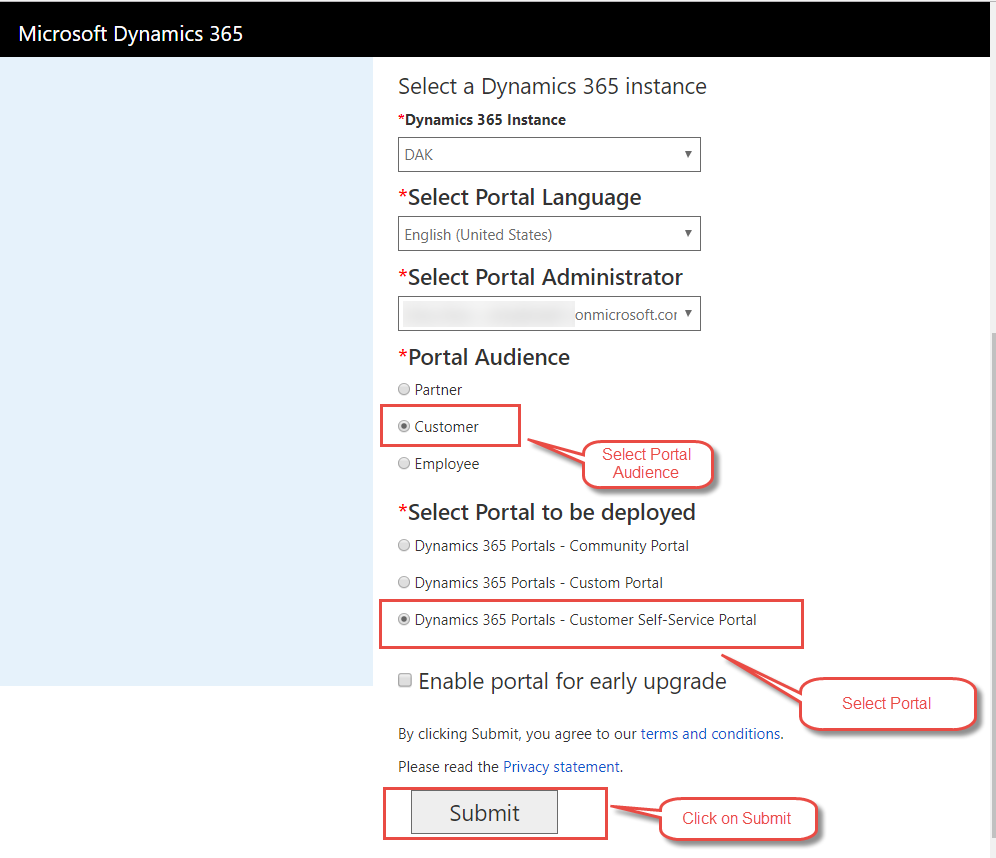
In the above image we can see a heading “Portal Audience”, I will briefly describe what does it mean:
- Partner: Outside vendors, Distributors.
- Customers: Direct users like contacts, accounts.
- Employee: Specific people, user license required.
Select the Audience according to your need, here I am selecting Customers.
Another heading that we can see in the above image is “Select Portal to be deployed“, I will also briefly describe what it means:
Dynamics 365 Portal – Community Portal:
In this type of portal, we can manage Forums, surveys, blogs and ideas etc.
It allows audience to perform tasks, manage their blogs and perform other activities.
It comes empty by default, but you can customize it for your own need.
Select the portal to be deployed, here I am selecting Customer Self-Service Portal.
After submitting the portal details, a popup will display to accept terms and conditions.
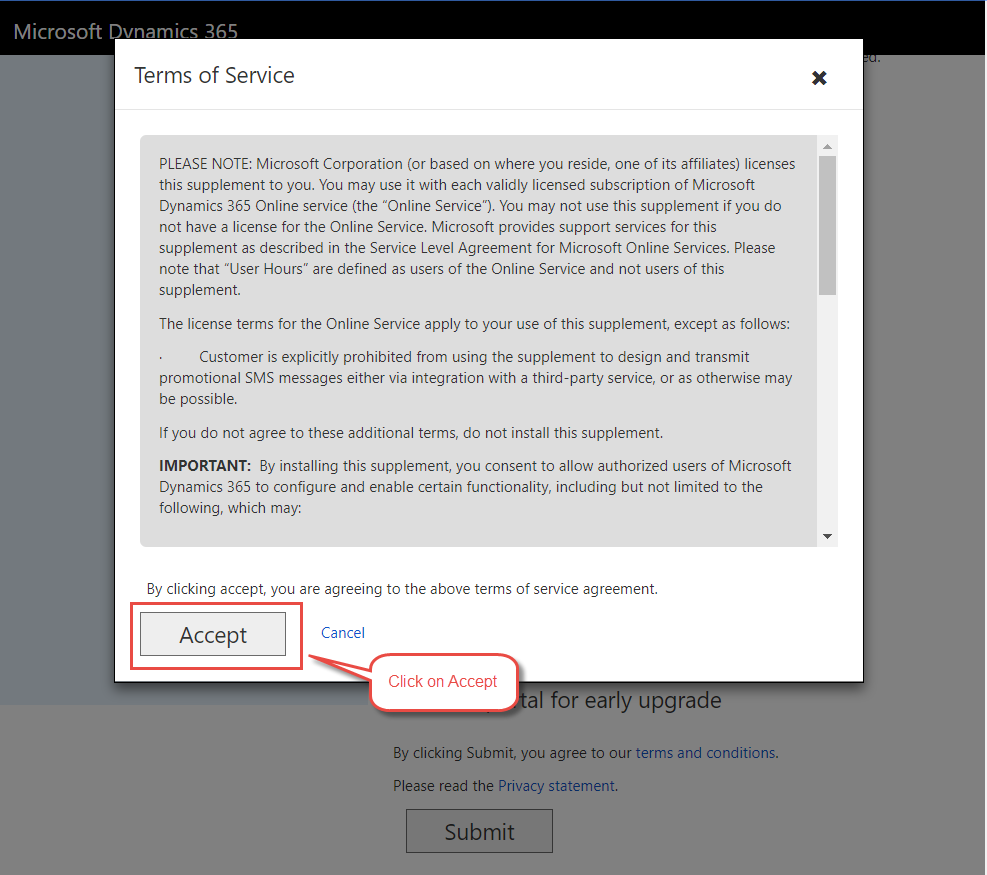
9. After accepting the terms and conditions, it will navigate you to the portal details page where it will show you the request id. Click on “here” after some time and then close this window.
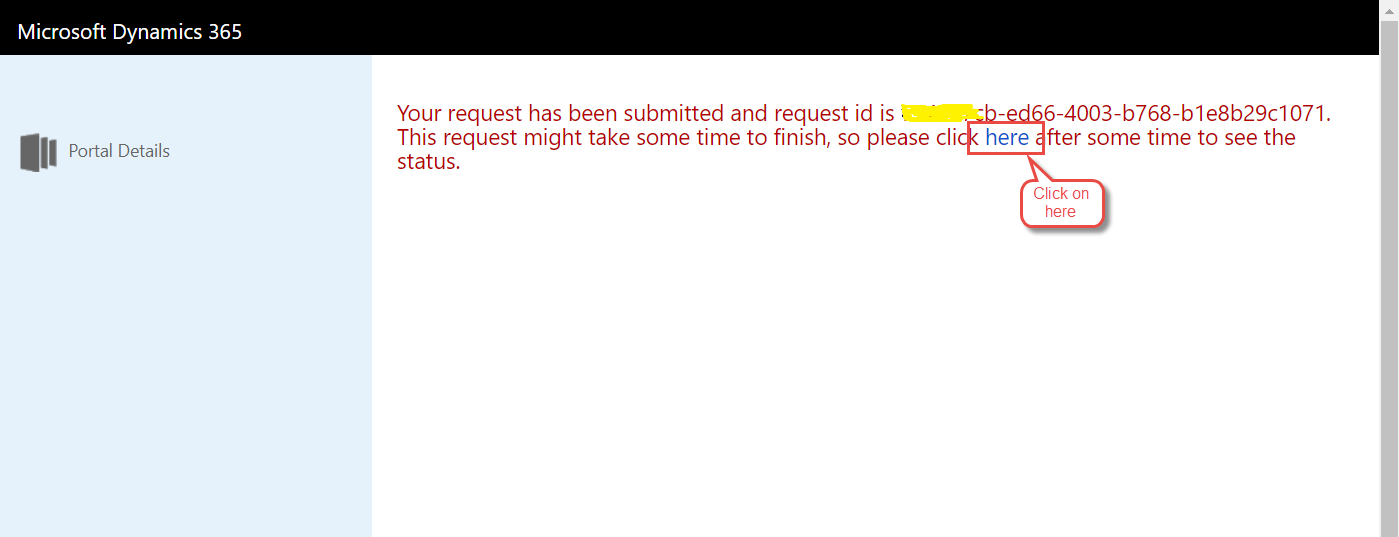
10. If you click here in the above image, then it will show you the window below:

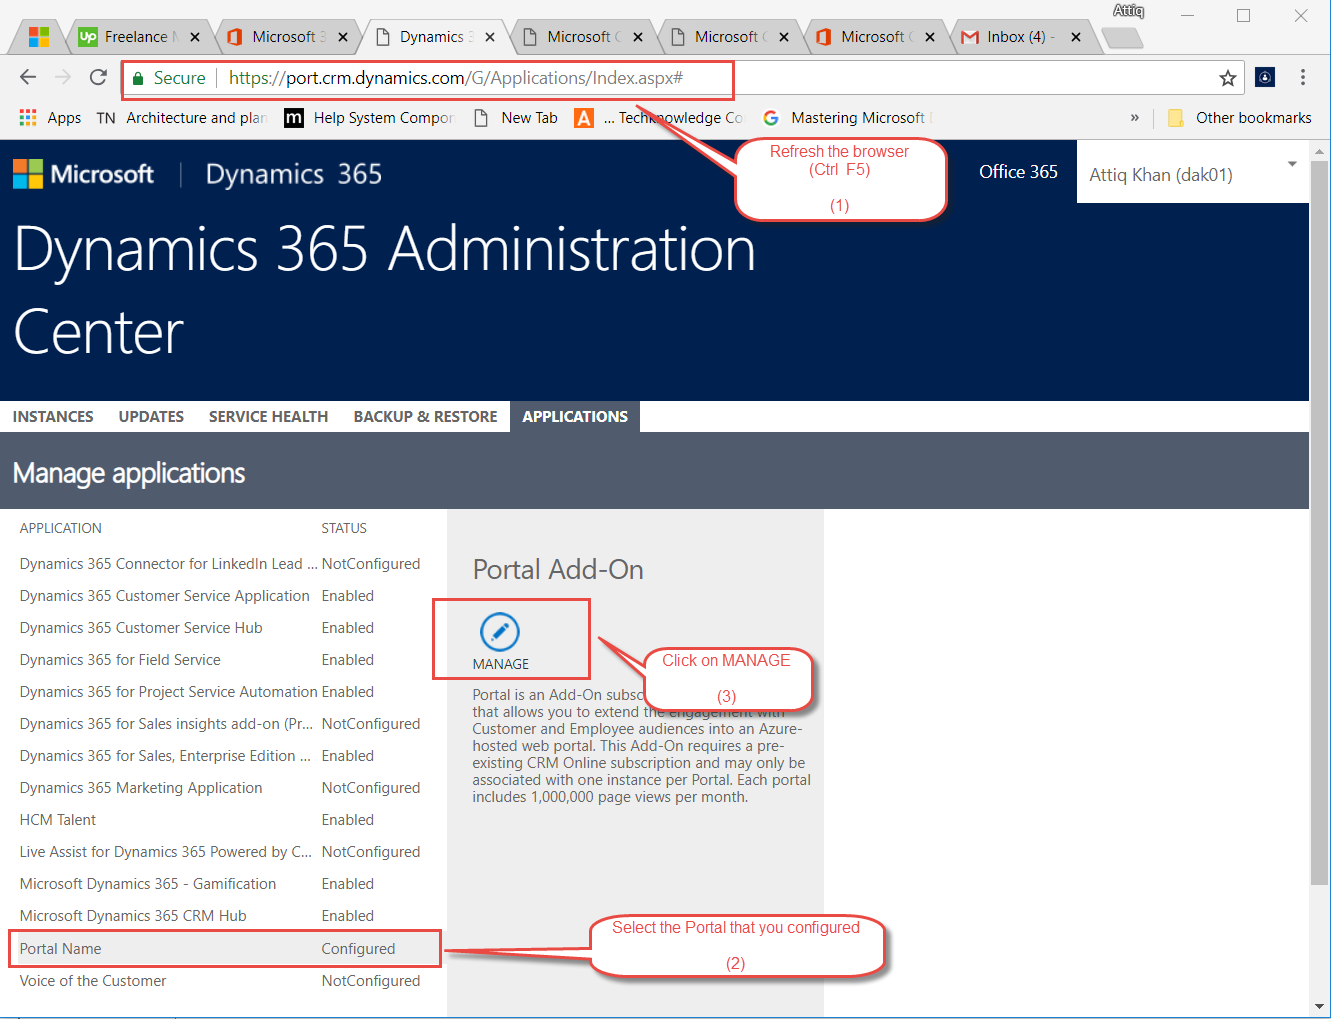
11. Refresh your browser after some time, you will see that your portal is configured now. Select your portal and then click on manage.
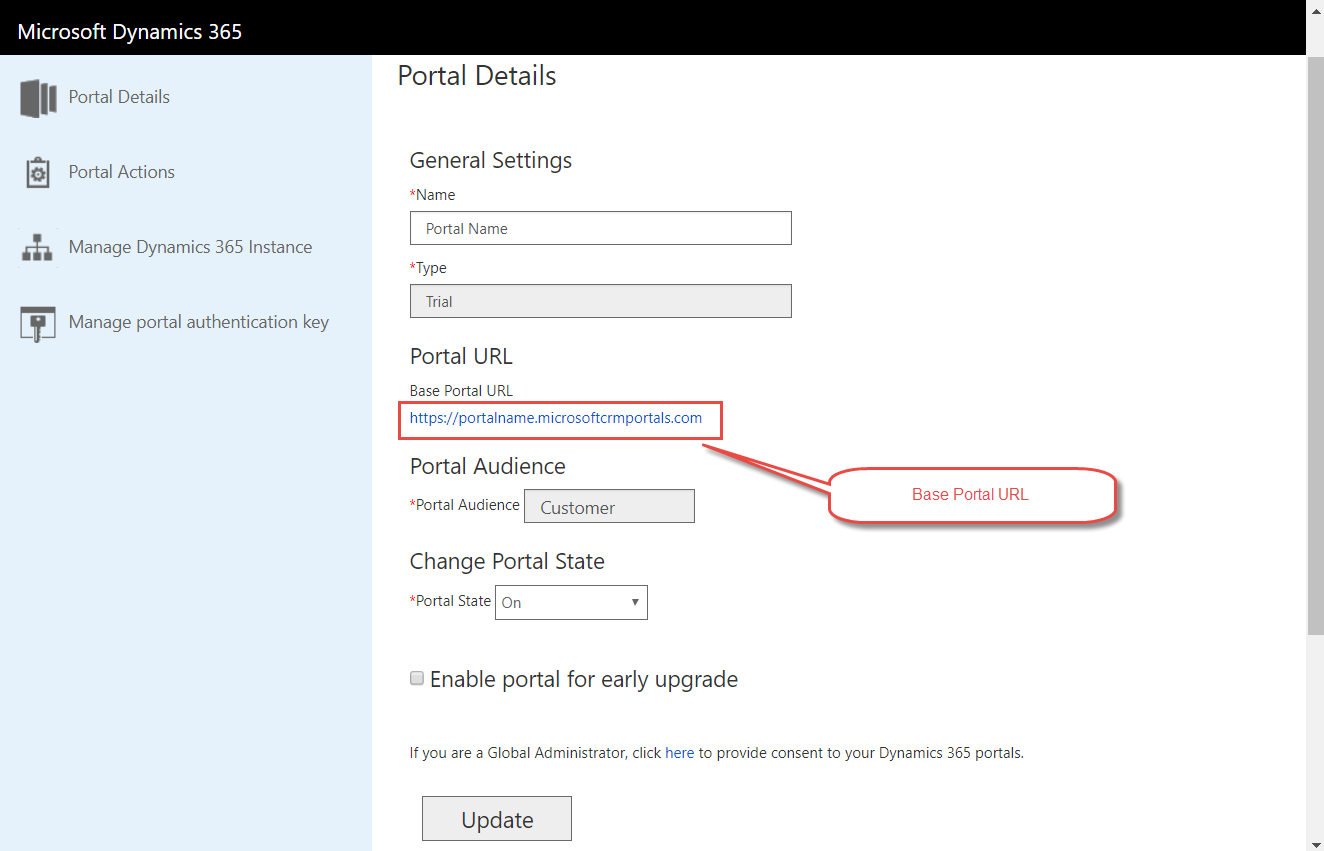
12. Here you will see the details of your portal.
13. Click on the Instances
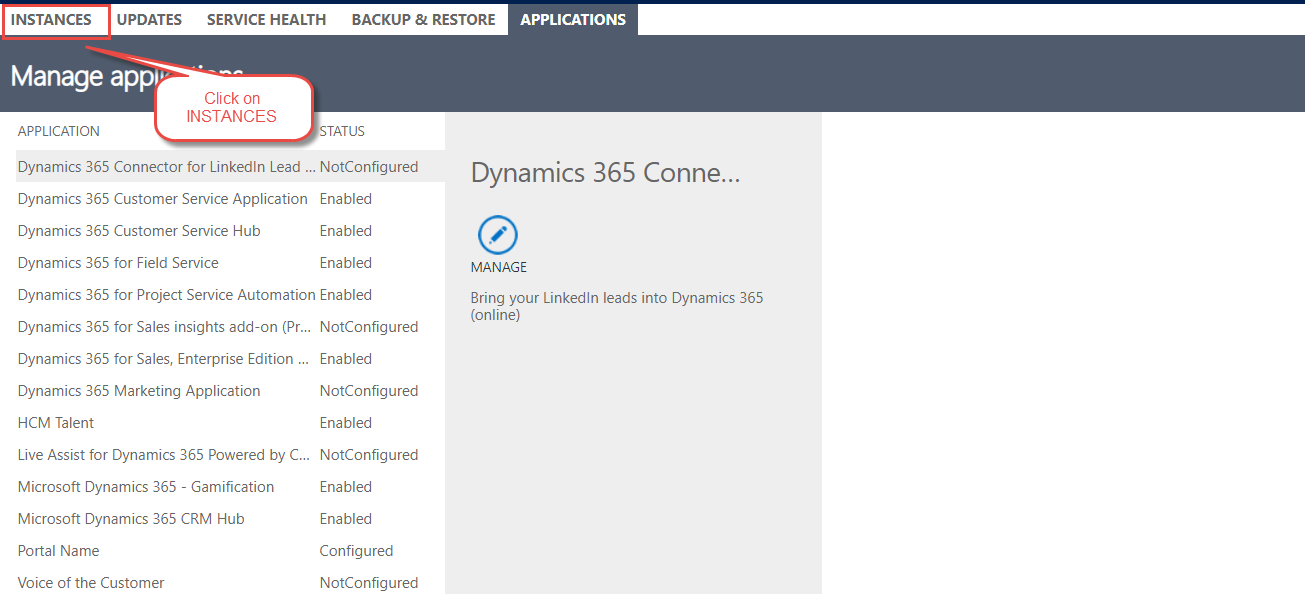
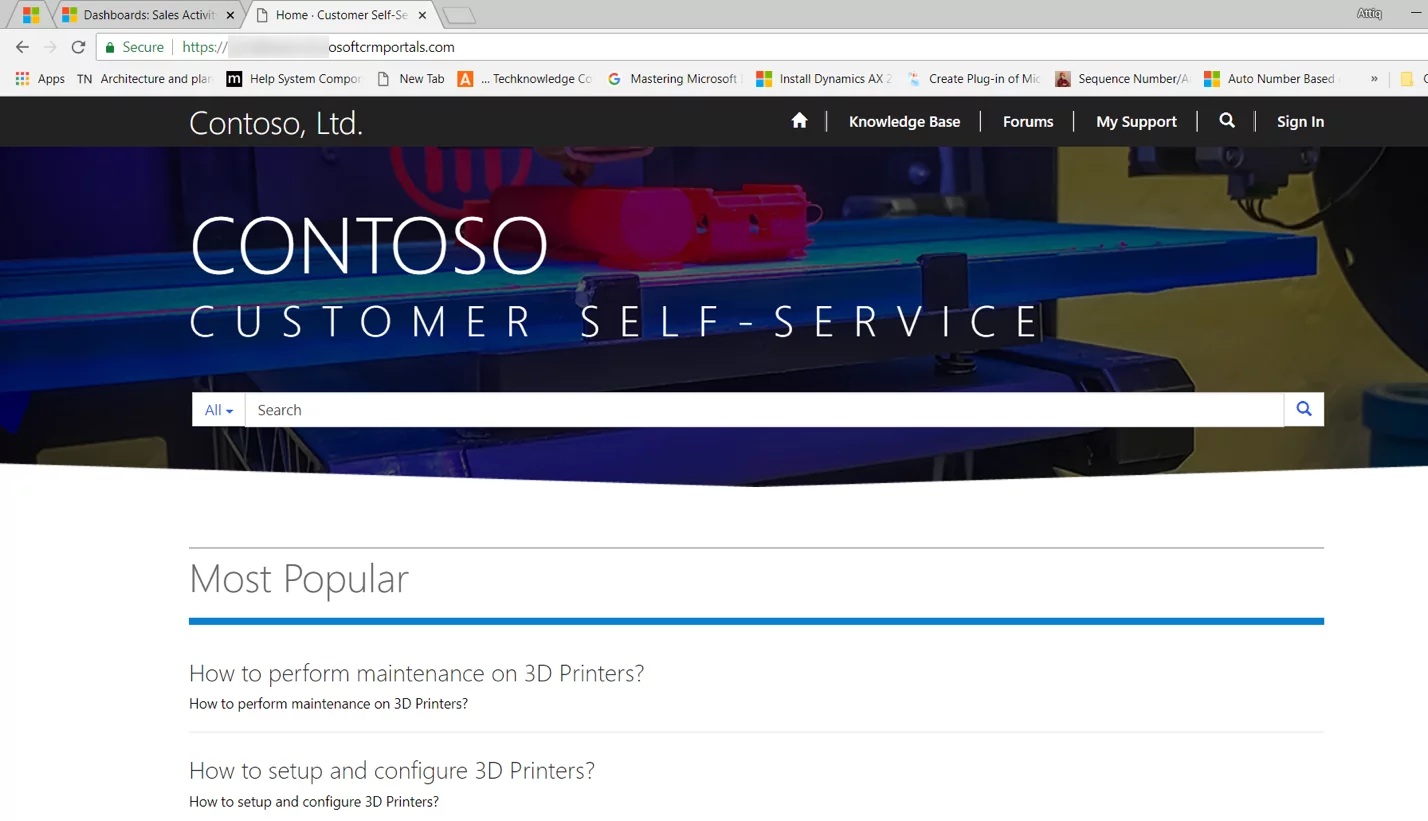
14. Here you will see that your portal is installing. Now, wait for the installation. Once the installation is complete, copy your base portal URL and browse it in a browser.
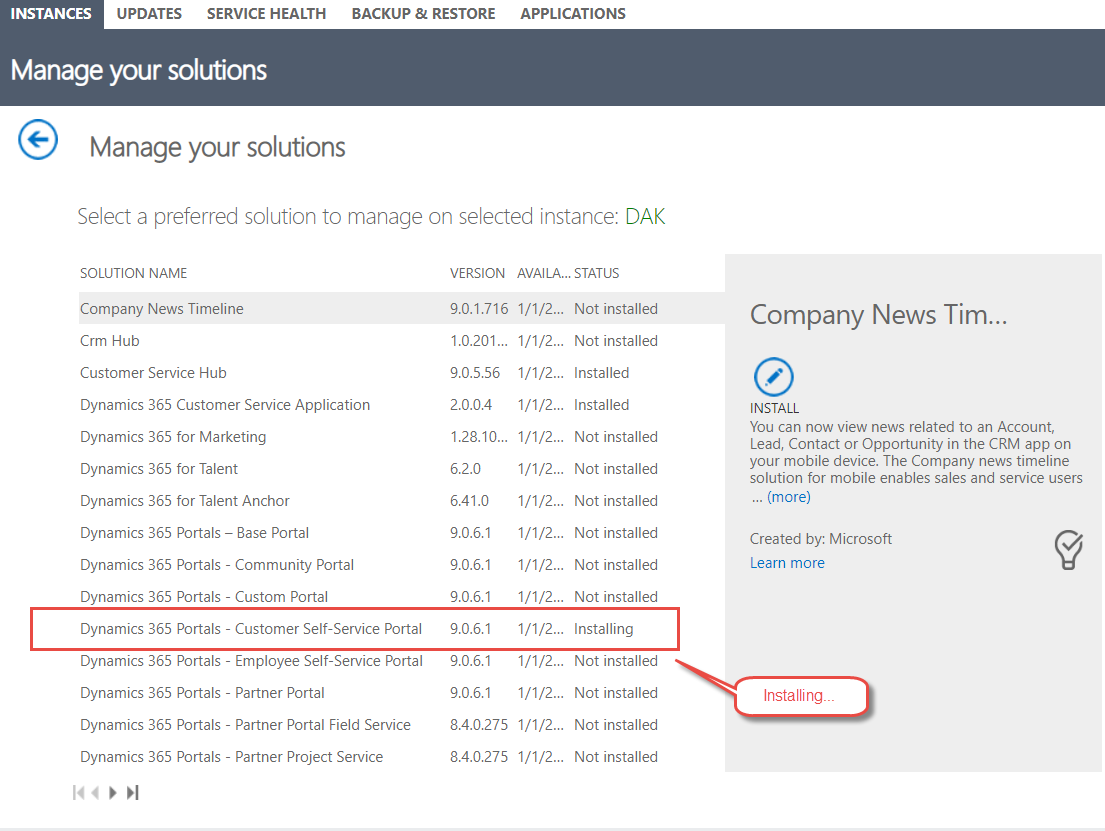
15. And there we go, finally you configured your portal.
Conclusion:
In this blog, we learned how to configure a portal while using Microsoft Dynamics 365 portal Add-On. In next blog, I will show you how to customize the portal.
You are all Set! If you have any question or queries, do not hesitate to reach out to us! or comment below or share it with others if you found this blog useful!


