Introduction
This is the second blog in the series regarding time series forecasting in the Azure Machine Learning Service (AutoML). In the first blog, we learned about time series forecasting and Azure Machine Learning Studio. In this blog, we will learn how to run a simple machine learning training experiment in Azure AutoML using Python. We will do this using the Orange Juice Sales dataset provided in Microsoft Open Datasets. By the end of this blog, we will have a time series forecasting model which we can use to forecast future sales. For your convenience, the whole Python code is freely accessible.
Navigating to the Azure Machine Learning Workspace
In the first blog, we created a Machine Learning workspace. We can use the same workspace for our Machine Learning experiment. To do this, open the Azure portal and click on ‘Resource Groups’

Once inside the resource group, click on the Machine Learning workspace.
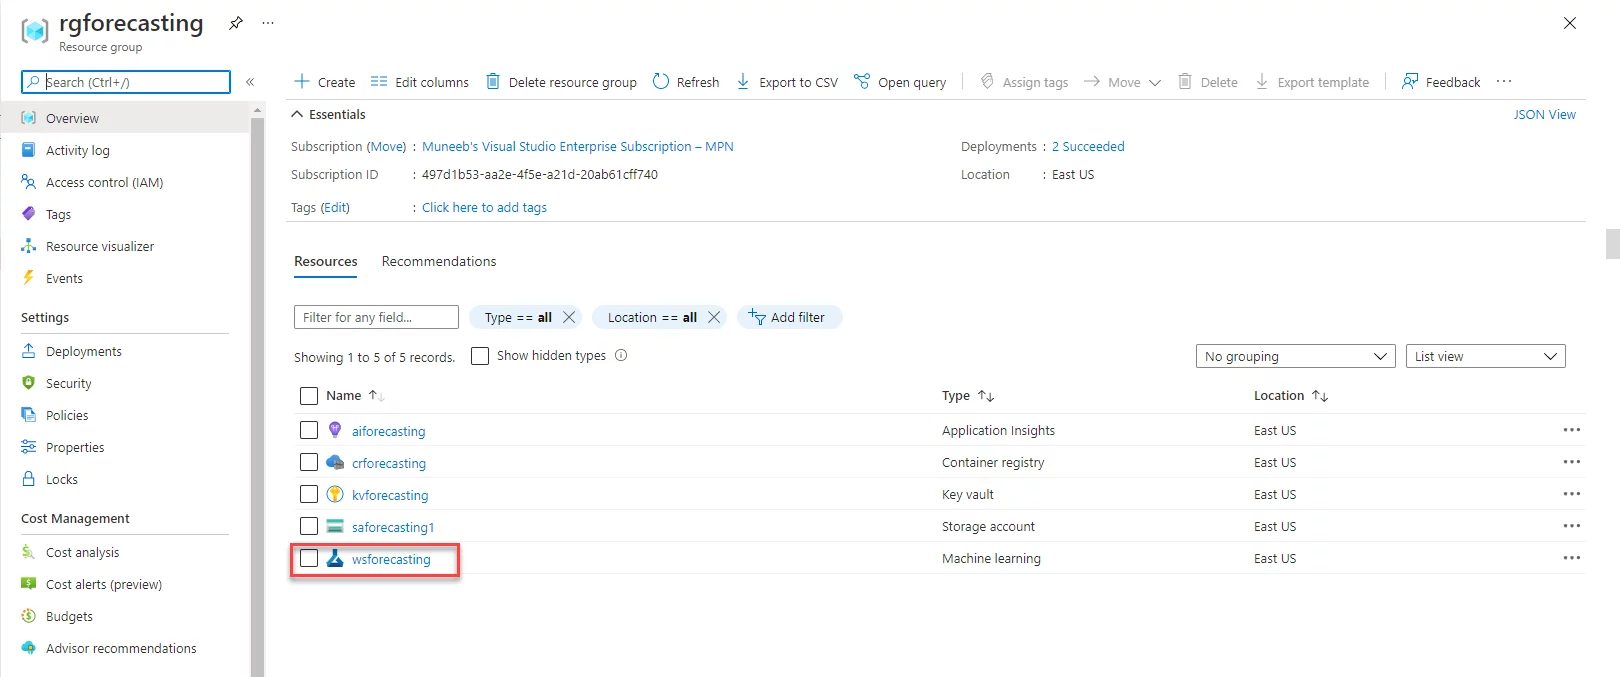
Once inside the workspace, click ‘Lunch studio’.
Creating Compute Resources Inside Azure Machine Learning Studio
Next, we need to make ‘compute resources’ required for this experiment. As discussed in the previous blog. a Compute Instance is used to run Jupyter notebooks, and Inference Cluster is used to run machine learning model training.
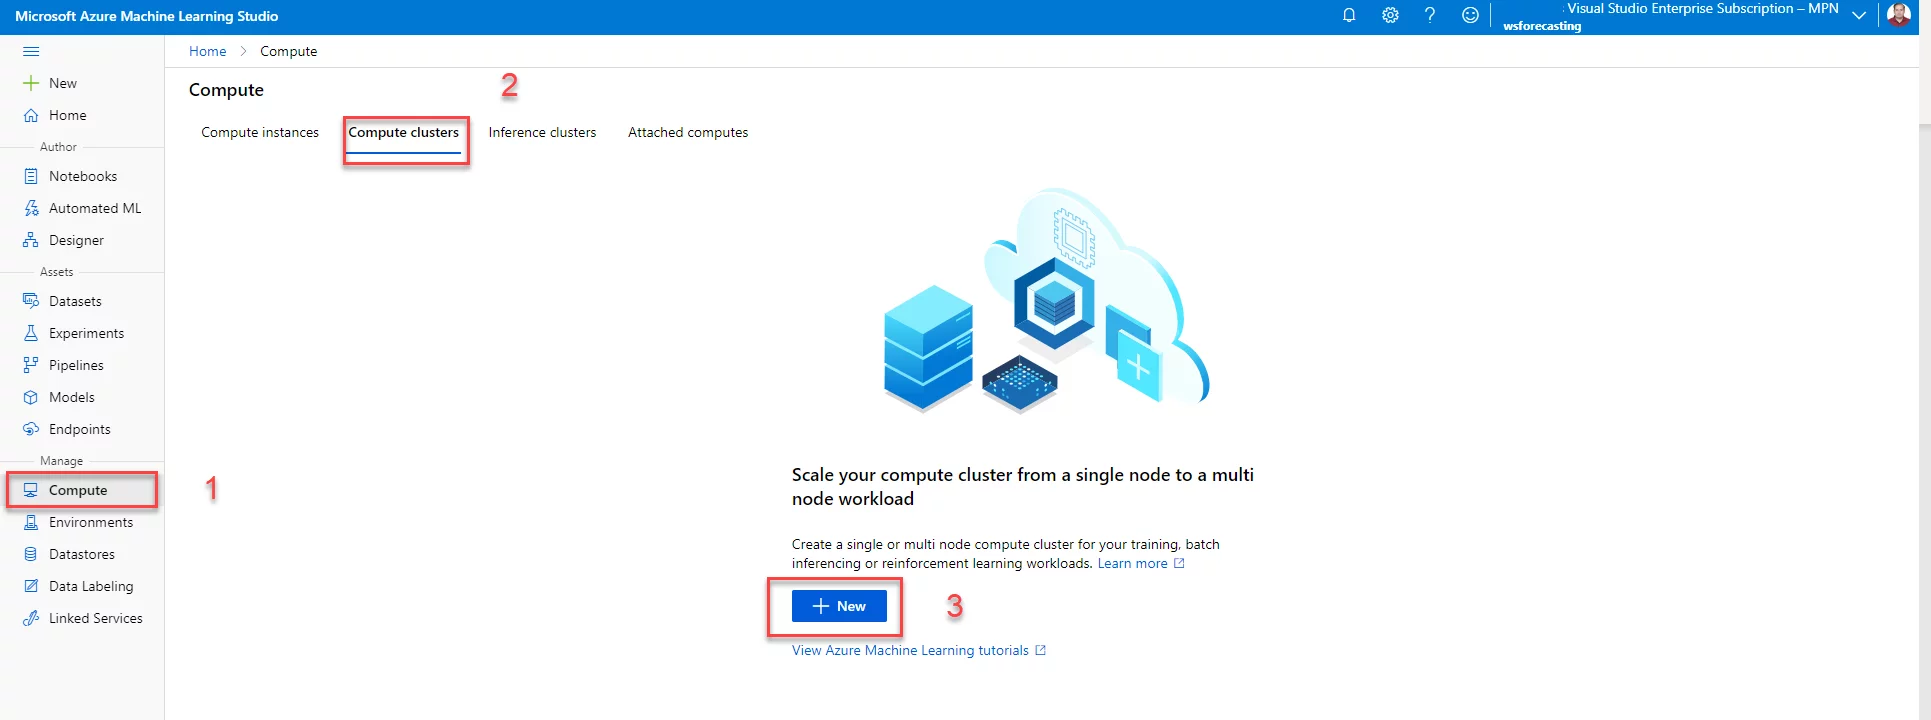
For computes, first Click Compute and then navigate to the Compute clusters tab.
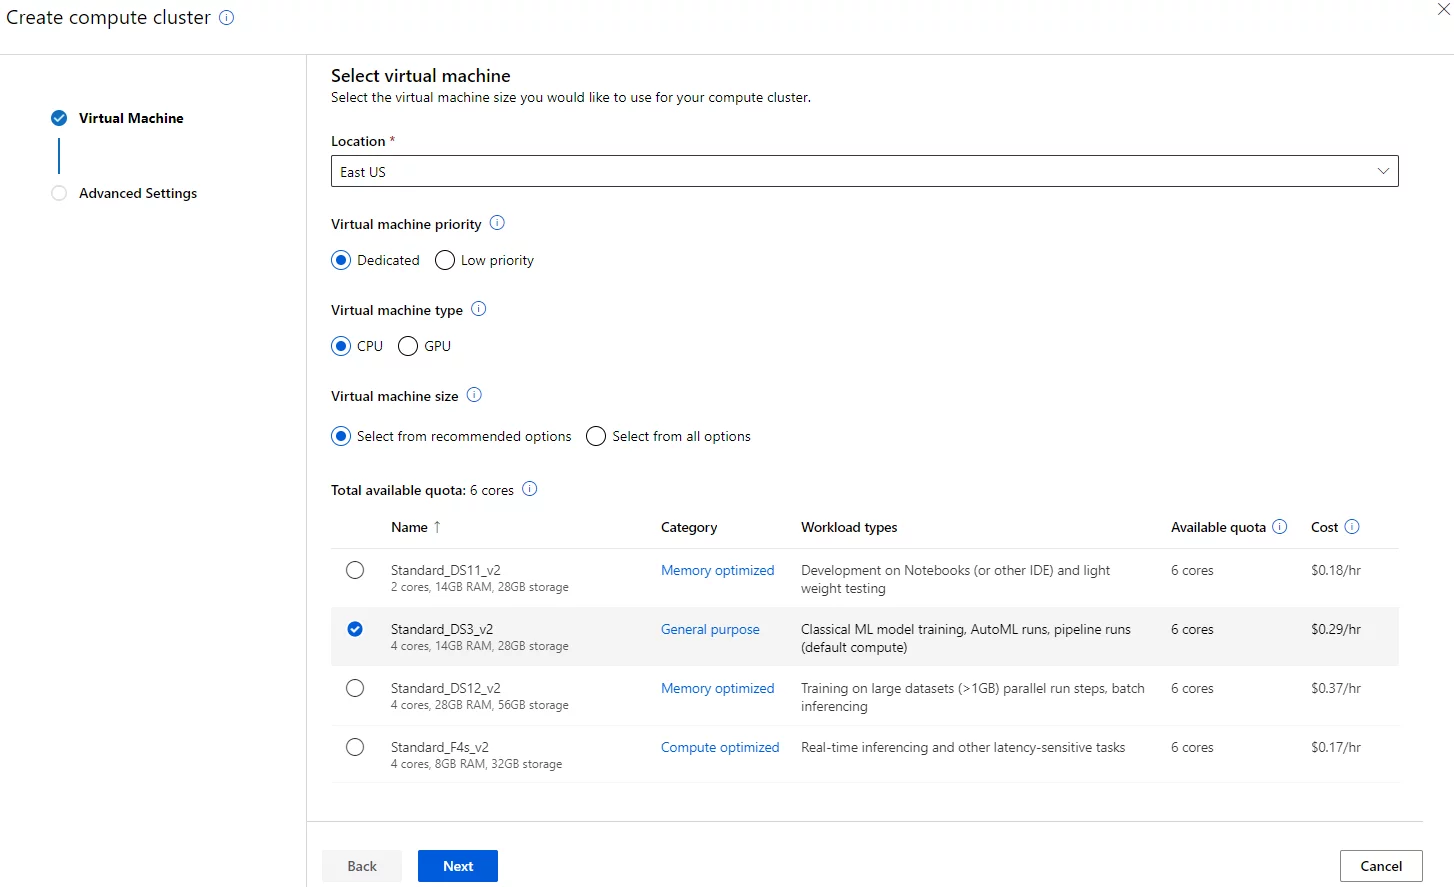
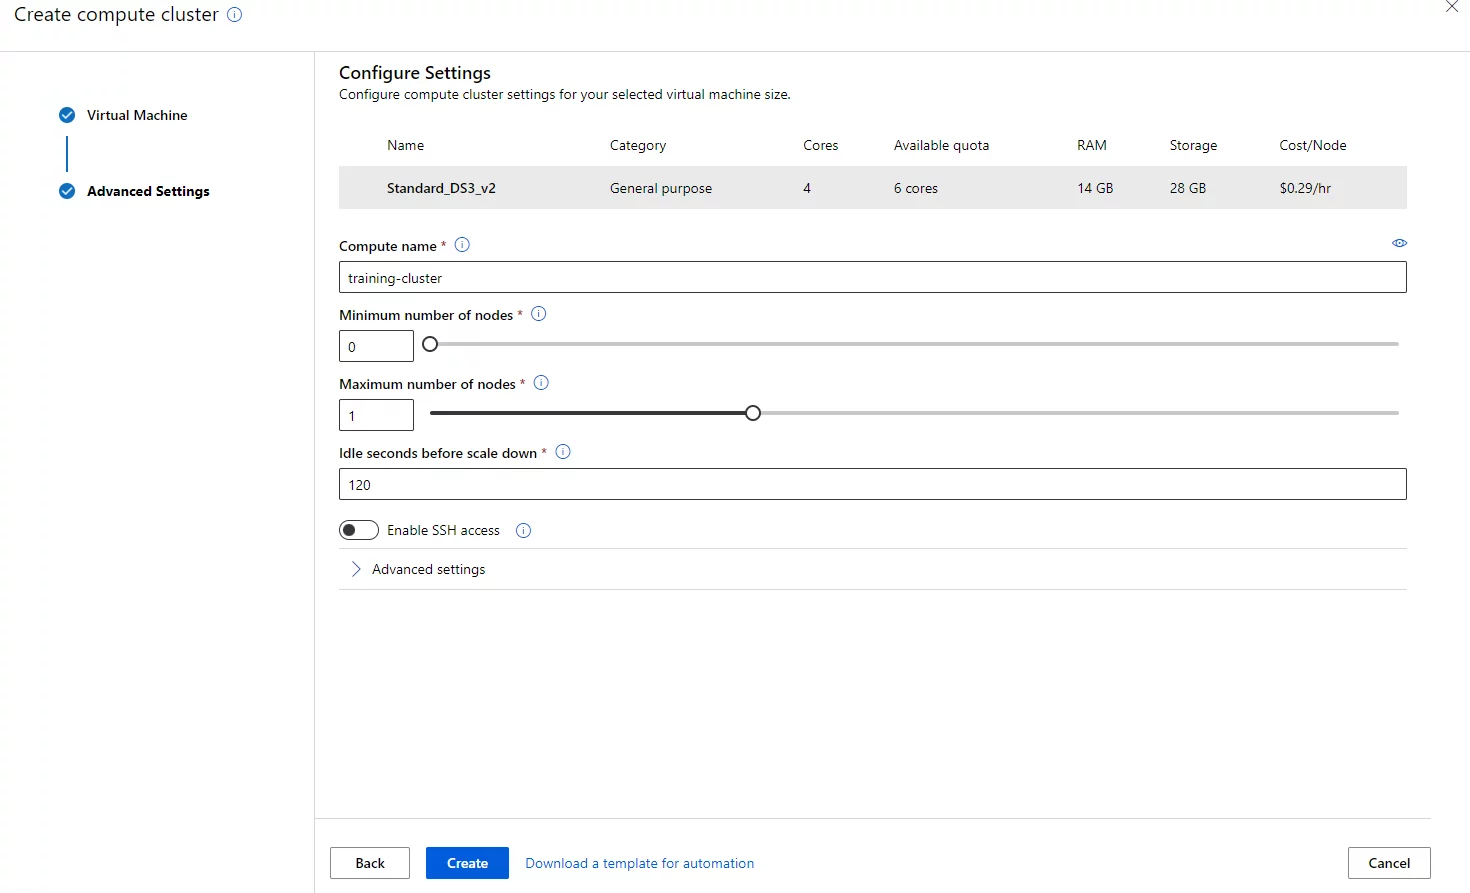
Provide details regarding the compute as suitable.
Then click “create.” This will provide a compute cluster for the training of machine learning models.
Similarly, we need to make a compute instance too. So, select the ‘compute Instances’ table and click ‘new.’
Once suitable settings have been set, click ‘Create.’
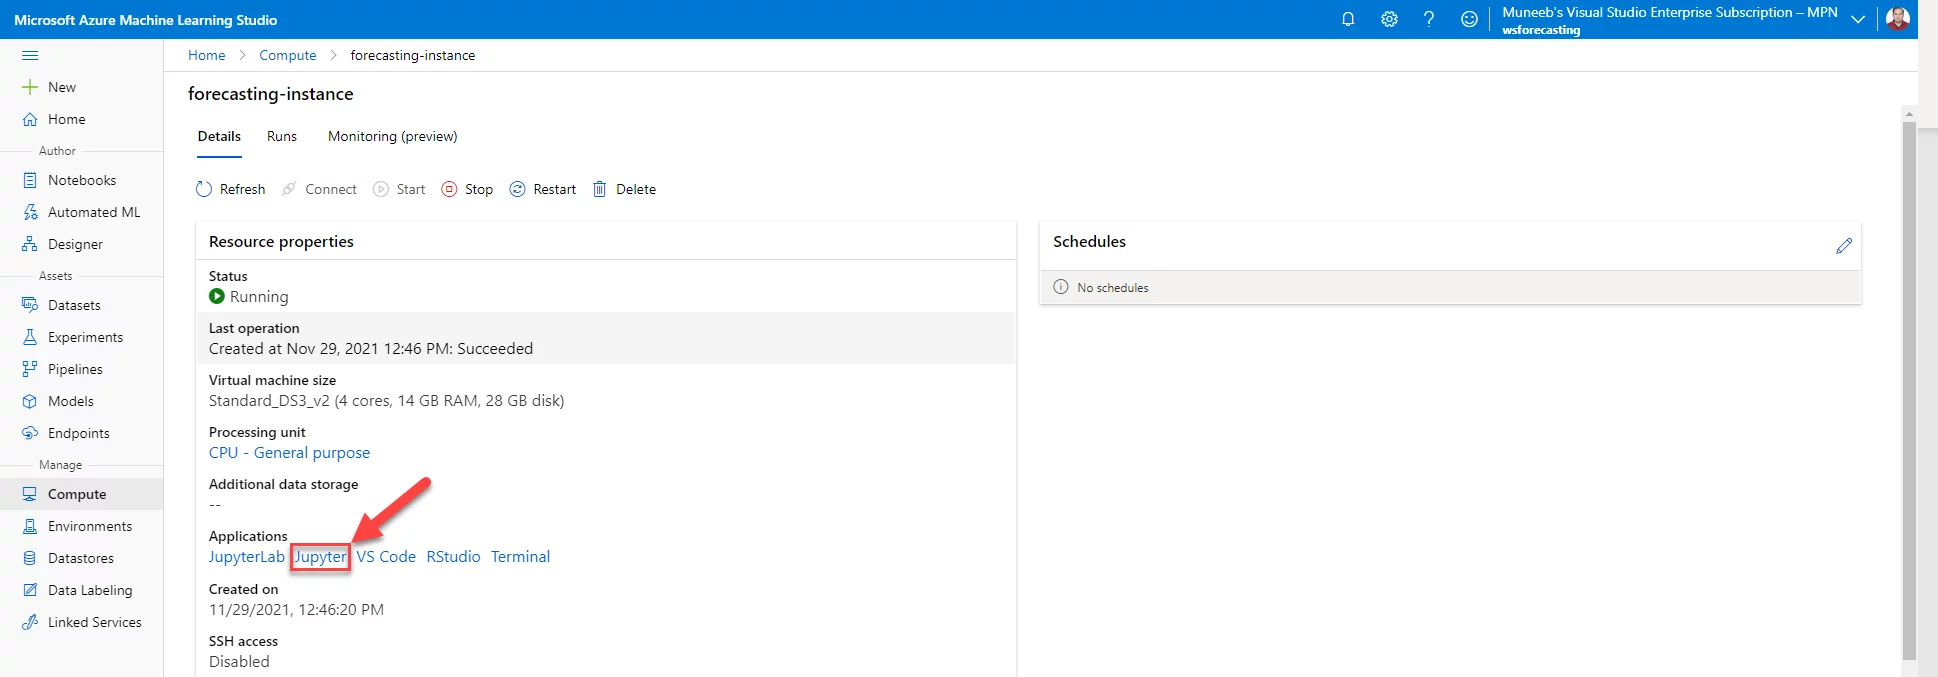
Once the compute instance has been provisioned and running, open it and click on the ‘Jupyter’ link.
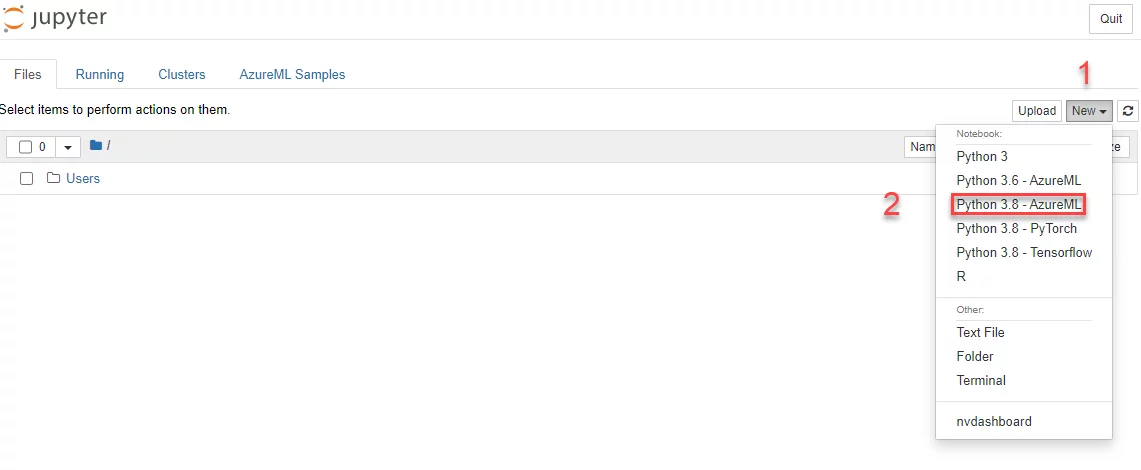
This will open a new tab in your browser. Click new and select the latest Python AzureML version.
You can rename the Jupyter notebook to ‘time series forecasting training notebook’ or any other suitable name of your choice.
Now, we have the compute instance, compute cluster and a Jupyter notebook. We can now start coding to train a time series forecasting model.
Training a time series forecasting model in Azure Machine Learning Service (AutoML)
First, we need to import all the necessary libraries. Refer to the documentation below for help regarding Azure Machine Learning related libraries.
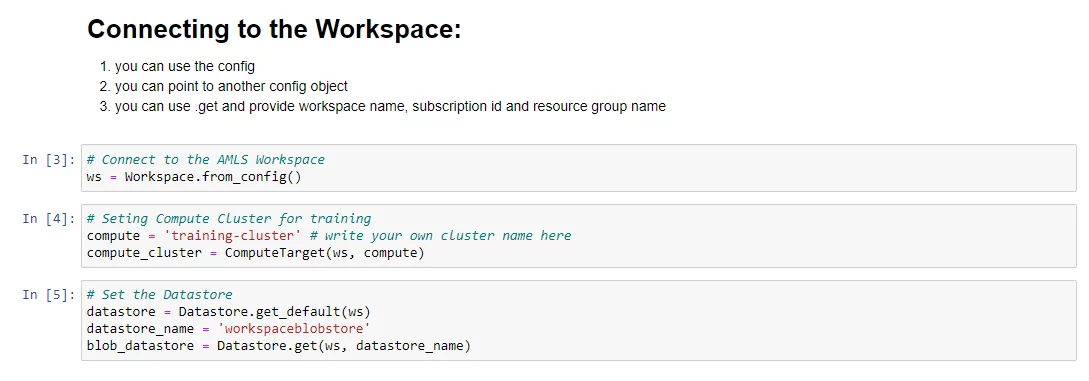
Next, we connect to our Workspace. The easiest method to do this is by using the config object.
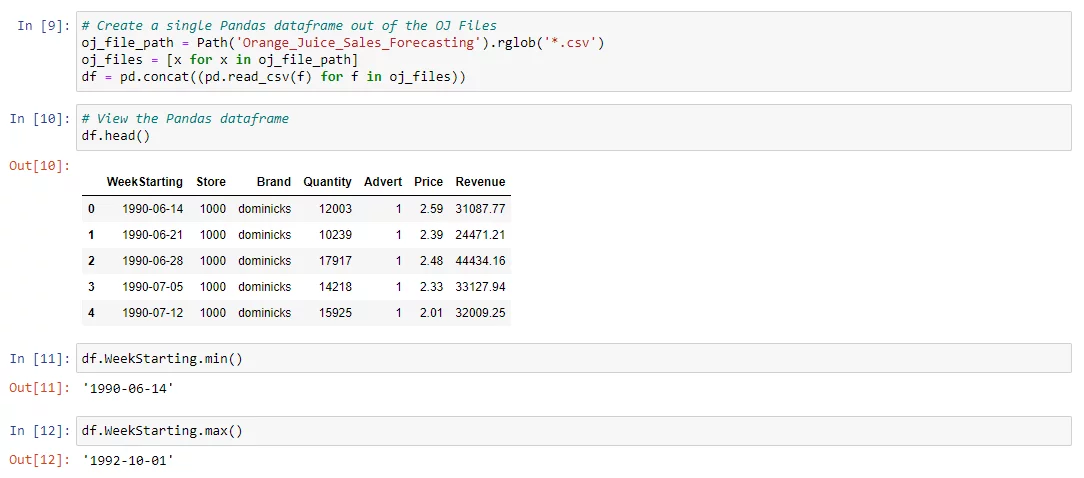
Next, we need to download the Orange Juice Sales Dataset from Azure open datasets.
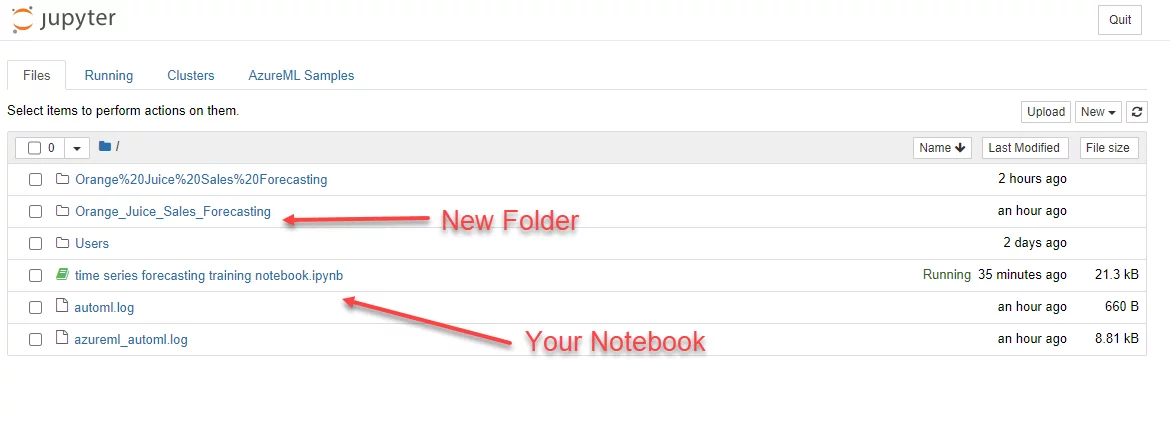
The new folder created through the above script can be explored using Jupyter.
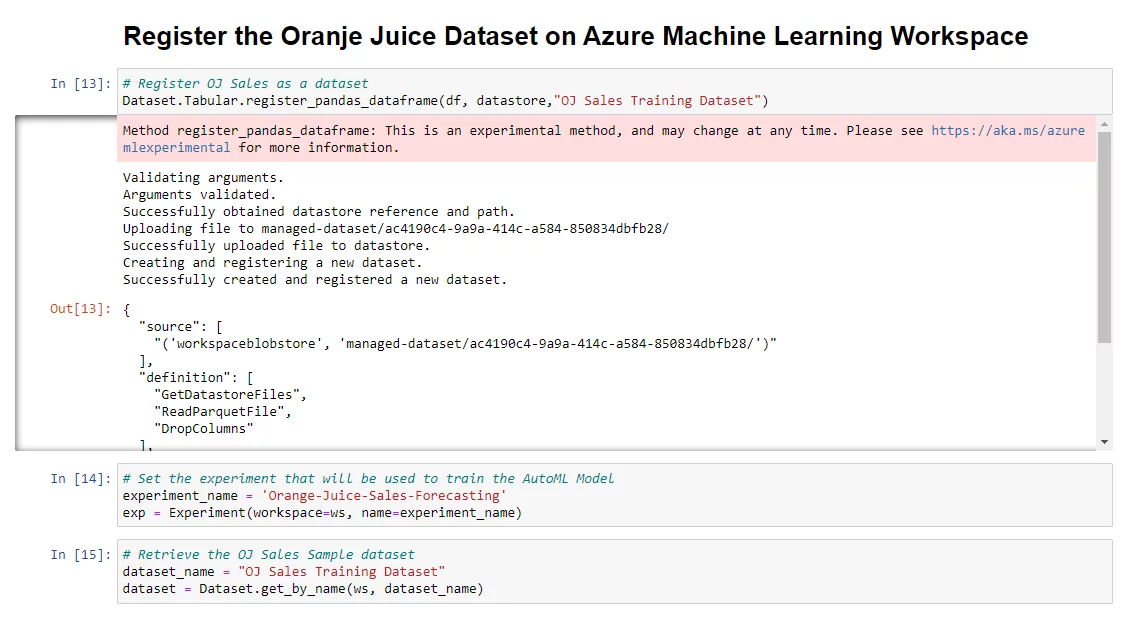
Once the dataset has been downloaded, we need to register it as a dataset in Tabular form.
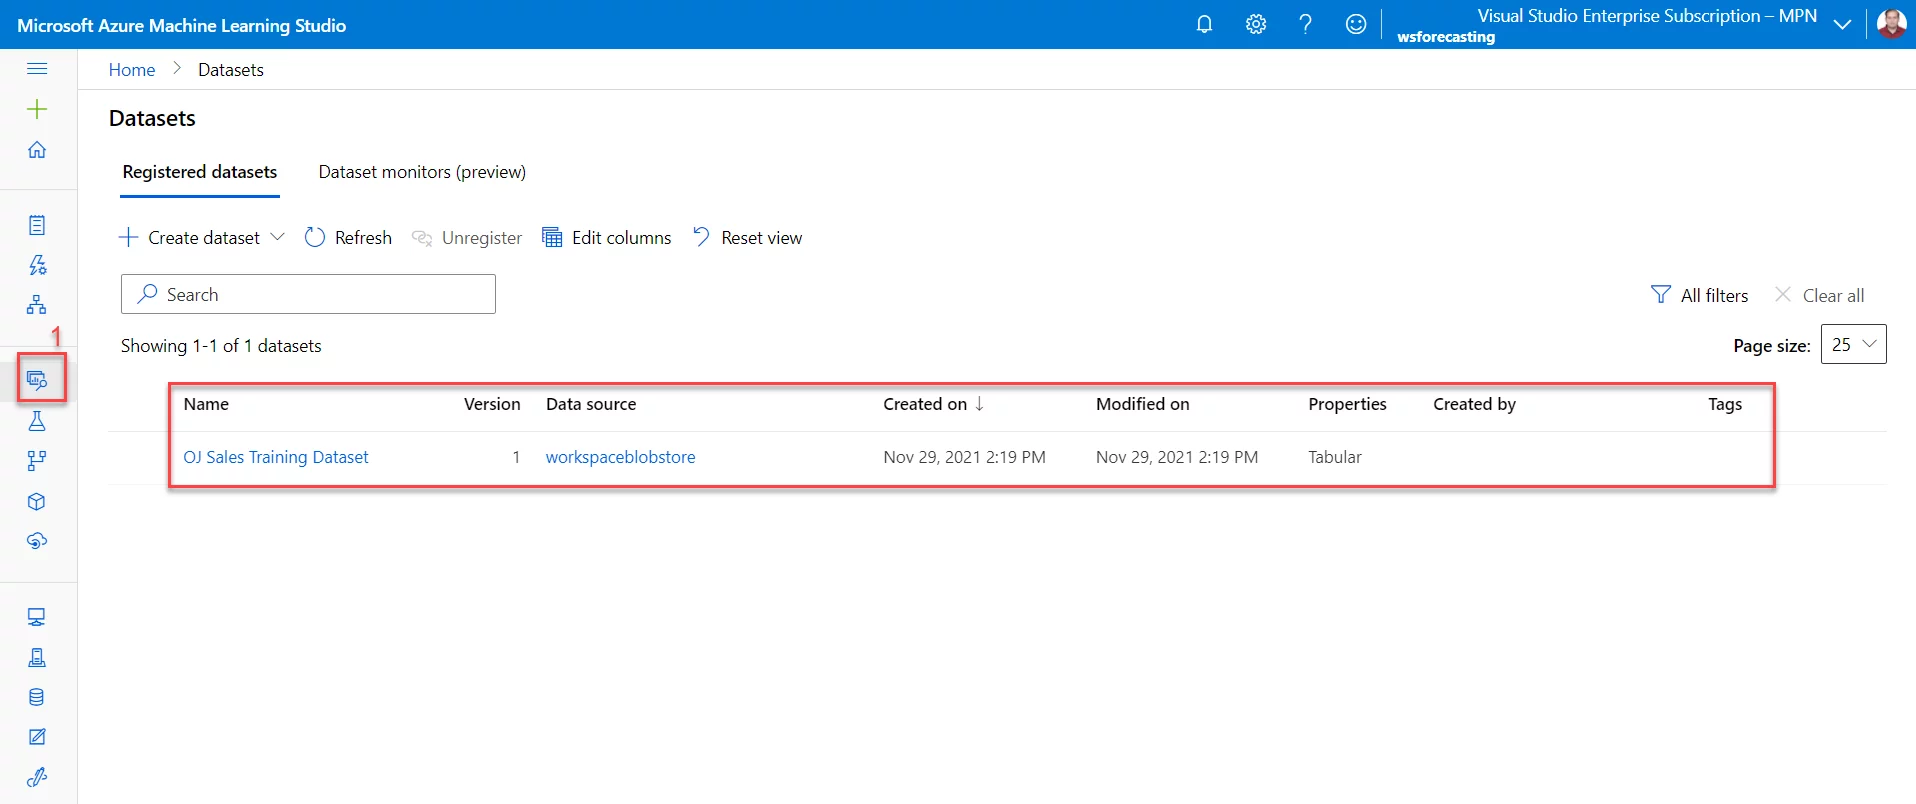
This dataset will be stored in the storage account, and a pointer to it will be kept under ‘Datasets’ in Machine Learning Studio:
Setting up the forecasting parameters is the next step, and an extremely important one. In this step, we tell Azure AutoML that the time-column is the ‘WeekStarting’ column, the forecast horizon is 5, and the time series identifiers are the ‘Store’ and ‘Brand’ columns. Also,we will set target lags, feature lags and rolling window size to Auto. We also add holiday data for the US, set seasonality to ‘Auto’, and include seasonality and trend to the features. For details and further configuration settings, refer to documentation on azureml.automl.core.forecasting_parameters – Azure Machine Learning Python | Microsoft Docs
Then, we need to set up the configuration of the run. Refer to the documentation here for details.
Make sure the training cluster is processing the runs successfully. If there is a Provision error due to a quota issue, follow the steps provided to request a quota increase.
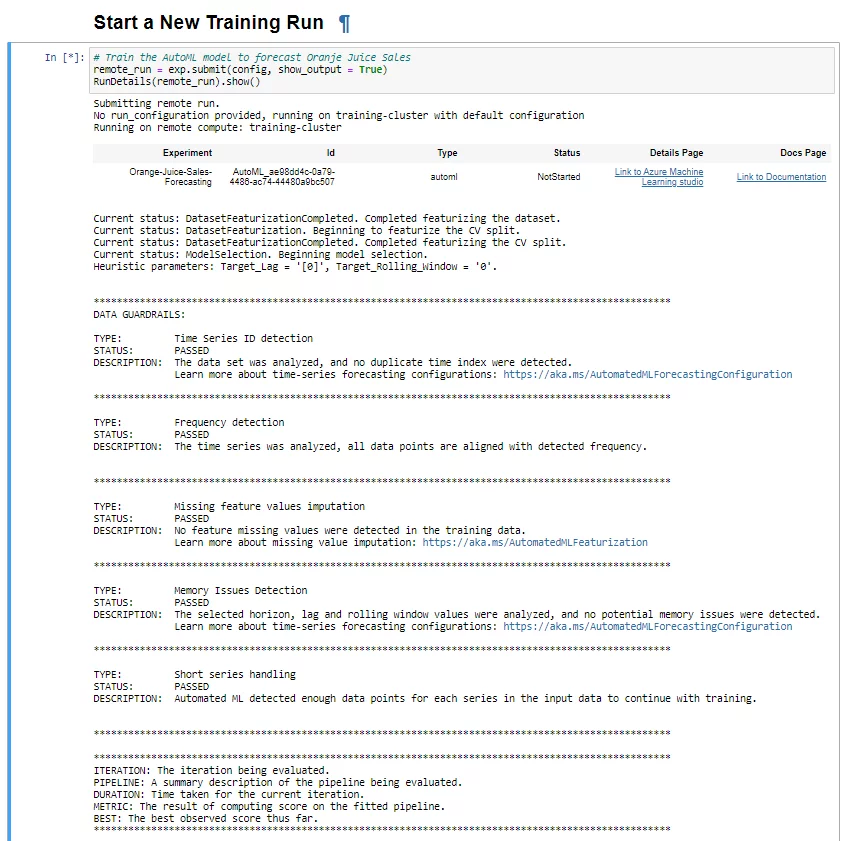
Next, start the machine learning training experiment. AutoML will start with warming the compute cluster, initializing the run, and running data guard rail checks on the dataset.
We can also open the Azure Machine Learning Studio experimentation by navigating to the studio or clicking on “Link to Azure Machine Learning Studio.”
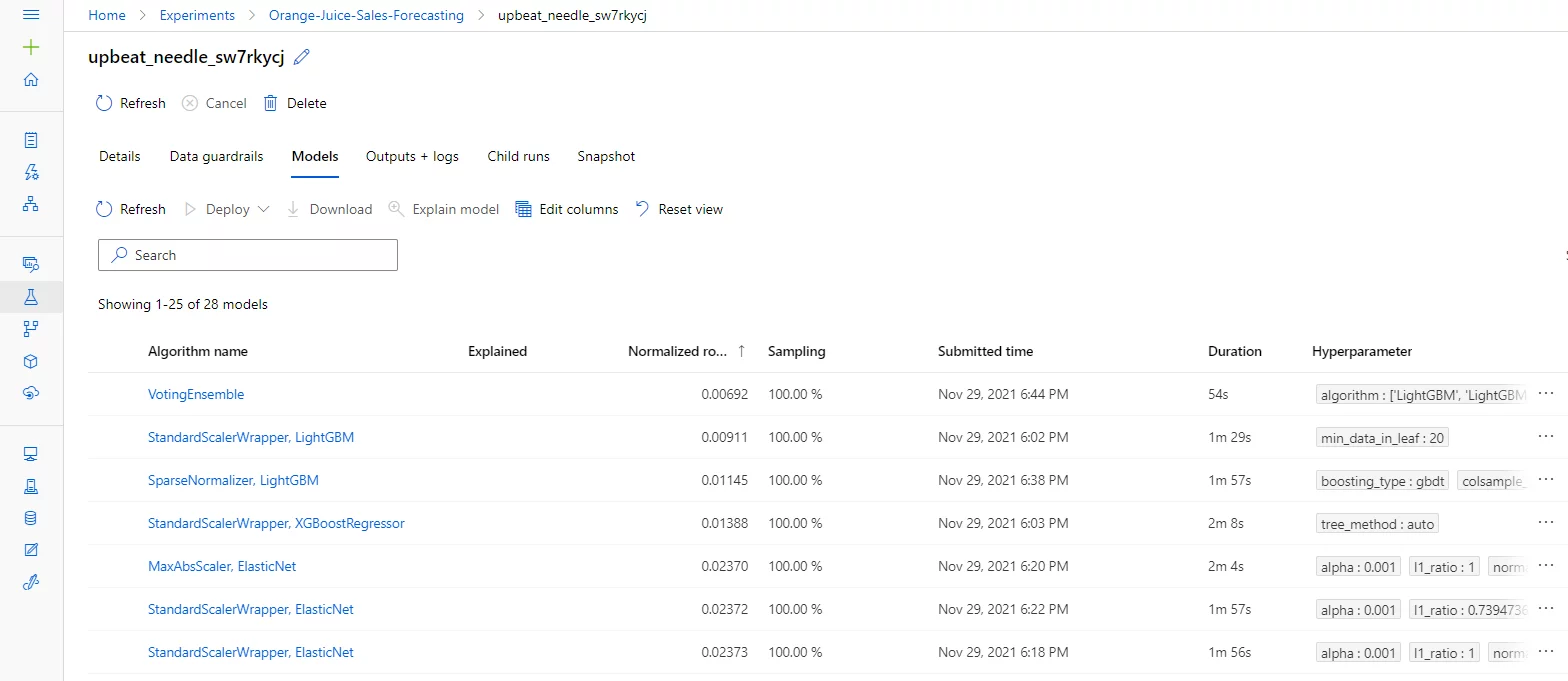
Once the training is complete, AutoML will give you a list of top-performing algorithms. As you can see below, ‘VotingEnsemble’ was the best model with a Normalized Root Mean Square Error of 0.006 (smaller the better.)
You can now register the best model in your Azure Machine Learning workspace.
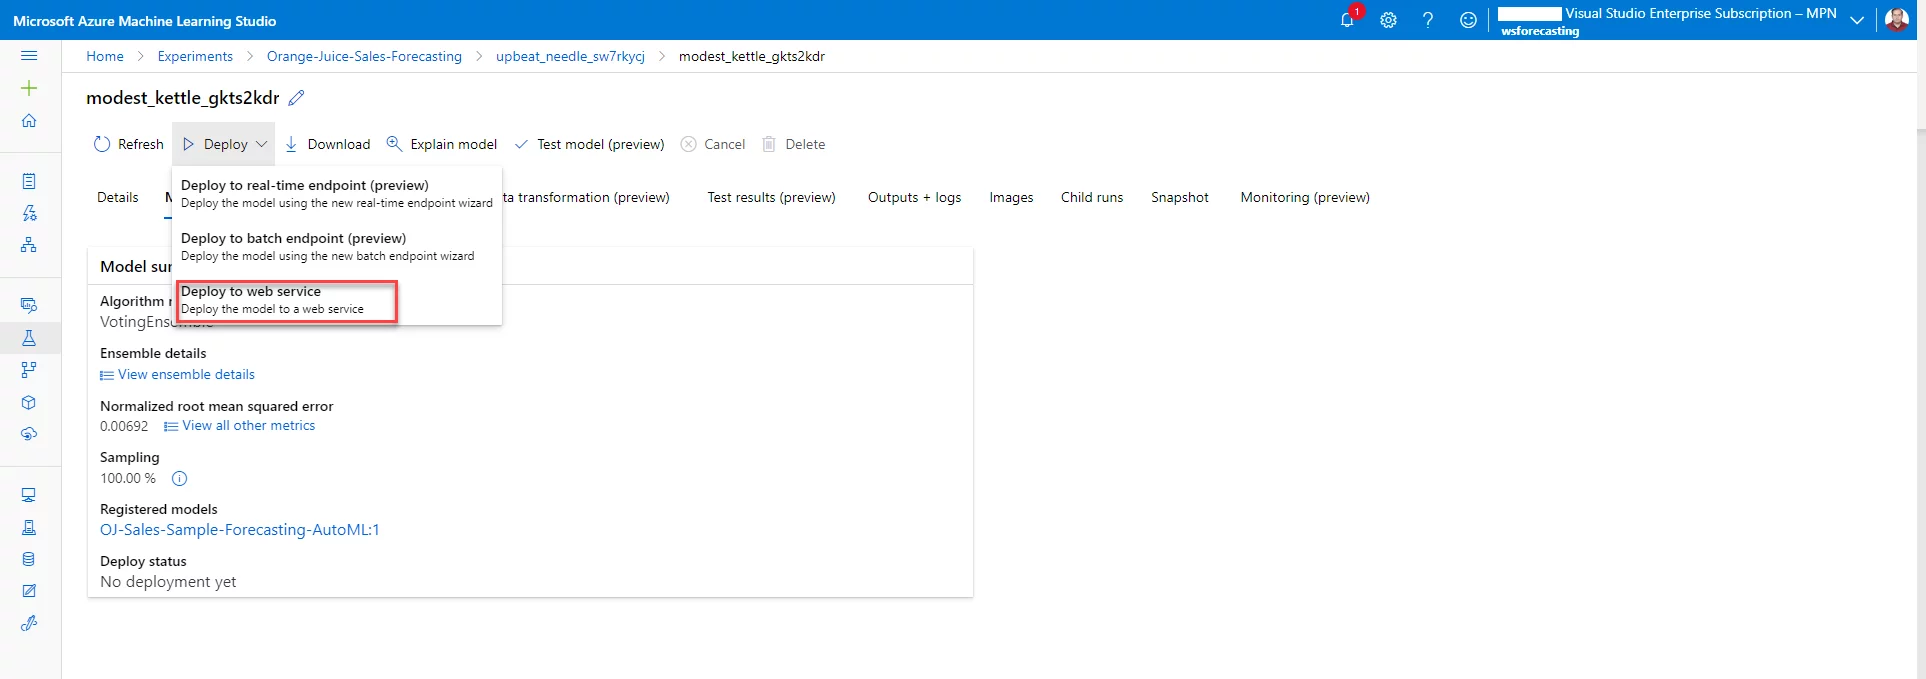
This model can then be consumed through a batch scoring pipeline. However, for quick testing, you can navigate to the model in the Azure Machine Learning Studio and deploy it in an Azure Container instance by using the ‘Deploy to Web Service’ option.
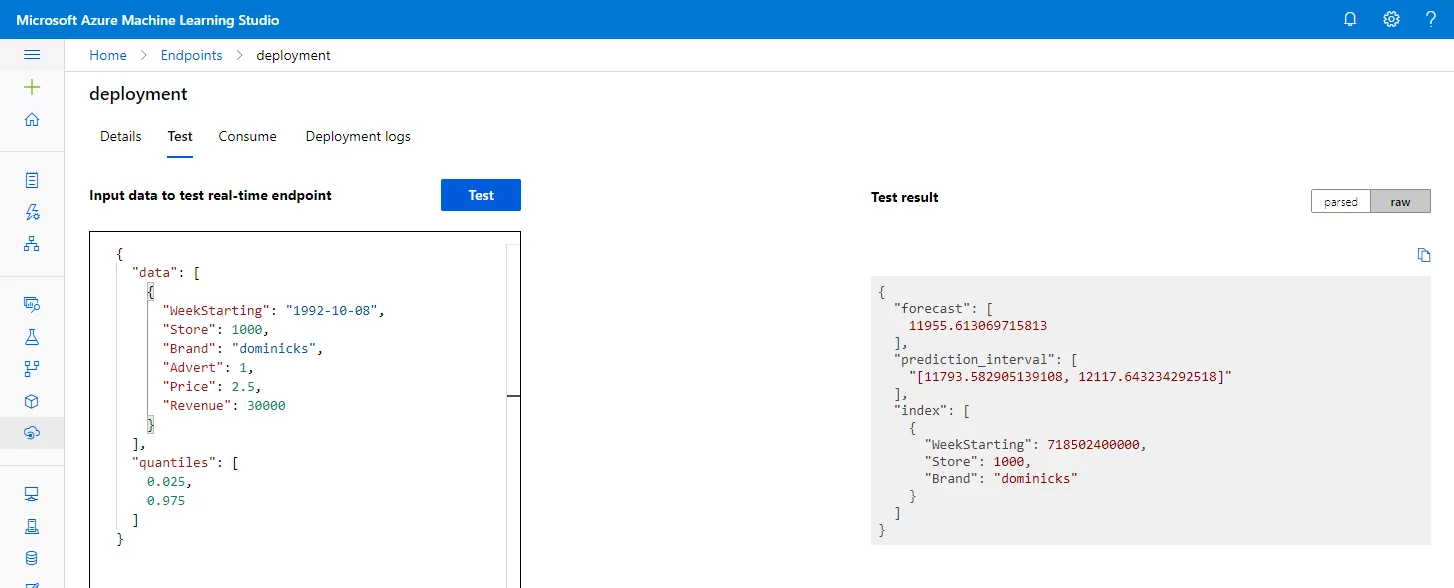
Once the deployment is successful, you can test it by navigating to the ‘endpoints’, then ‘real-time endpoints’, selecting the service and then clicking on ‘Test.’
As seen above, we have a prediction from the week starting from 1992-10-08 that was not included in the training data.
Conclusion
We have successfully trained and registered a time series forecasting model using Azure Machine Learning Service (AutoML) in this blog. In the next part, we will discuss the top 10 tips to take your machine learning model to the next level.


