Retrieving Records from Dynamics 365 using Azure Function in Visual Studio

Uzair Alam
Introduction
Microsoft Azure is a cloud-based service for developing, testing, and managing applications. It supports different programming languages and frameworks, including Microsoft and third-party solutions. Microsoft Azure function is also an easy solution for running small code independently without worrying about the whole application infrastructure. This blog is your guide to retrieving records from Dynamics 365 using the Azure function.
Interested in learning more about the Azure Functions? Click below to read the Microsoft Azure Functions official documentation: https://docs.microsoft.com/en-us/azure/azure-functions/functions-overview
Prerequisites
The prerequisites to retrieving records from Dynamics 365 include:
- Visual Studio 2019 IDE to write and execute the code
- PFE Libraries help us retrieve the records.
There are two main advantages of using PFE Libraries:
- Provide effective and authentic connection with CRM
- Handle parallel requests to CRM
Download and Install Visual Studio 2019.
Learn our Dynamics 365 Services.
Open Visual Studio and create an Azure Function Project:
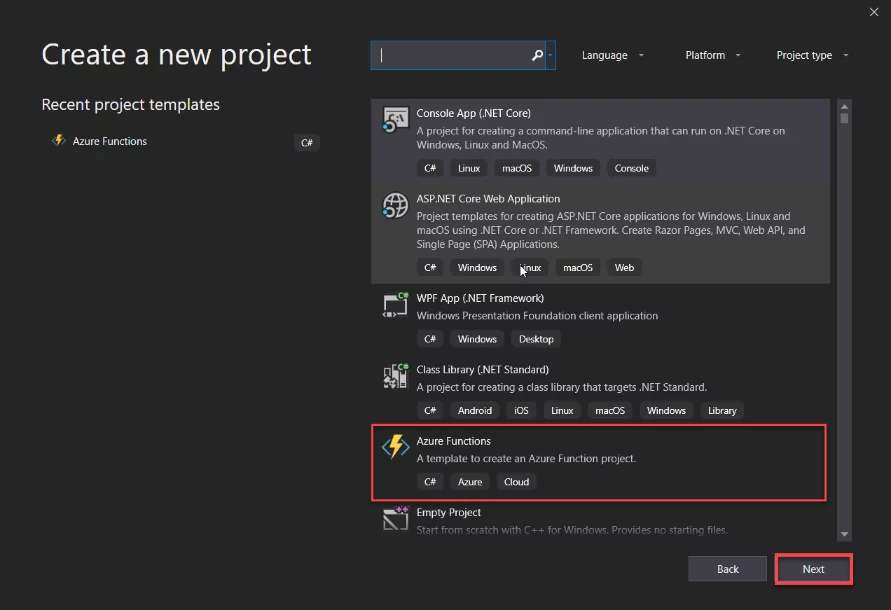
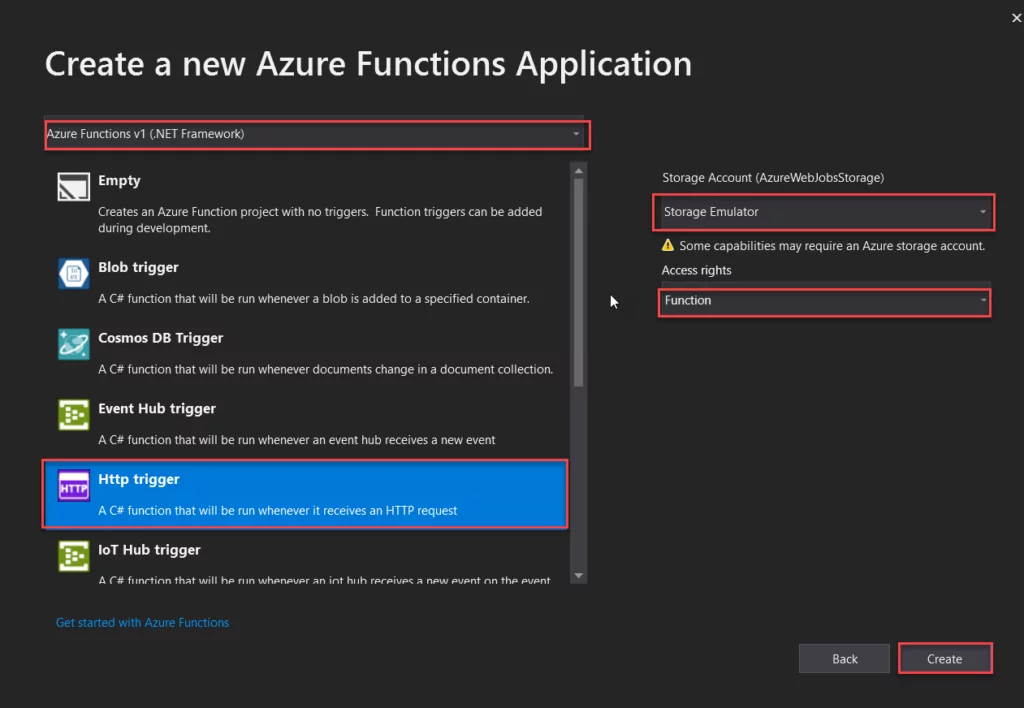
Select the highlighted settings for your project to get started.
Add PFE Libraries:
After creating the Azure Function project, add the PFE libraries to the solution. Paste these two files in the solution folder from:
pfexrmcore > sourceCode > sourceCode > Samples > PfeXrmCoreWalkThroughApp
- SampleConfig.cs
- ServiceManagerContext.cs
Add this function in Function1 class.
Further Reading: Simplify your Azure Infrastructure with Azure Blueprints
Integrate Dynamics 365 with Azure for Enhanced Efficiency
Unlock the full potential of Dynamics 365 by integrating with Azure Functions. AlphaBOLD's Azure services can guide you through the process for seamless data retrieval and processing. Ready to enhance your Dynamics 365 efficiency with Azure?
Request a Consultationprivate static OrganizationServiceManager GetOrganizationServiceProxy() { try { var orgName = “TESTORG”; // CRM Organization Name var userName = “[email protected]”; // User Name var password = “testuser”; // Password var uri = XrmServiceUriFactory.CreateOnlineOrganizationServiceUri(orgName); var serviceManager = new OrganizationServiceManager(uri, userName, password); return serviceManager; } catch (Exception ex) { throw ex; } }
This function will establish a connection with Dynamics 365 Online. For the time being, the CRM credentials are hardcoded in the portal, but this information will be updated post-deployment. For now, we are only using the CRM credentials for testing purposes and have the flexibility to change it later.
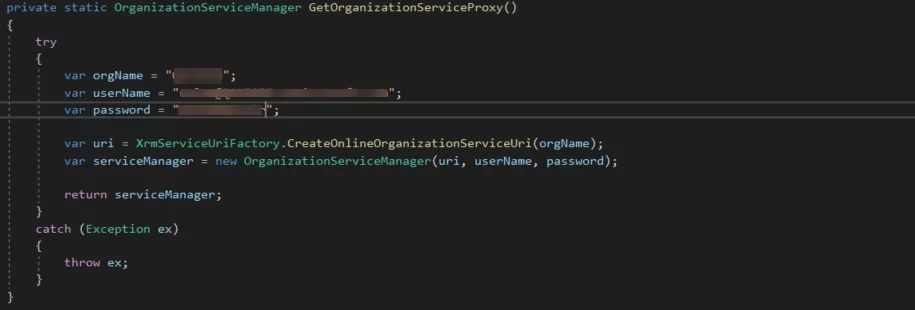
You will need to add this code in your Task function; refer to the image below:
var orgProxy = GetOrganizationServiceProxy();
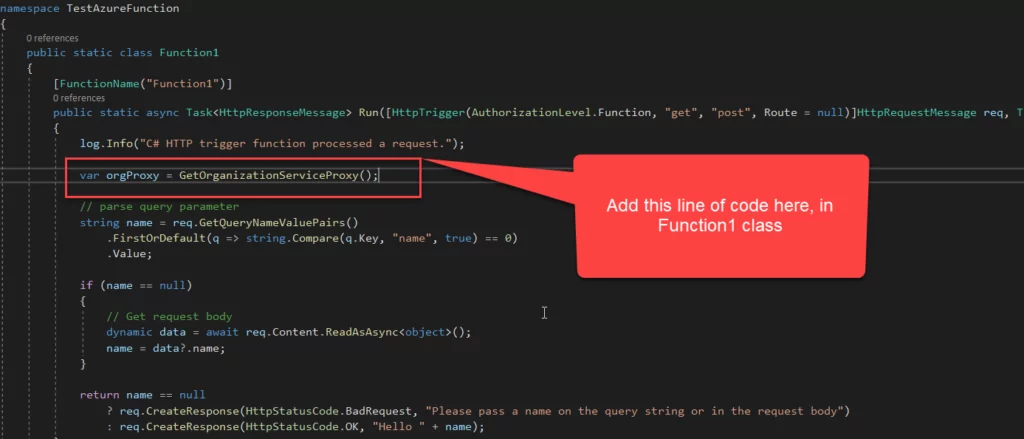
NuGet Packages:
Right-click on the project and select Manage NuGet Packages to install these:
- NET.Sdk.Functions
- Pfe.Xrm.CoreV8
- Configuration.ConfigurationManager
Add these namespaces:
- using Microsoft.Pfe.Xrm
- using System.Configuration
- using System
Get FetchXML from D365:
For records retrieval, you must construct a FetchXML or you can download it from Dynamics 365.
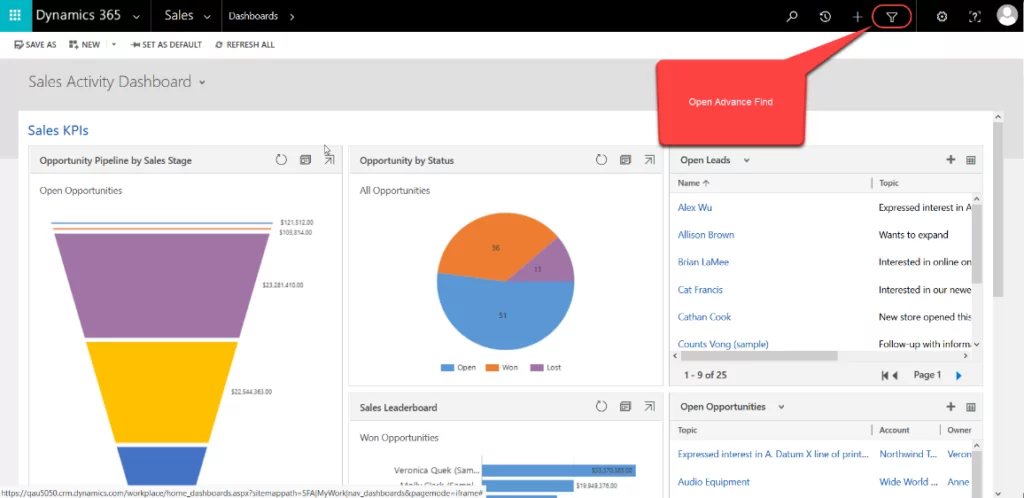

After downloading the FetchXML, Paste it to your code.

Now we must write a query to retrieve the records from CRM using FetchXML.
Paste this code after the FetchXML.
var Query = new Dictionary<string, QueryBase>(); Query.Add(“accounts”, new FetchExpression(FetchXML)); var Results = orgProxy.ParallelProxy.RetrieveMultiple(Query, true)[“accounts”].Entities;
After all the accounts are retrieved from Dynamics 365, we need to display them and test whether the records have been retrieved. For this, we will need to add the following lines of code in the Task Function:
Further Reading: Dynamics 365 Support: Navigating Microsoft’s Updates.
Transform Your Dynamics 365 with Azure Function Integration
Transform your Dynamics 365 application with Azure Function integration for better data management and retrieval. AlphaBOLD's Azure Services are designed to smooth and effective your integration process.
Request a Consultationforeach (Entity Result in Results) { // Displaying all Accounts name… log.Info(“Successfully Retrieved———> ” + Result.Attributes[“name”].ToString()); }
To test the statement above, you need to add the following response to the log file to ensure whether the function is executed successfully or not.
return req.CreateResponse(HttpStatusCode.OK, “Successful”);
Your complete Task Function code will look like this

If you face any errors, please check for missing namespaces.

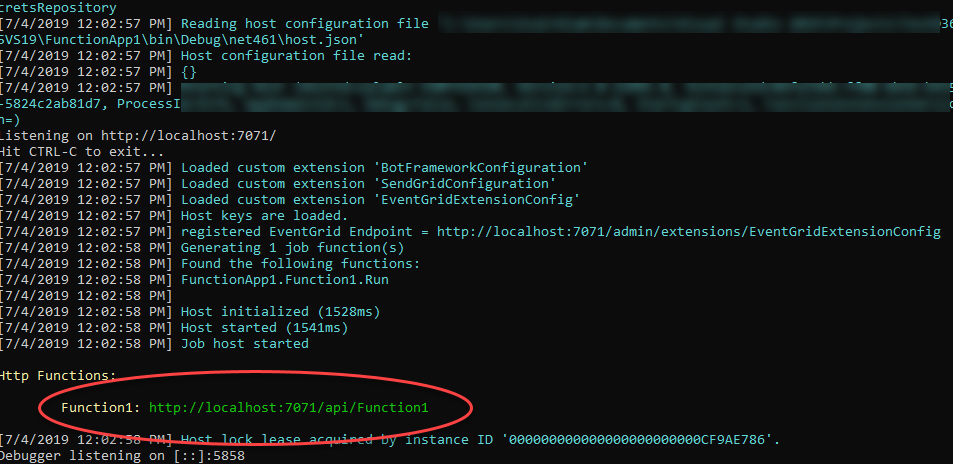
Now, you will need to build your program. To do that open the Console Window, copy the URL, and RUN this in the browser.
After you run the URL in the browser, your results will be displayed in your Console from where you can retrieve them.
Conclusion
The purpose of this blogpost was to give you all a step-by-step tutorial for retrieving records from Dynamics 365 using the Azure Function in Visual Studio. I hope that this blogpost has helped give you some clarity on the process. If you have any insights or questions for us, please leave a comment below.
Our next post will show you how to deploy this function to the Azure Subscription and dynamically connect with the Dynamics 365 Org. If you have any questions or queries, leave a comment below. You can also connect with our BOLDEnthusiasts by clicking here.
Stay tuned!
Explore Recent Blog Posts






Very Informative. Just a little confusion, you are saying to paste two files but the files are not listed?
Hi Jack,
Please check again, we have added the files.
1- SampleConfig.cs
2- ServiceManagerContext.cs
Regards,
BOLDEnthusiasts