Introduction
In this post we will try to achieve a way to create new “contacts” records in Dynamics 365 CRM with the help of Microsoft Flow connector.
Intro Power Apps
With the help of Microsoft Power Apps, we can build the apps that run on browser, tablets and on smartphones. Power Apps has three most important additives:
- Canvas Apps
- Model-Driven
- Common Data Service
In this blog we’re focusing on canvas apps of Microsoft Power Apps. Canvas apps permit us to work with 200 data sources.
Steps to Create Dynamics 365 record from Power Apps using Microsoft Flow
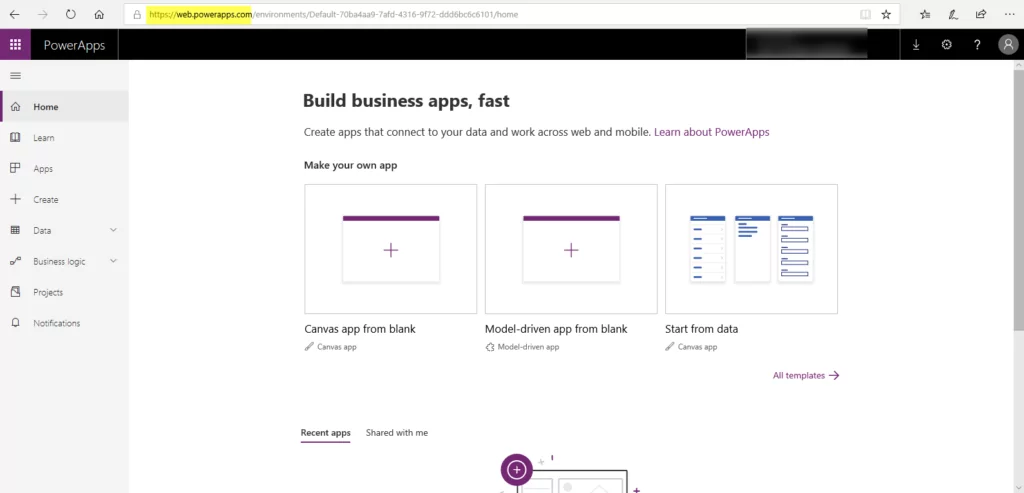
Step 1: Login to Power Apps using https://web.powerapps.com/home.
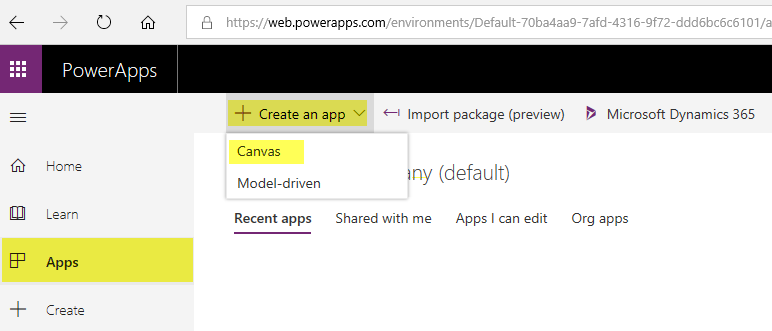
Step 2: Now Go to Apps > Create an app and click on Canvas.
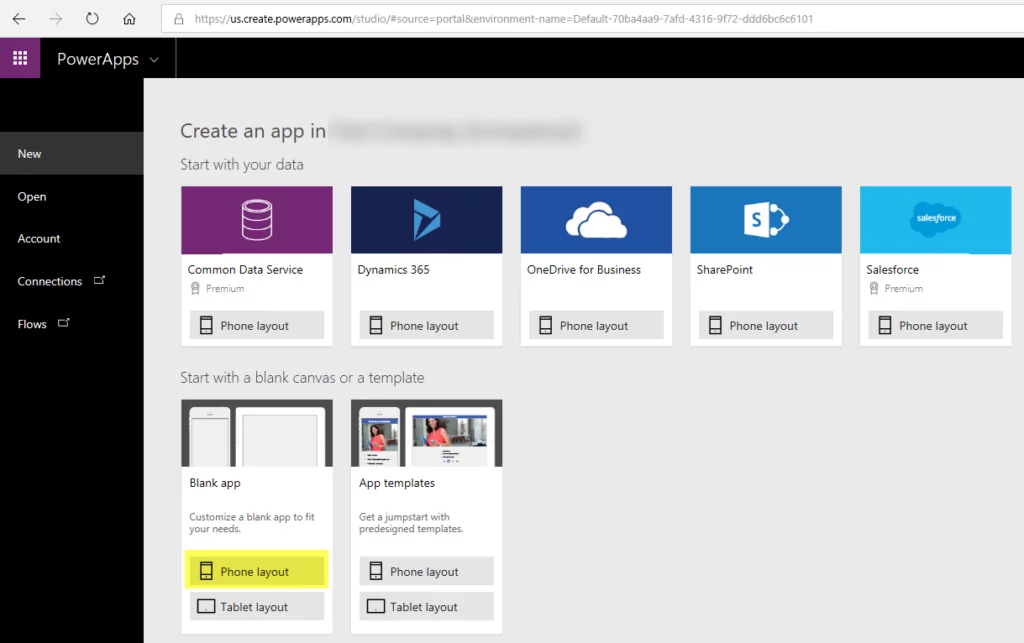
Step 3: After that it will ask for the selection of canvas. Here we will select from the Blank app and Phone layout.
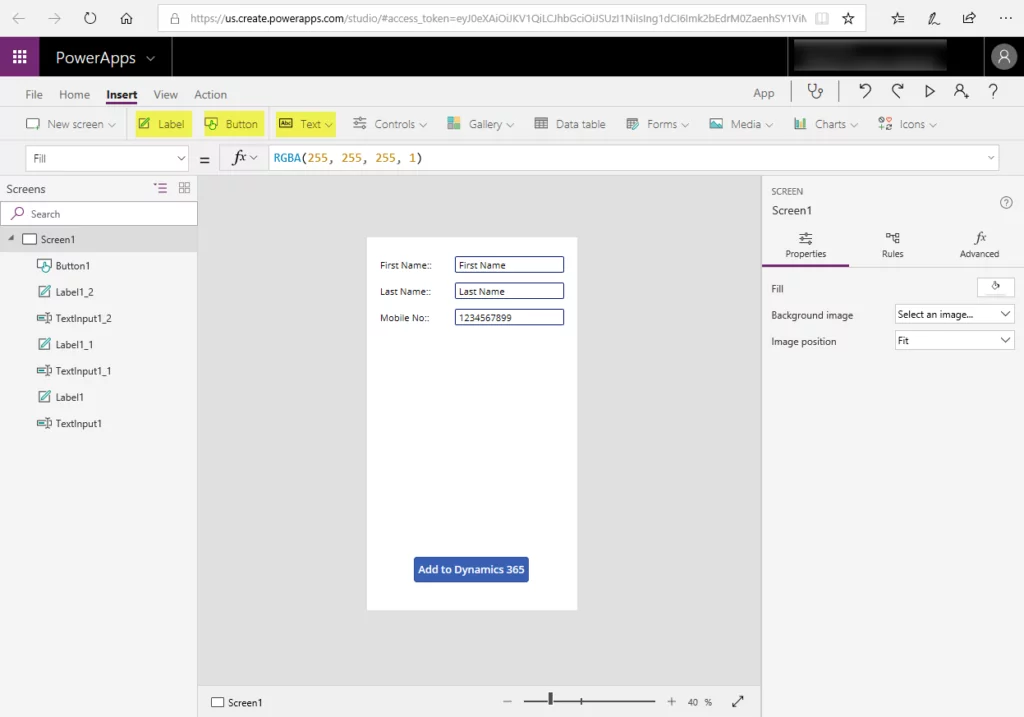
Step 4: Now we will add Textboxes, Labels and Button on the canvas.
Step 5: Now Go to Action > Flows > and click on Create a new flow.
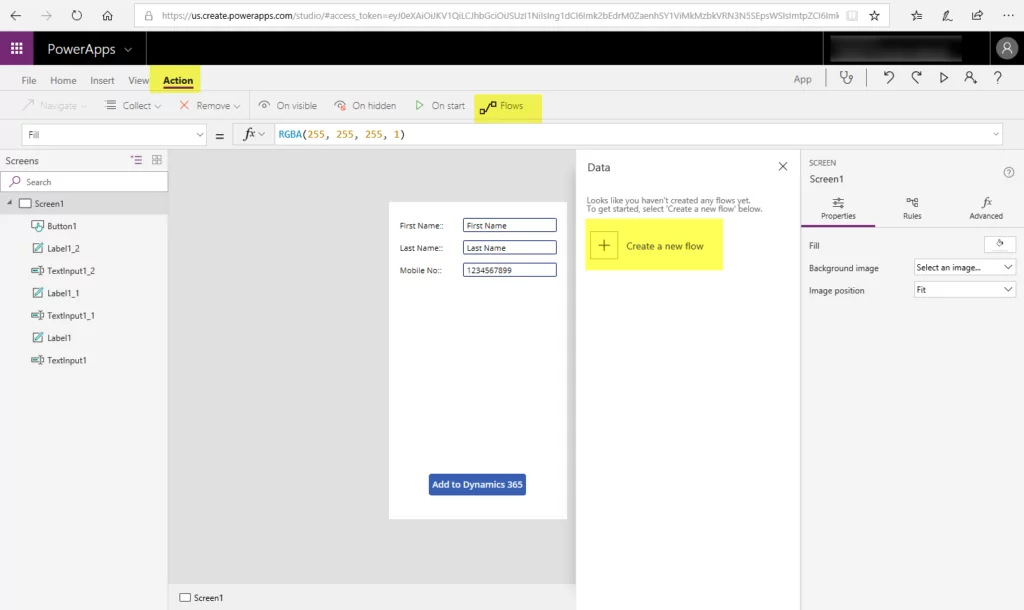
Step 6: In the next step, it will take us to the flow with the same credential as the one used in the Power Apps site. Now click on New Step as shown in the image below:
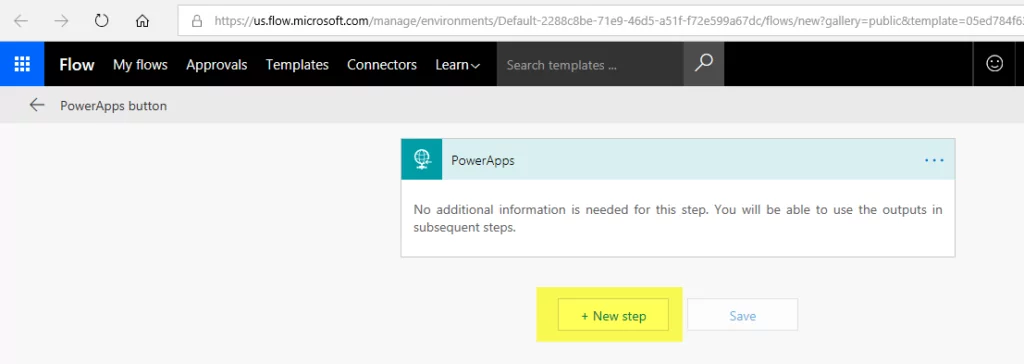
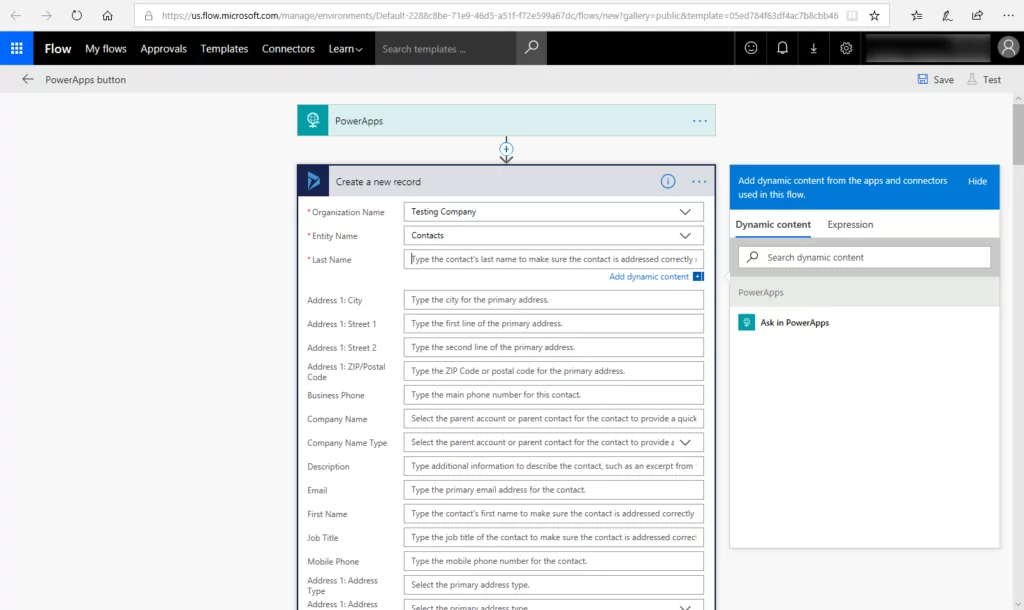
Step 7: In the next step, it will ask for the Flow connector that will be used for data connectivity. We will search action and select Create a new record.

Step 8: In this step, we will select the Organization Name and Entity Name that we want to utilize to save the record. In our scenario, we will select the contact.

Step 9: After selection of our entity, it will show us a full list of fields that are available in our Contact entity.
Transform Your Workflow with Power Apps
Enhance your Dynamics 365 environment with custom Power Apps and Microsoft Flow integrations. Discover how we can elevate your business efficiency.
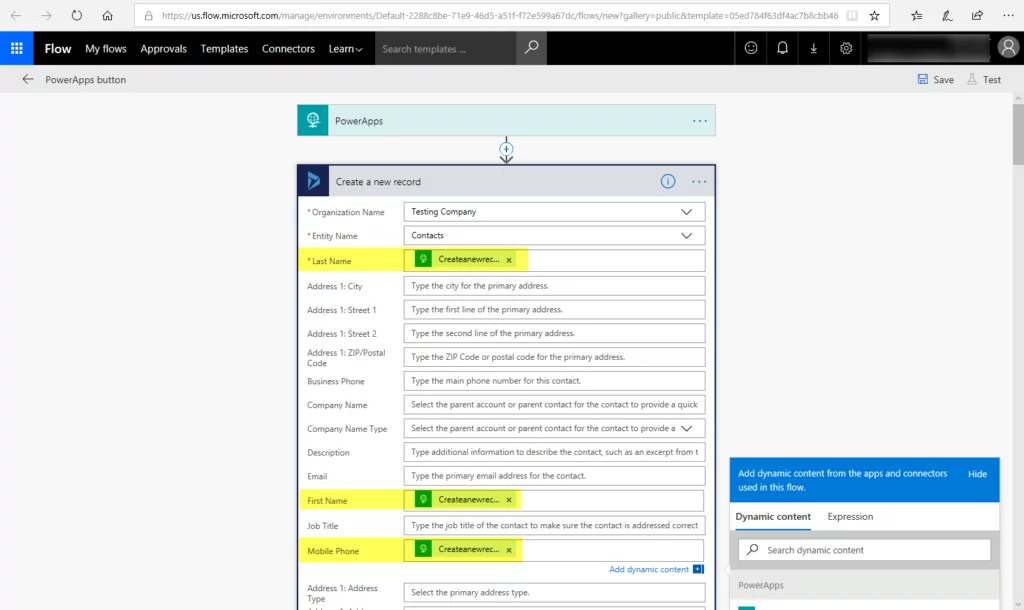
Request a DemoStep 10: In this step, we will map the fields that we have in the Power Apps Canvas to the fields that are available in the list using Dynamics content selection as shown in image below.
Read more about 5 Reasons Why PowerApps Are the Future of Dynamics 365
Step 11: After completing the mapping we will now save the Flow so we can utilize it in our Power Apps. Click on Save.
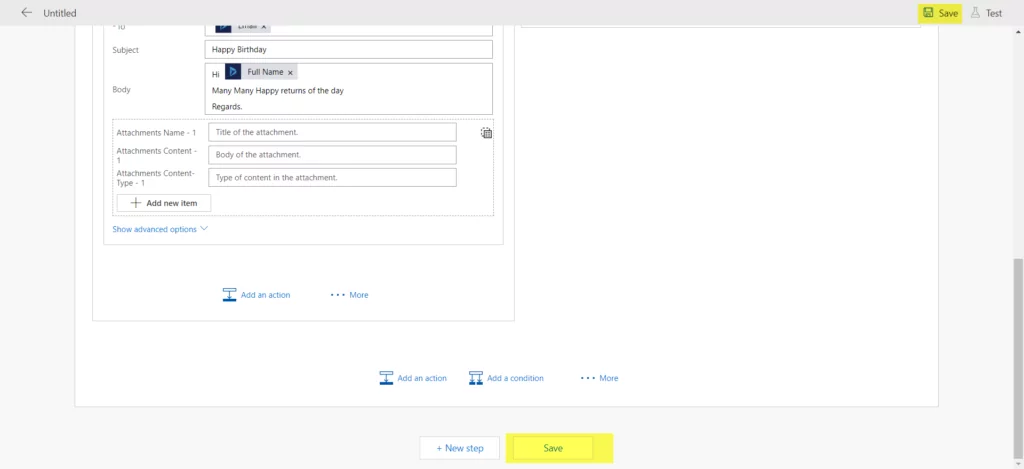
Step 12: Now our created Flow will be shown in the list and we can utilize it for Data connectivity with Dynamics 365 org on which we need to perform the operations.
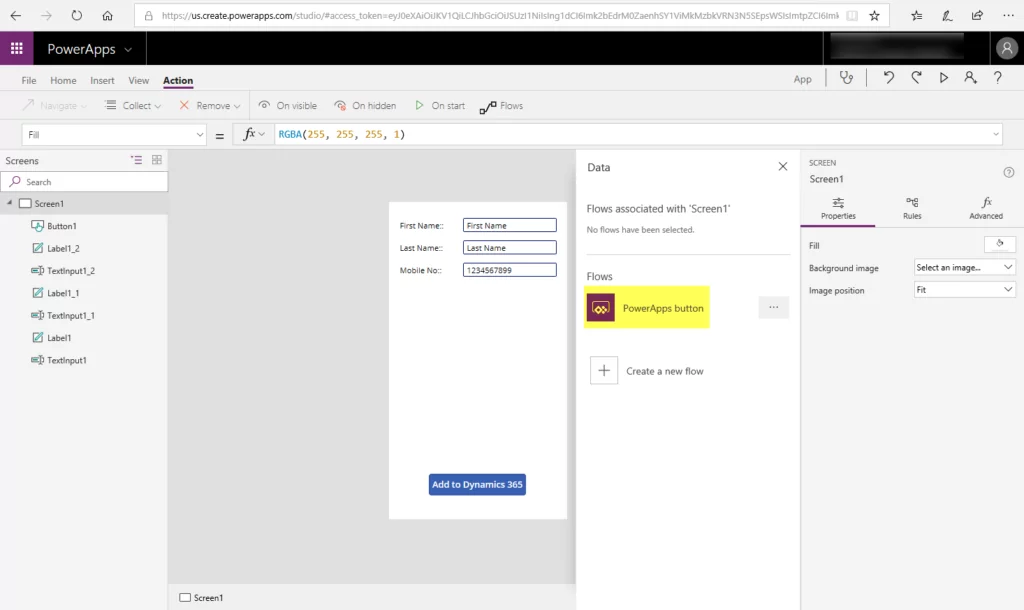
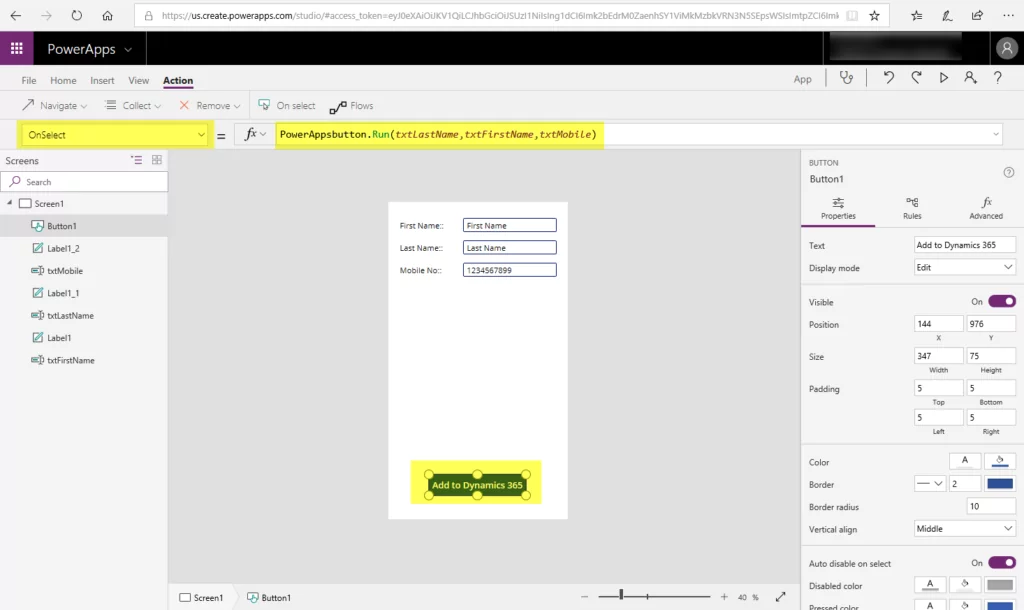
Step 13: We will trigger the Flow on the Click of Button. To call this we will use following expression on the OnSelect function of the button.
“PowerAppsbutton.Run(txtLastName, txtFirstName, txtLastName)”.
Step 14: After completing we will click on the Run button for the Power Apps to test.
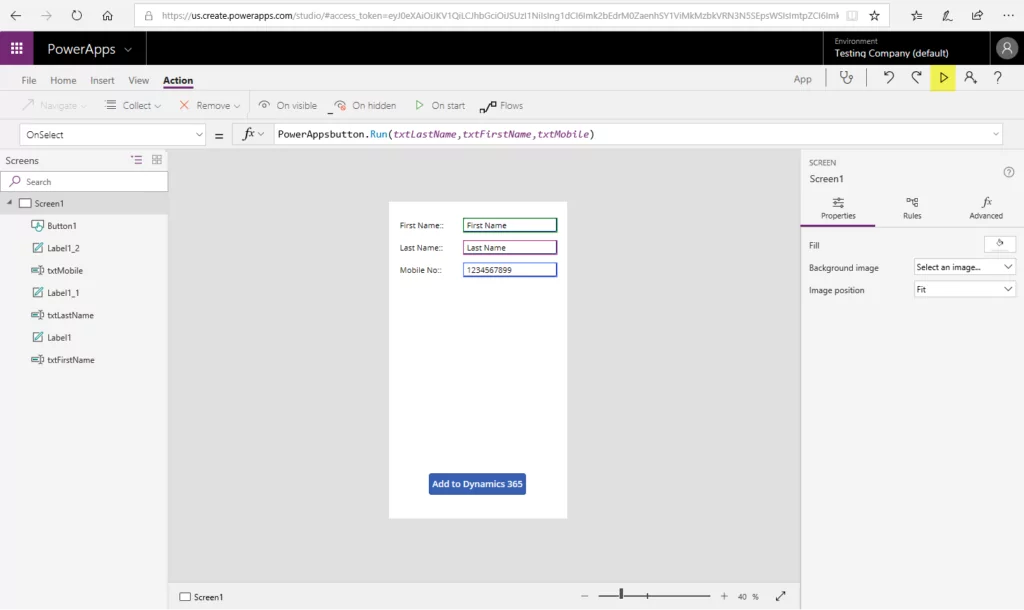
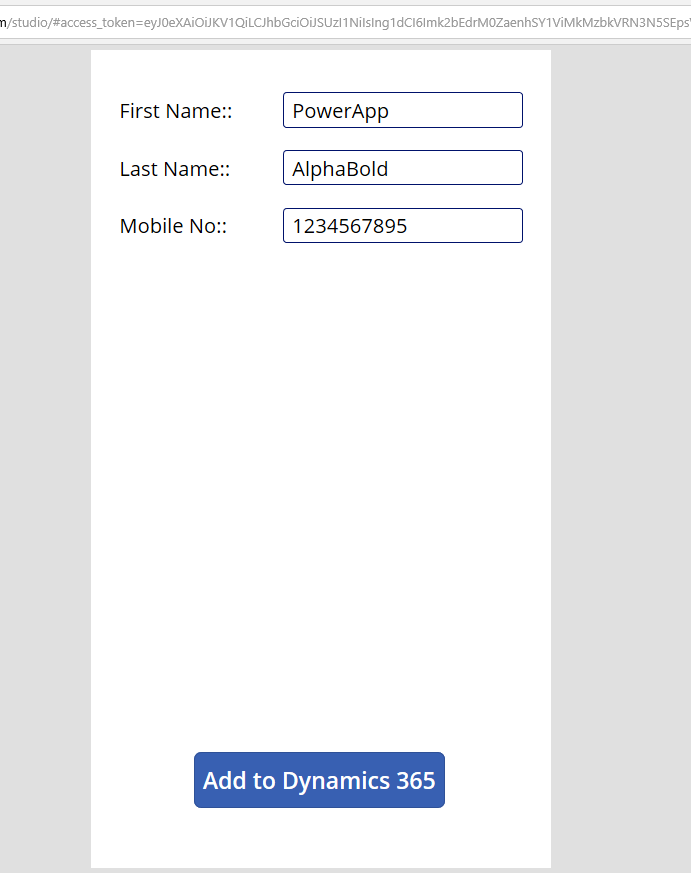
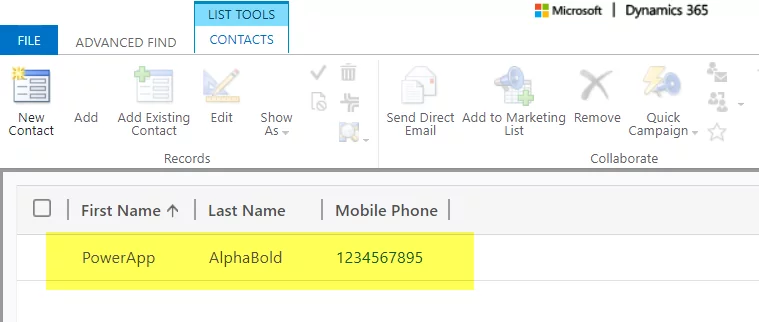
Step 15: In the next step, once we click on the Run button, we will see the apps screen. Fill the field with our desired values and click Save, and then we can verify it from Dynamics 365 CRM.
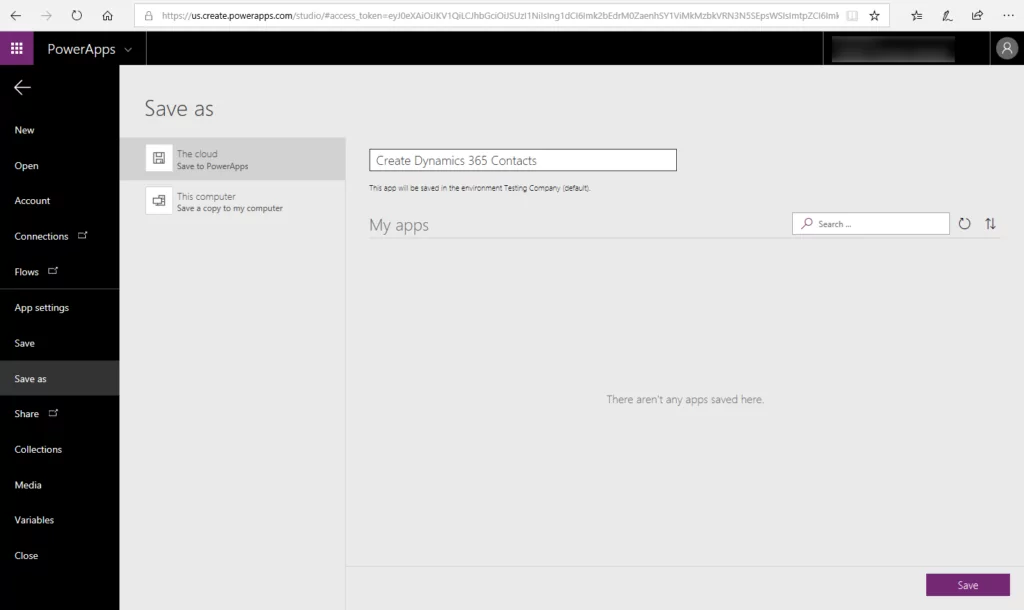
Step 16: In this step, we will save our PowerApp.
Streamline Your Dynamics 365 Operations
Leverage the power of Power Apps and Microsoft Flow to automate and optimize your Dynamics 365 record creation. Let our experts guide your transformation.
Request a DemoStep 17: We can also share Power Apps with any user that we want to.
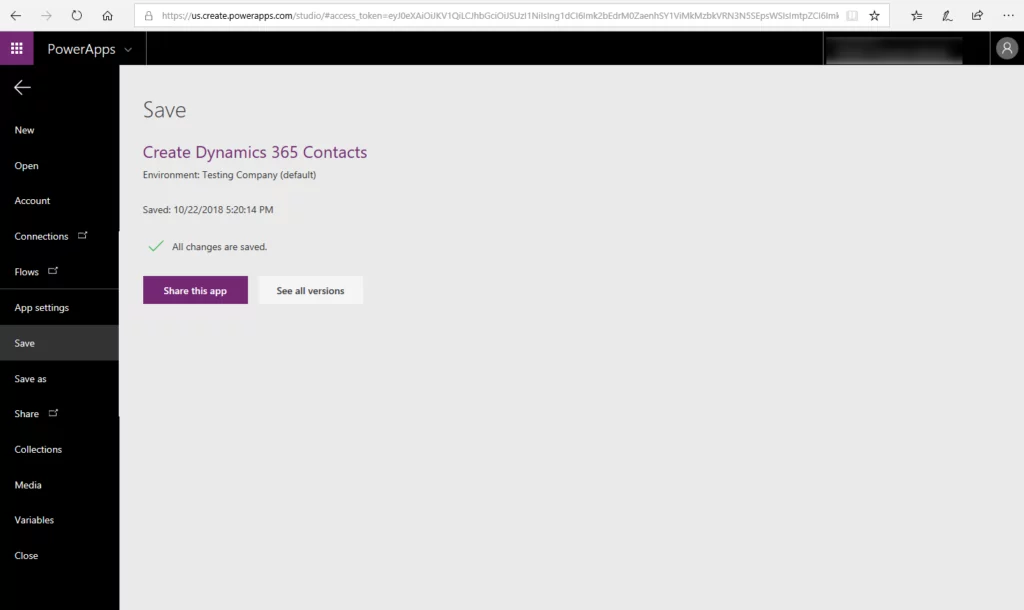
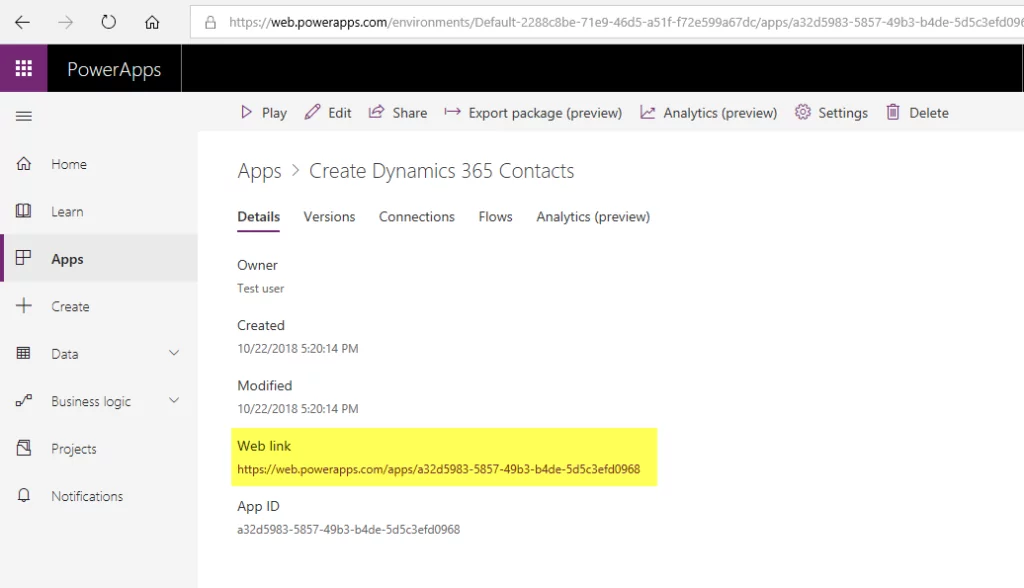
Step 18: After successfully saving we will see the screen below and from there we can click on the highlighted link to open our Power Apps.
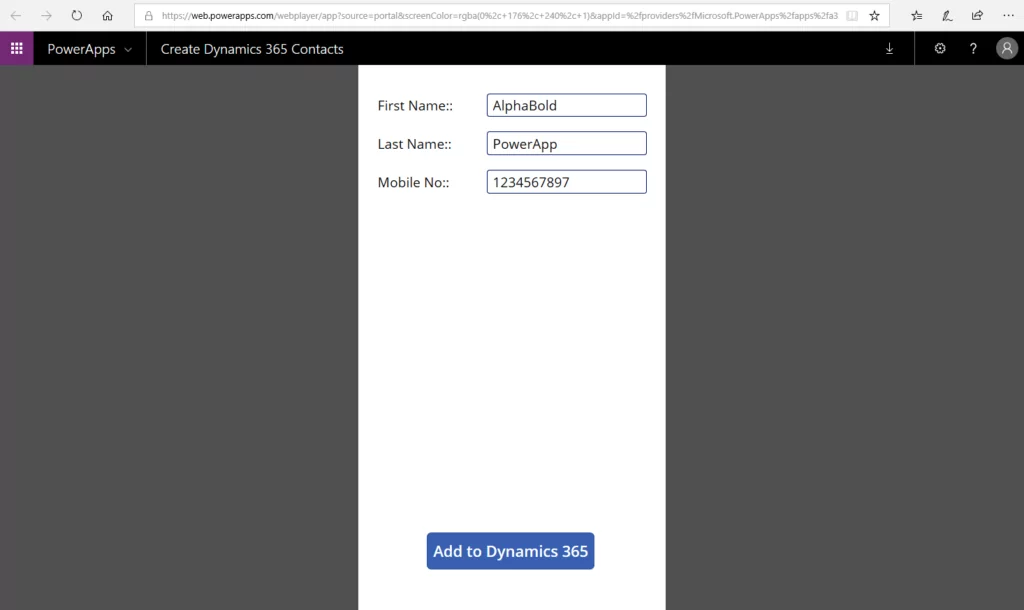
Step 19: Once we click on the link it will open our Power Apps. As shown in the image below:
Step 20: After saving the record we will verify it in Dynamics 365 CRM. We can see both records that we created during the test run and the one which is highlighted is the one we just created.

Conclusion
Explore Recent Blog Posts





Hi I am getting invalid argument type (error). Expecting a Text value instead .
location scree1.OnVisible
Hi Maruf,
We need more information, would you please identify at which step and expressions you are receiving this error?
Regards,
BOLDEnthusiasts
This is great. Can you tell me under who’s context the flow runs? If we share the App with other users and they create a contact record will the created by be the flow owner or the current user who is using the app ?
Hi Bushan,
If your flow is running on an automated trigger, it will always run in the context of a flow. If the App/flow is shared with another user team, then it will run on the user context so the owner of the record will be the one who is using the App/flow
Let me know if you need any further help.