This guide builds on getting a connection to CRM with the Kingswaysoft Dynamics 365 plugin for SSIS. Link here to get started with part one of this guide: https://www.alphabold.com/dynamics-365-kingswaysoft-data-integration-connection-guide/
In this guide we will work towards getting data out of Dynamics. We will get data and display it on the screen using a data viewer provided by the SSIS package actions. Please follow the steps below to get started.
Learn more about Dynamics 365 Services!
Open Project
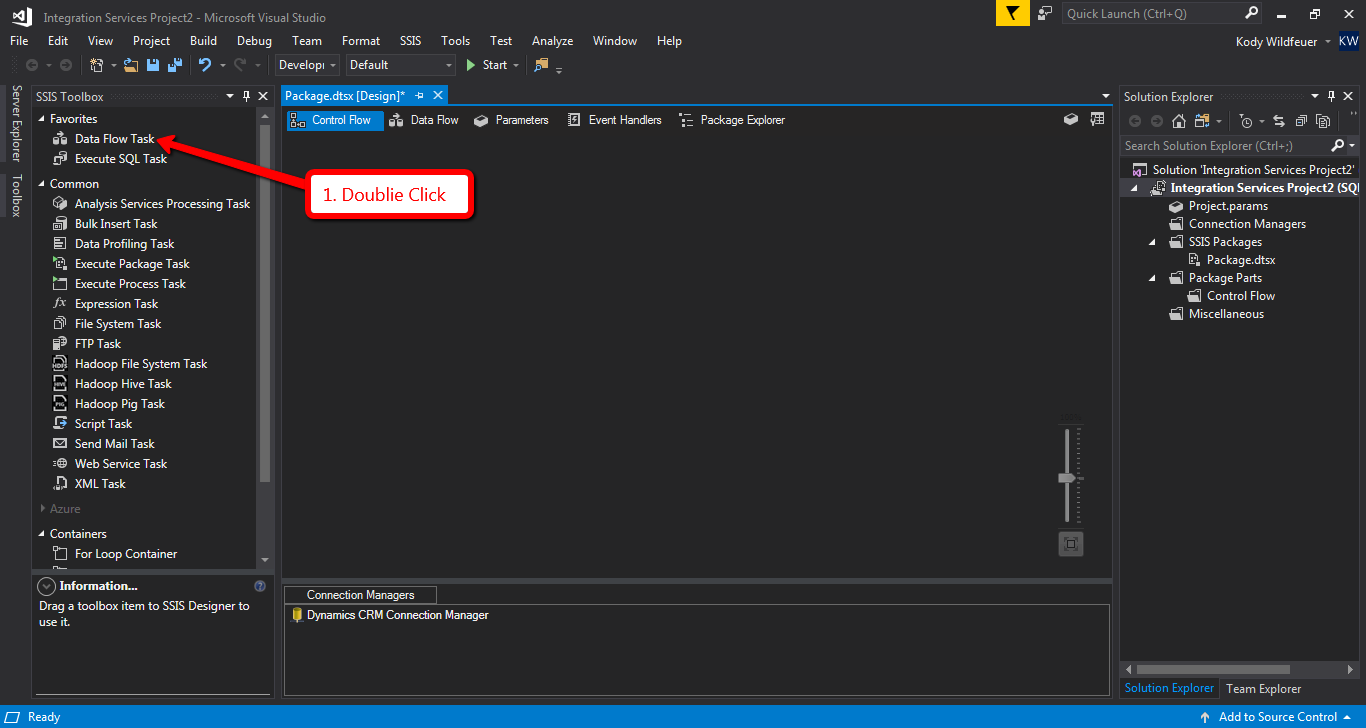
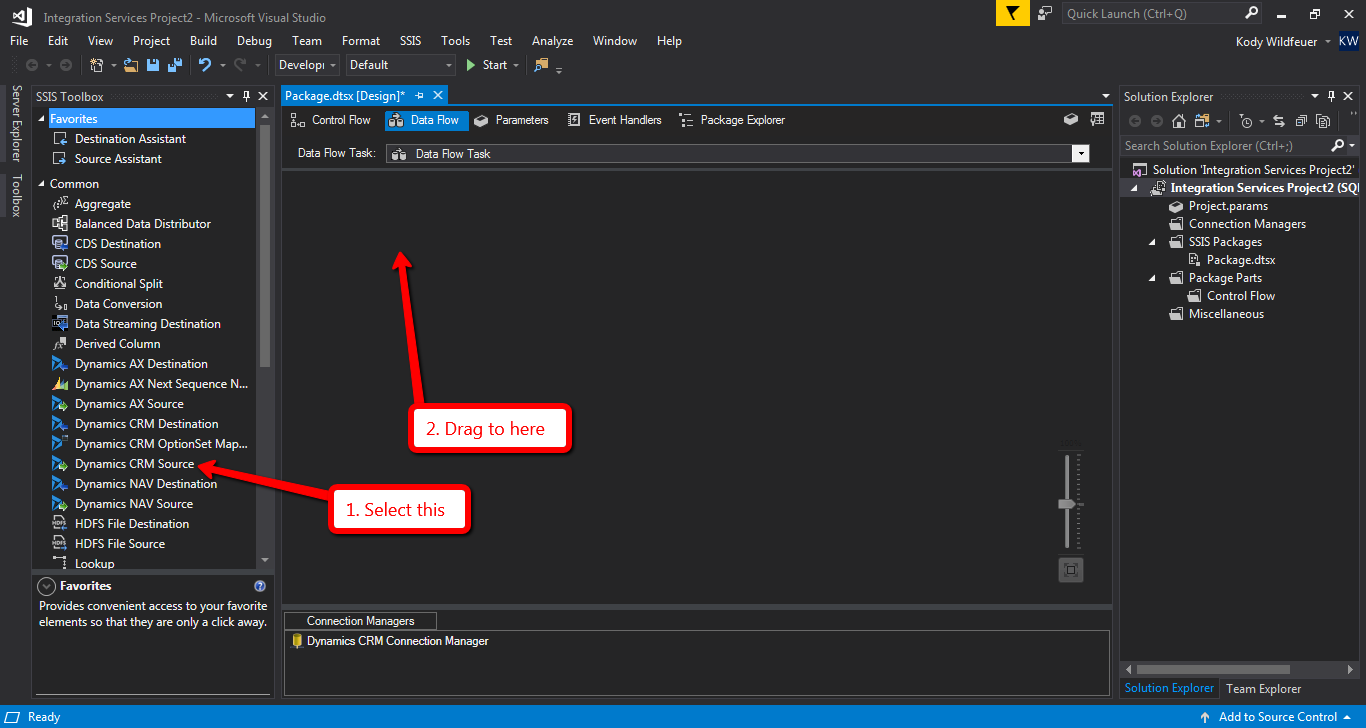
Double Click on ‘Data Flow Task’ in the left section (SSIS Toolbox) of Visual Studio.
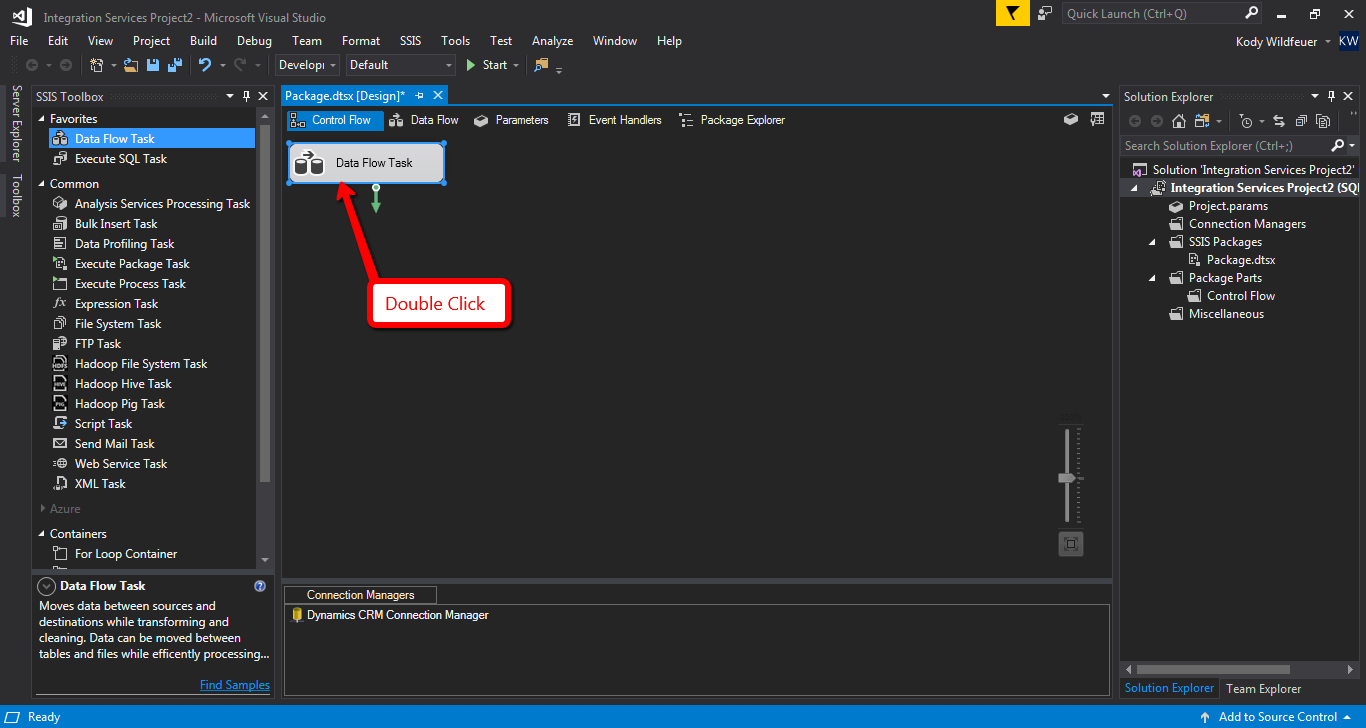
Select Dynamics CRM Source on the left side of the screen.
Drag this to the middle section of the screen.
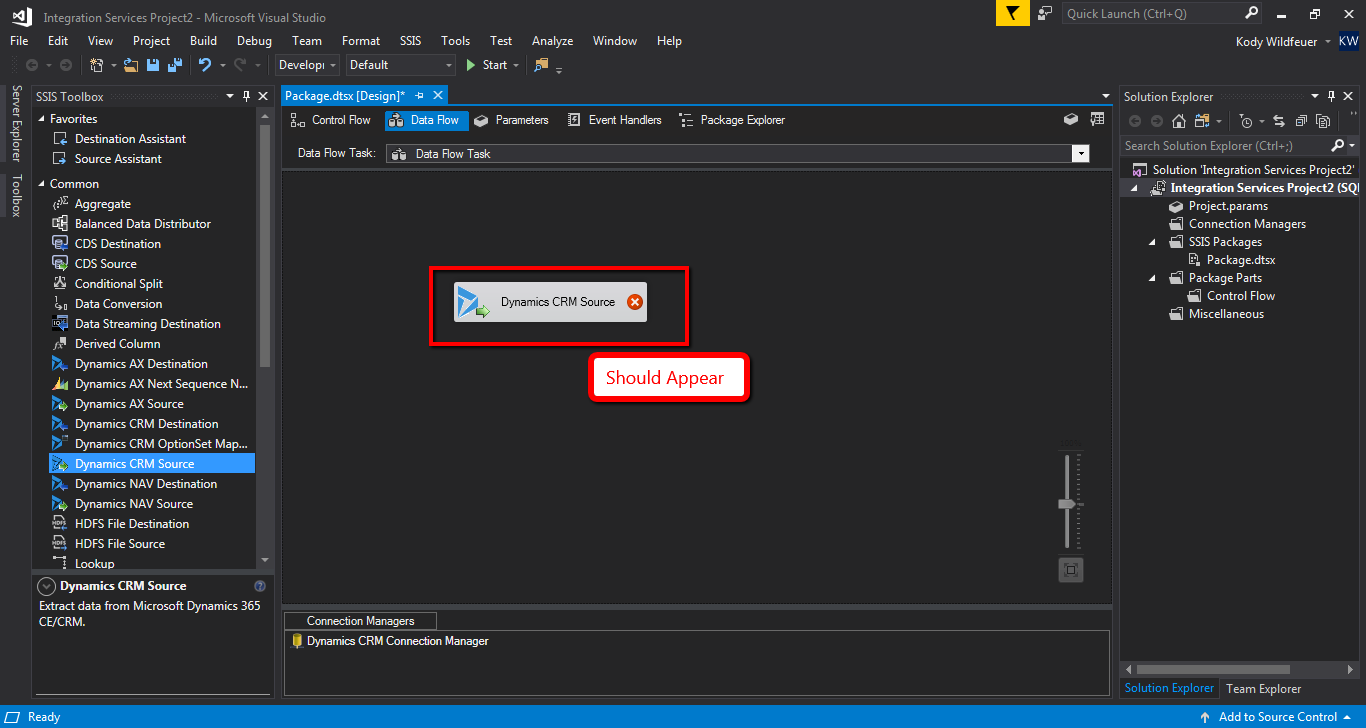
The below screenshot should be similar to what you see.
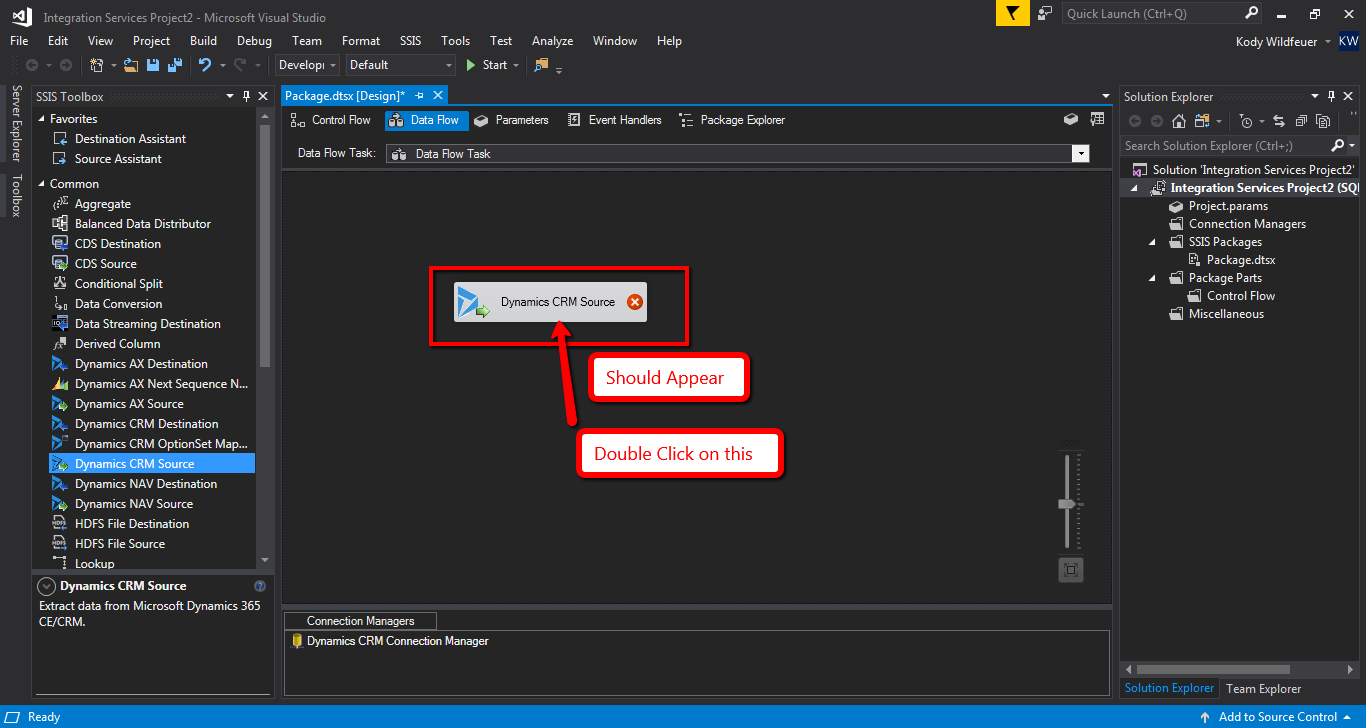
Double Click on Dynamics CRM Source in the middle section of the screen.
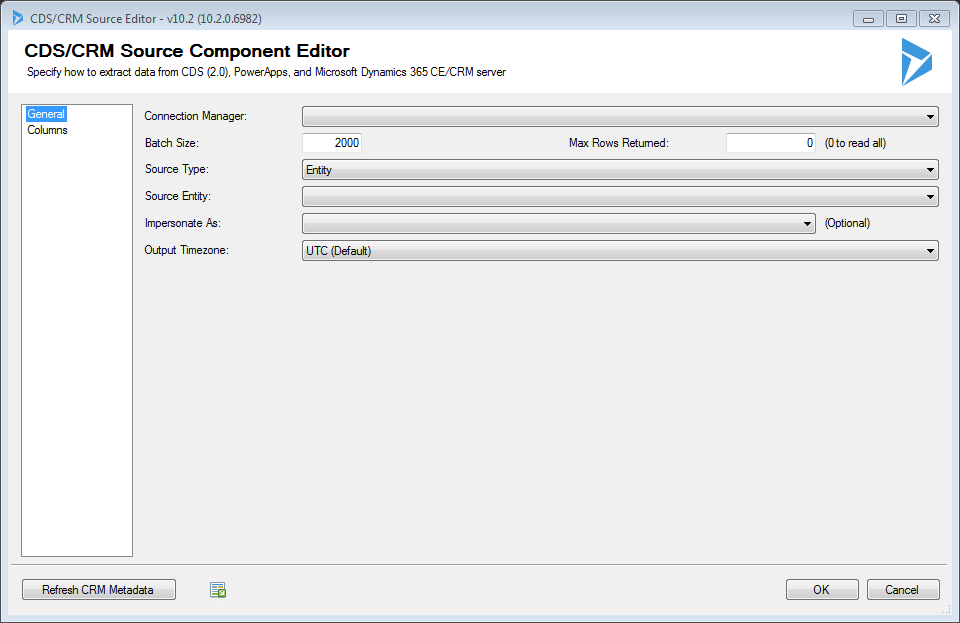
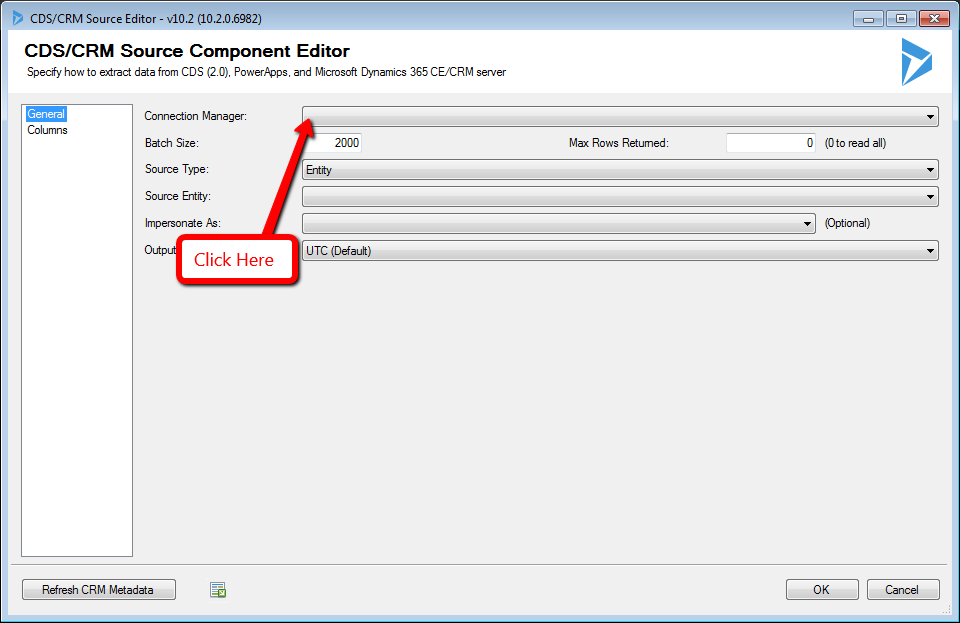
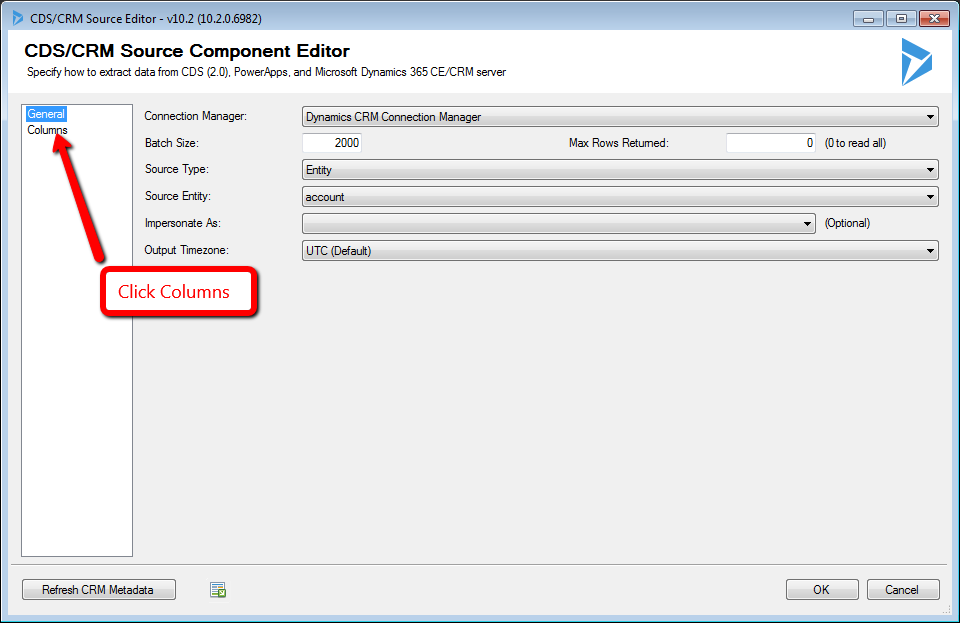
In the next step, following screen should appear.
Click on the dropdown labeled ‘Connection Manager’
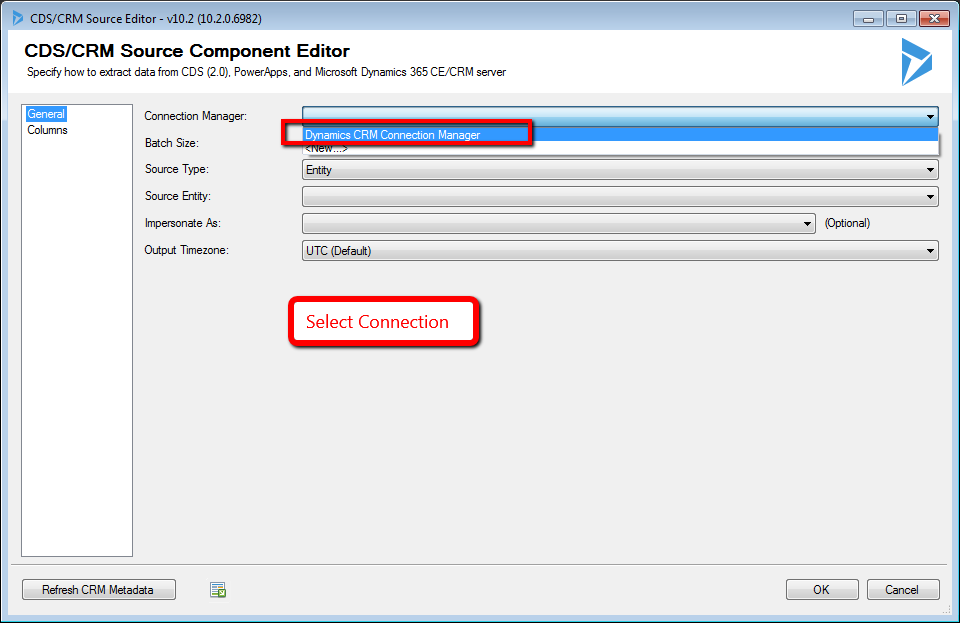
Select Dynamics CRM Connection Manager.
(If you do not see this option please refer to this guide to get this set up and try again. https://www.alphabold.com/dynamics-365-kingswaysoft-data-integration-connection-guide/)
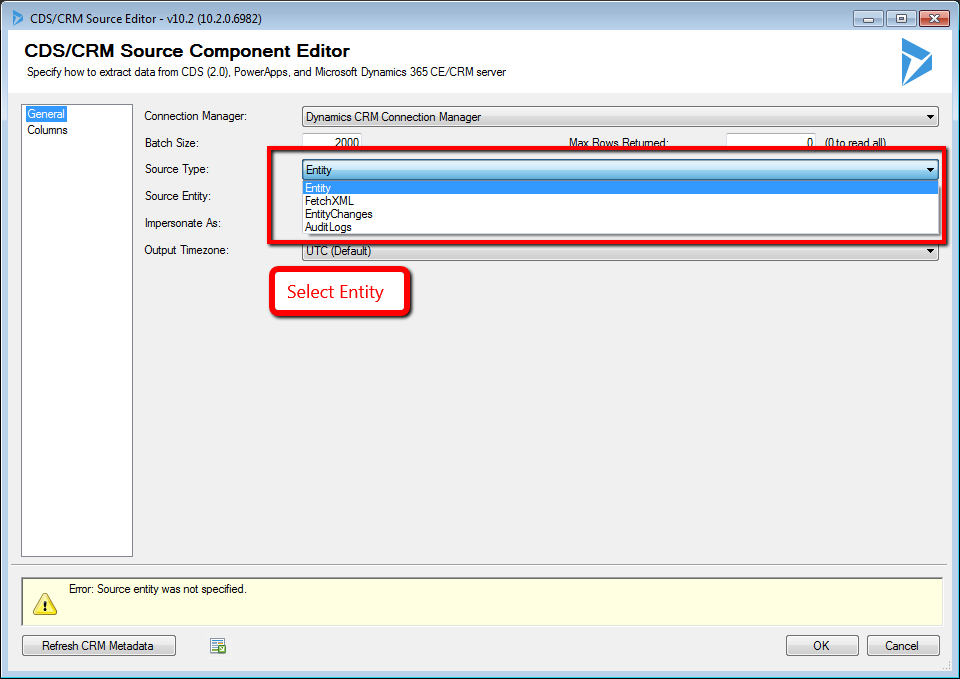
Select Entity for source type.
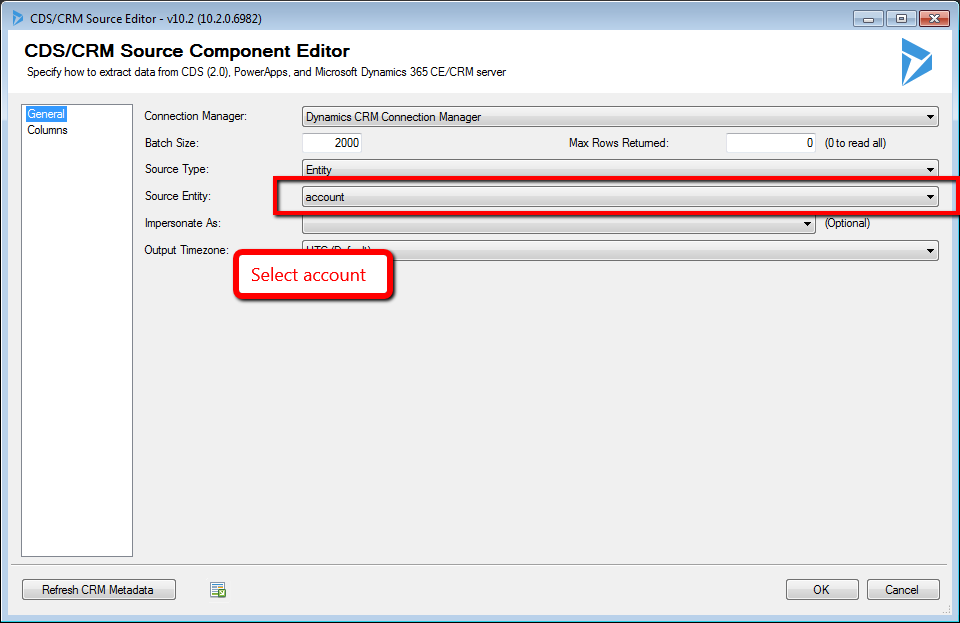
Select the account entity.
Click the columns option on the left side of the screen.
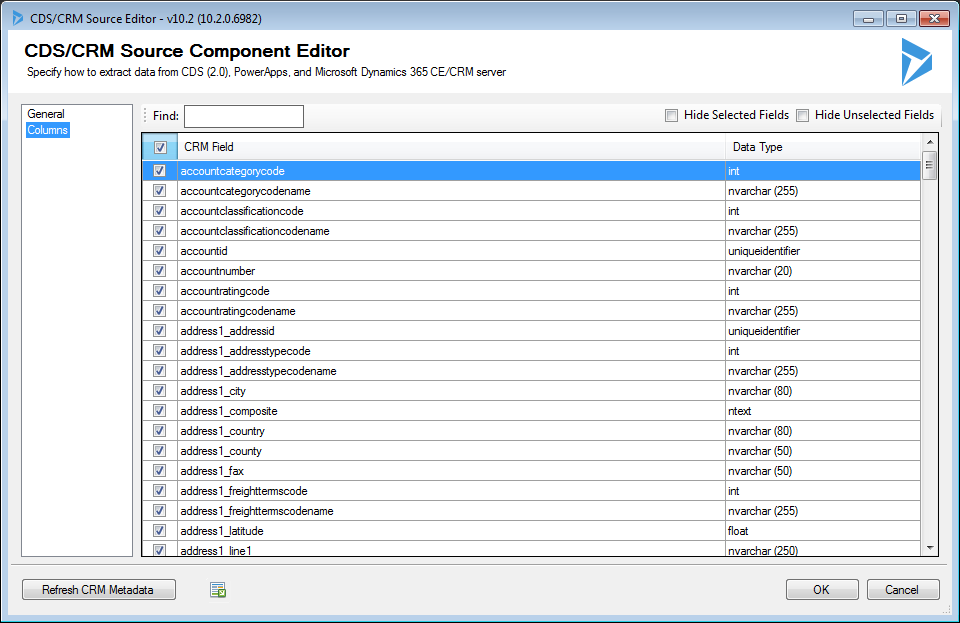
In the next step, following screen should appear.
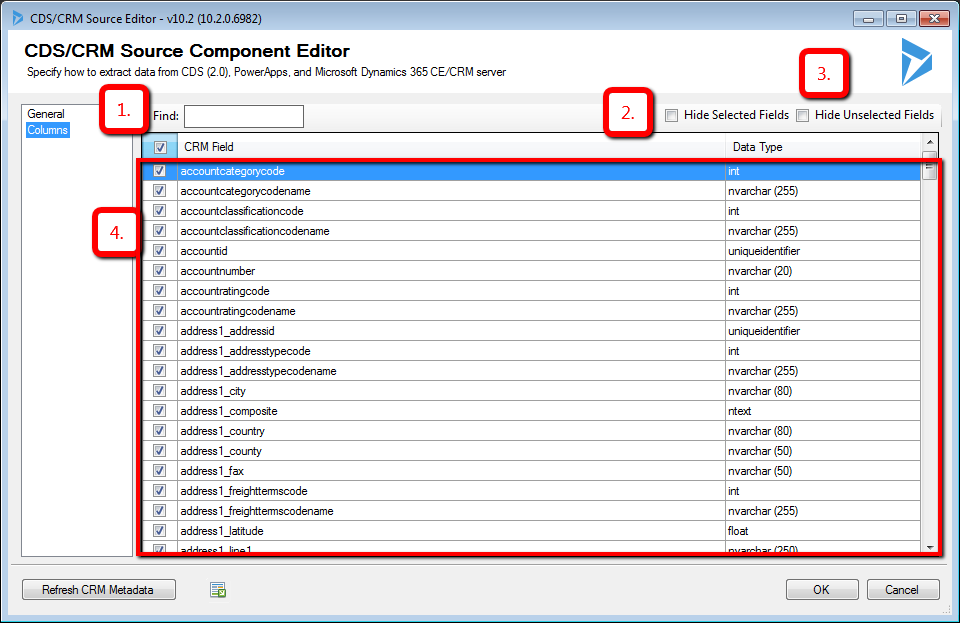
Descriptions of different elements numbered below on the screenshot:
- You can search through the fields to select only the ones you need easily using this search bar.
- This check box allows you to hide selected fields.
- This check box allows you to hide unselected fields.
- This is the list of fields that are available for the selected entity. In this case these are fields for the account entity.
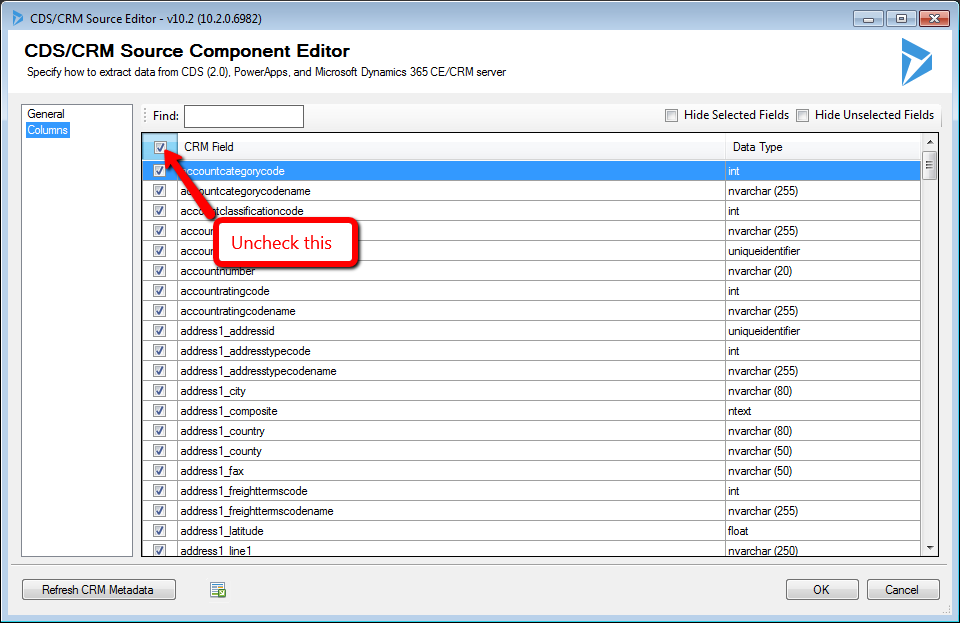
Uncheck the box shown below:
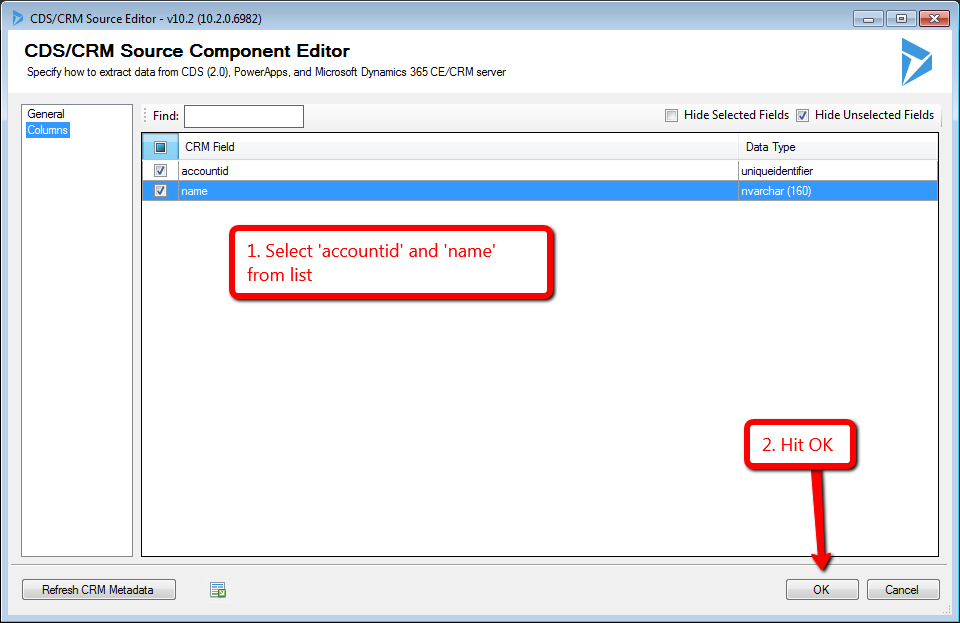
Select ‘accountid’ and ‘name’ from list
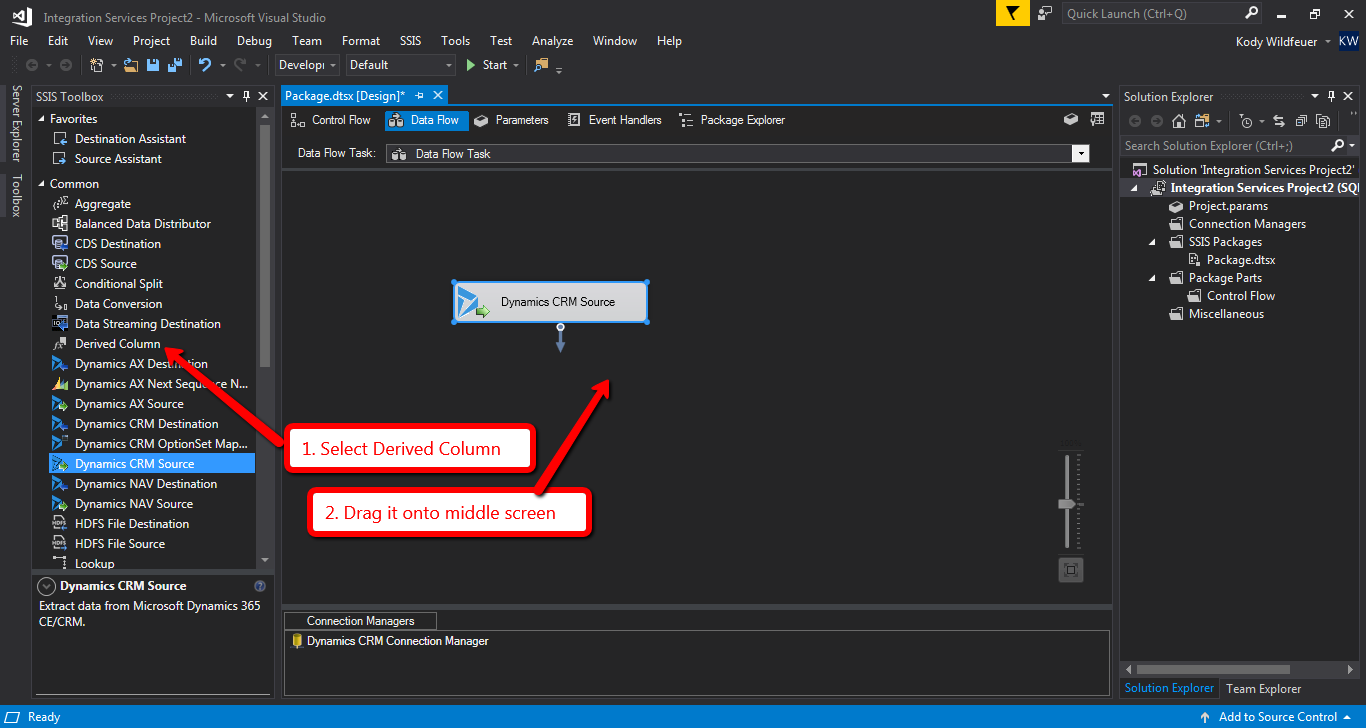
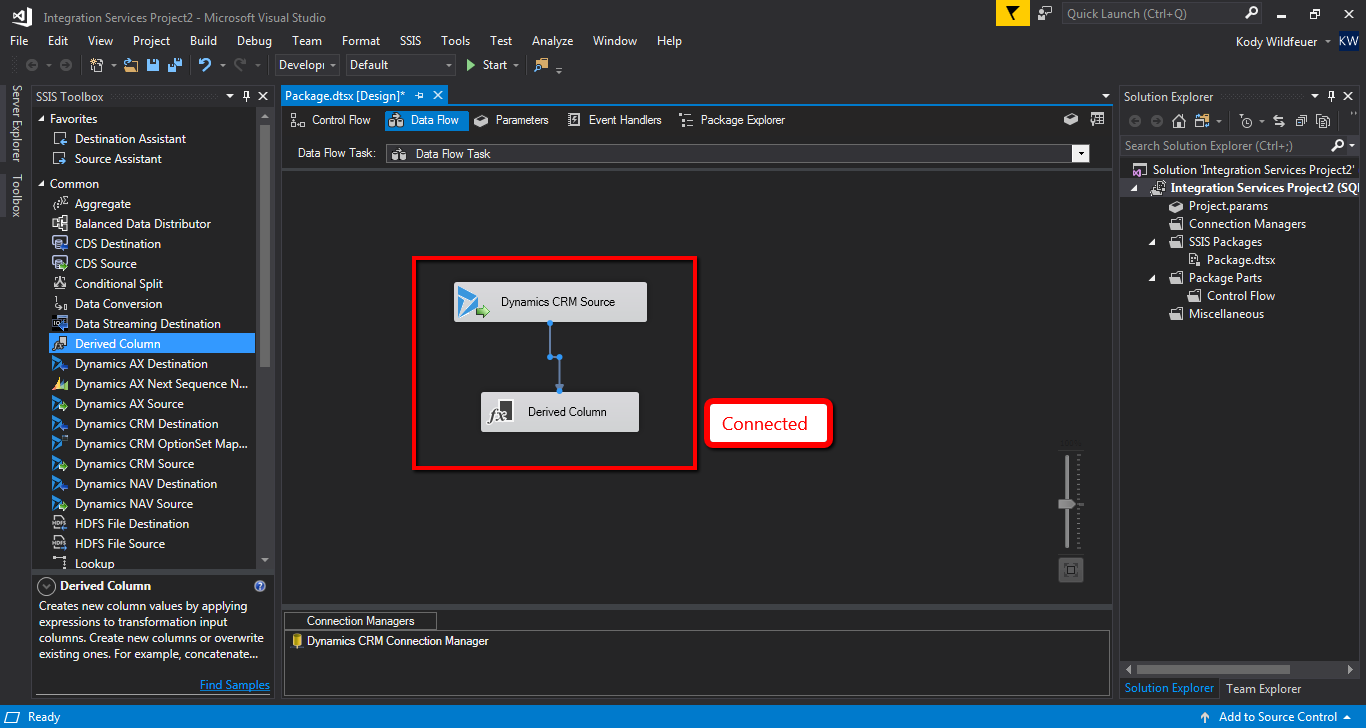
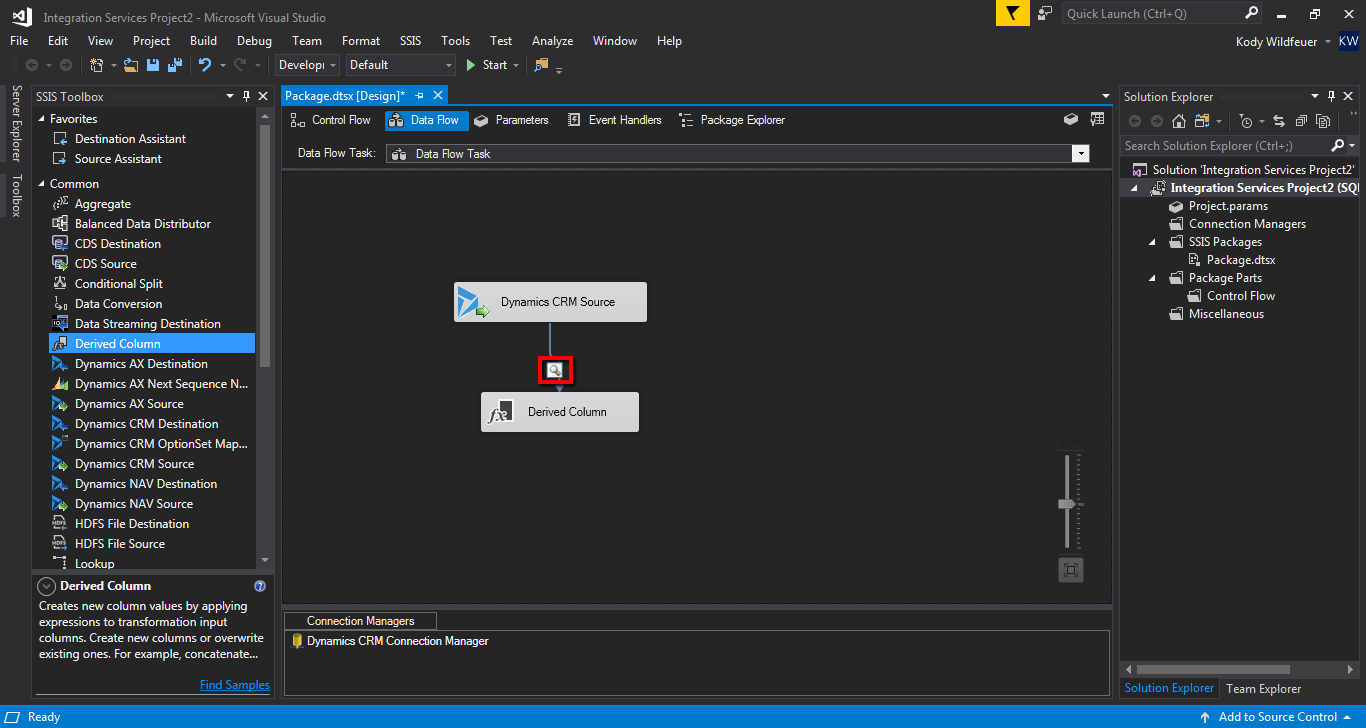
Select ‘Derived Column’ from the list on the left hand side of the screen and then drag it to the middle section of the screen.
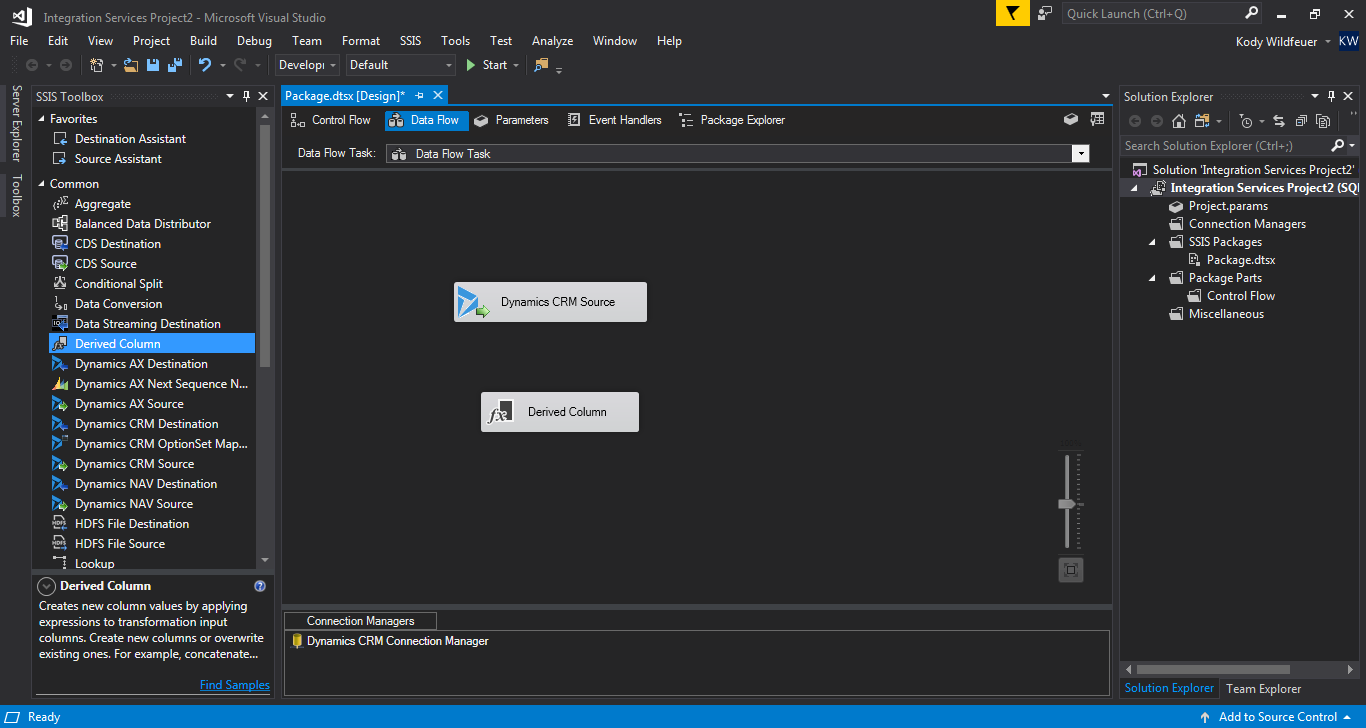
Should look similar to what is shown below.
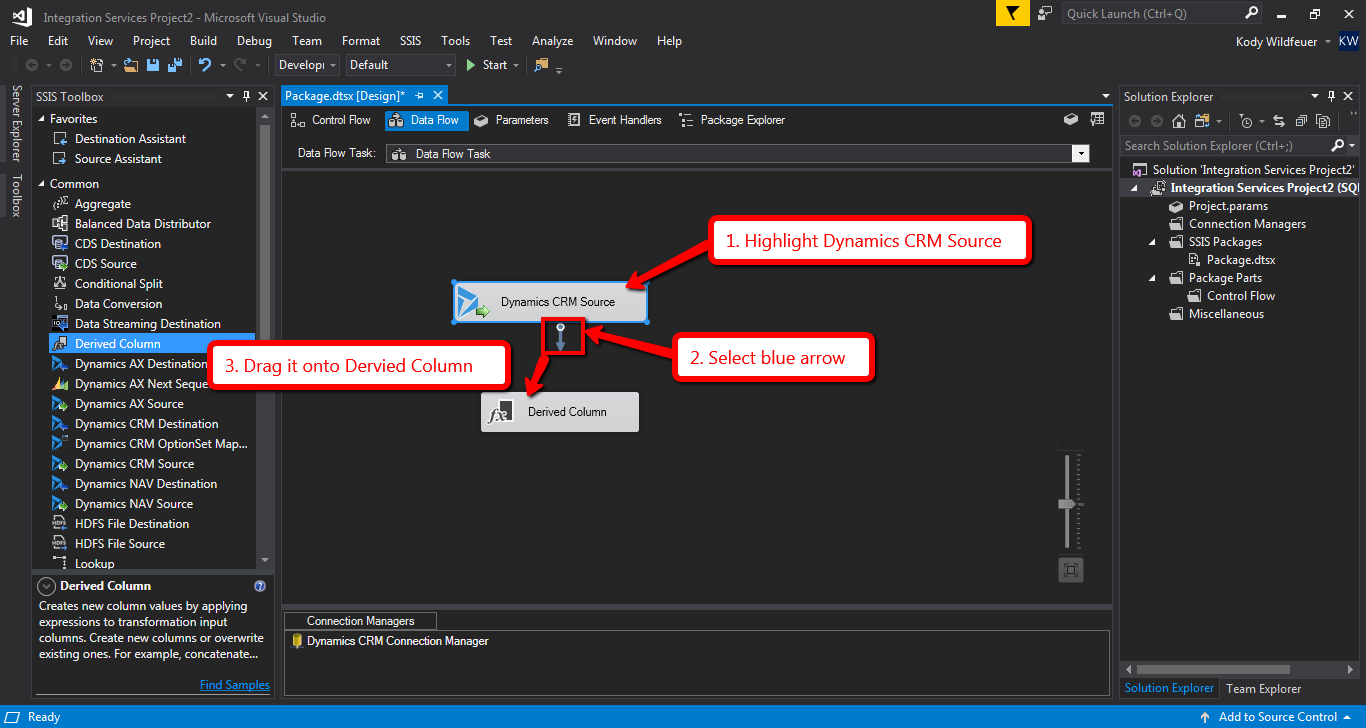
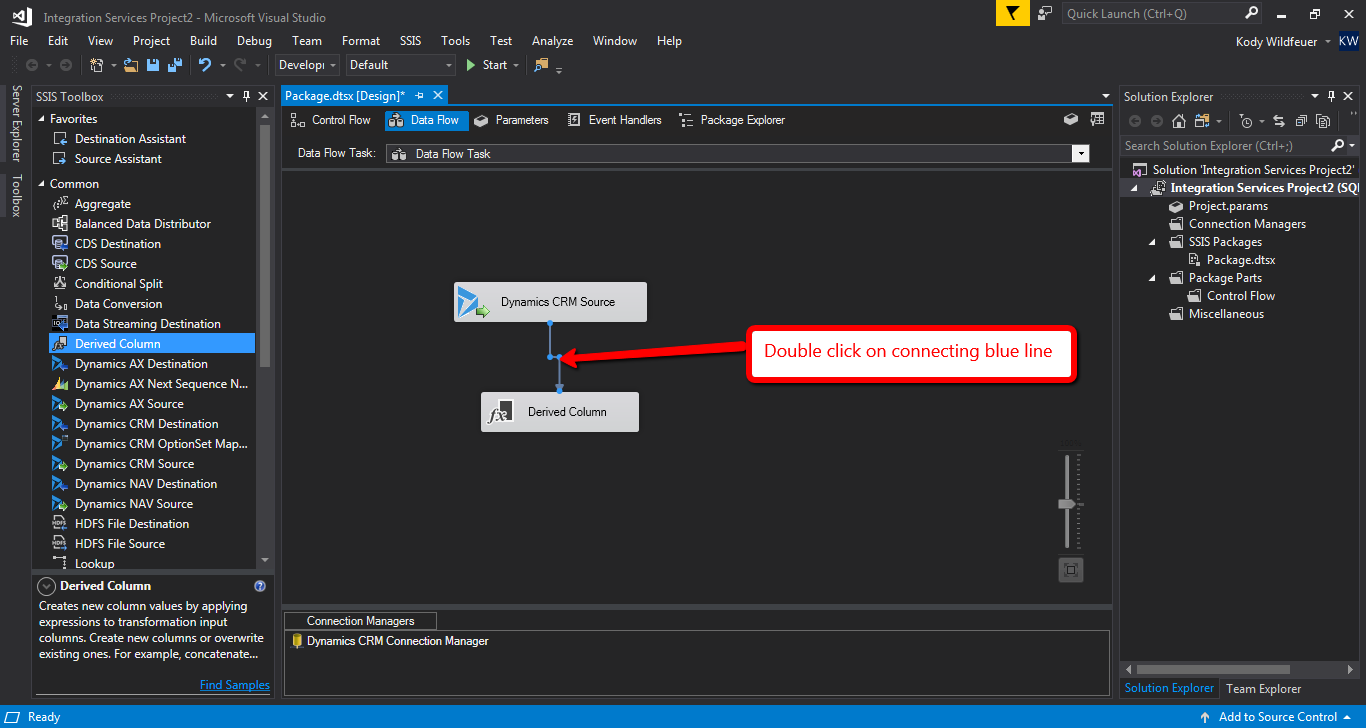
Follow steps listed below:
Note: This is just a derived column – which does not do much good in terms of actually manipulating the data but it at least allows us to see the data in easy fashion. Feel free to store this data in SQL or write it back into CRM using the Kingswaysoft Destination once you feel comfortable with this exercise.
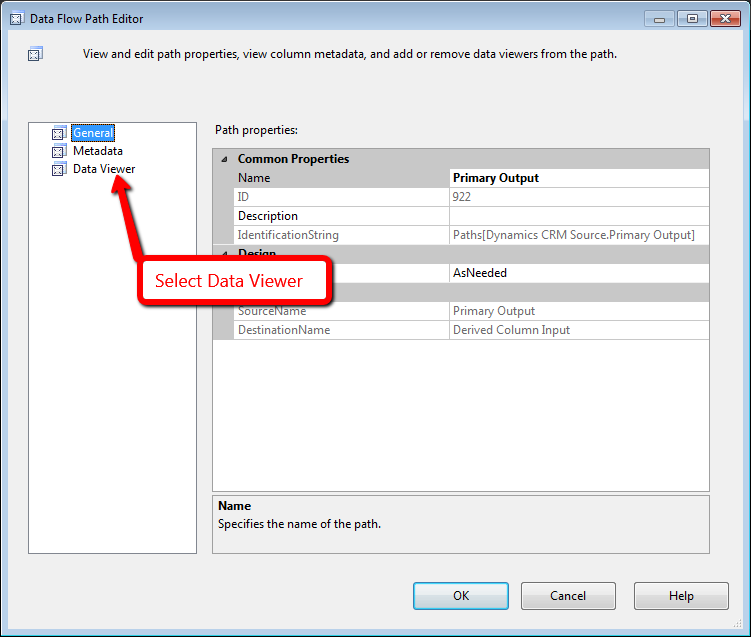
Popup window should appear as shown below. Select Data Viewer on the left hand side of the screen.
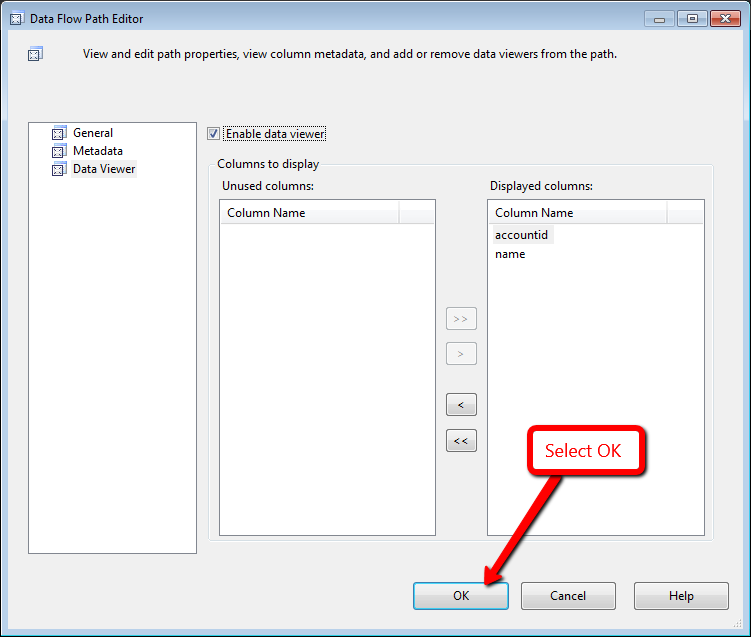
Select OK
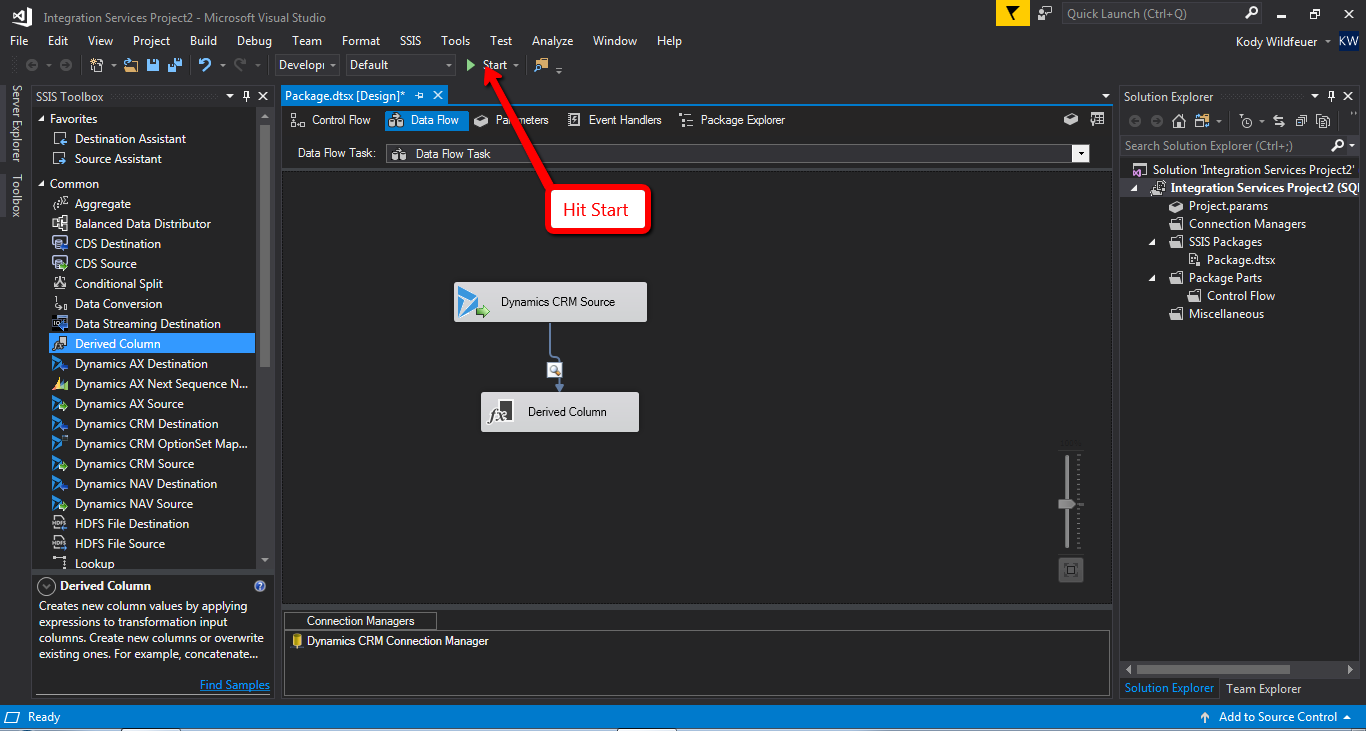
Hit start to see the data get pulled out of the connect CRM system.
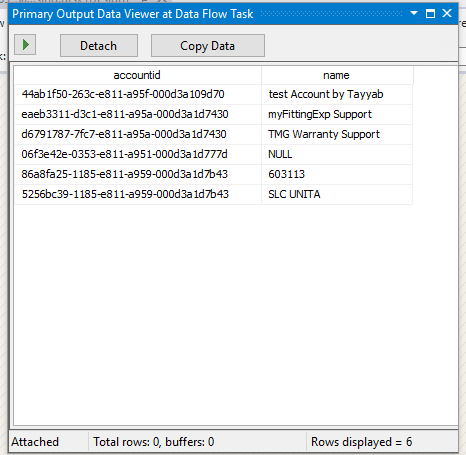
The popup below should show you the returned accounts from your CRM system.
Explore Dynamics 365 Services!
You have accomplished reading data out of CRM using the kingswaysoft package. You can use this data to be written back into SQL tables or manipulated and put back into CRM using different actions with the SSIS package. Feel free to use this to your advantage when large scale data is needed to be interacted with in CRM.
If you have any question or queries, do not hesitate to reach out to us!
Go forth!

