

Introduction
While working with Dynamics 365, there is usually a scenario which demands integration with data from SQL tables or other sources and get the data into CRM. There are a few different options to approach this task. There is an SSIS extension that is easy to use with some powerful features that allows for quick turn around on integration development. Today, we will go through how to set up a project to get your SSIS Integration package connected to Dynamics CRM using the Kingswaysoft addon.
Learn more about our Microsoft Dynamics 365 Services
Starting a new project
Open Visual Studio.
Open New Project.
Under Business Intelligence, select “Integration Services” and then select “Integration Services Project”.
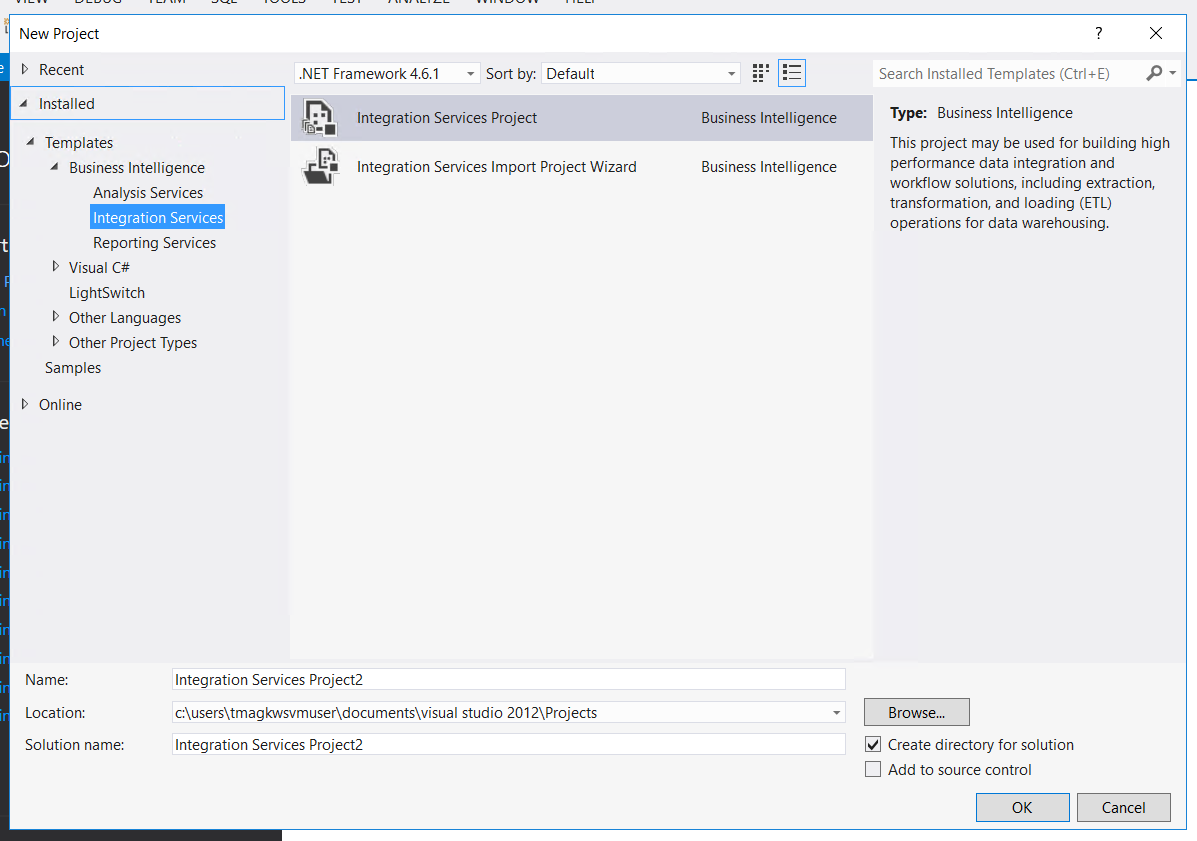
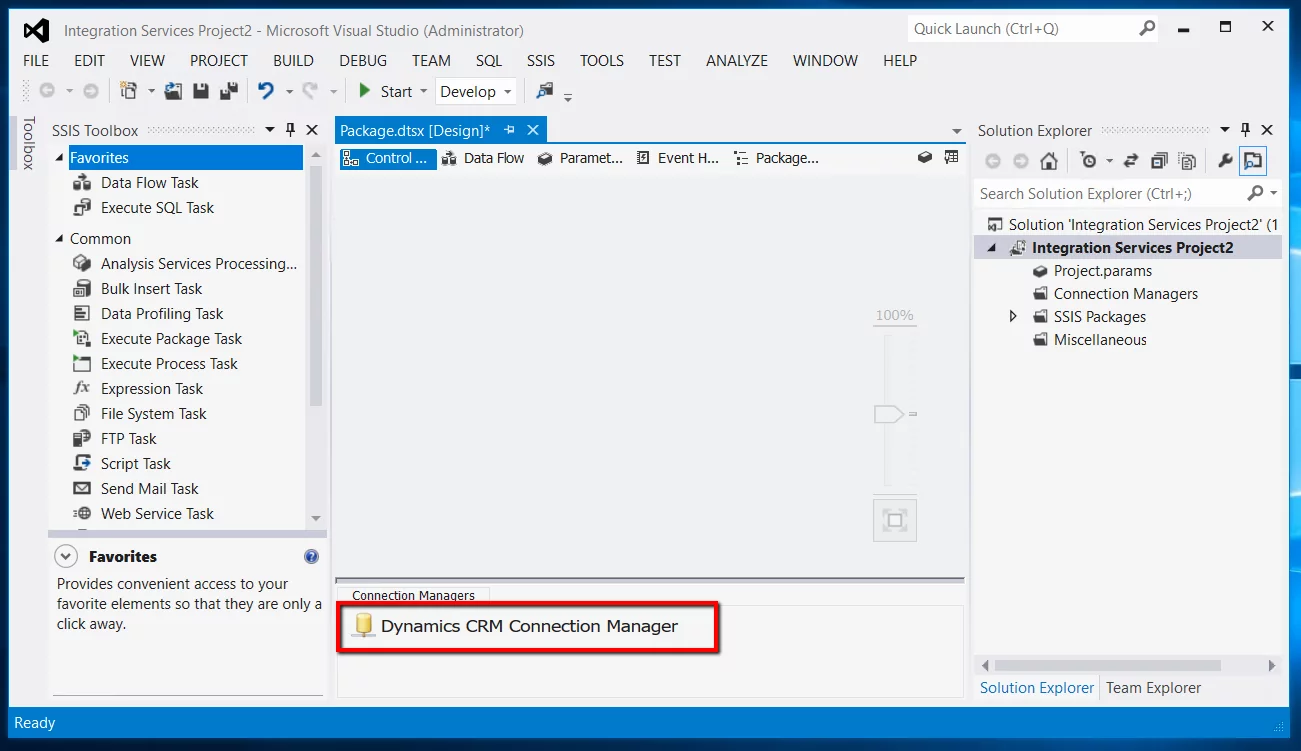
After you hit “OK”, the project will be created and you will see the screen shown in the next image.
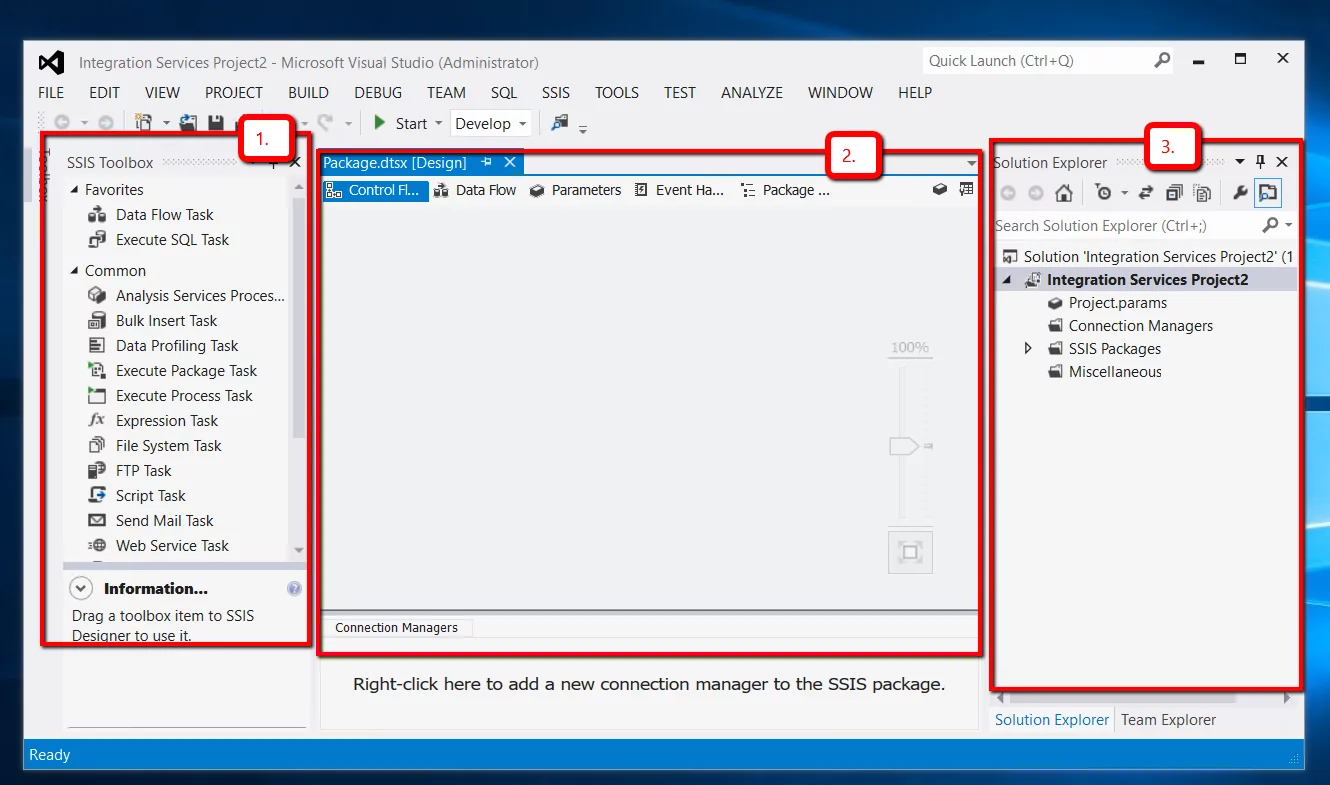
As an introduction, I will walk through the three different sections that make up the above-shown layout.
- This is the SSIS Toolbox. The SSIS Toolbox houses all the different tasks and actions represented through Visual elements. You will combine these different actions to create your integration.
- This is the portion that will show you the integration actions of the SSIS package that we will be developing. This will tell the story of what the package is trying to accomplish through different actions.
- This portion is called the solution explorer which basically shows the project structure similar to the windows file explorer.
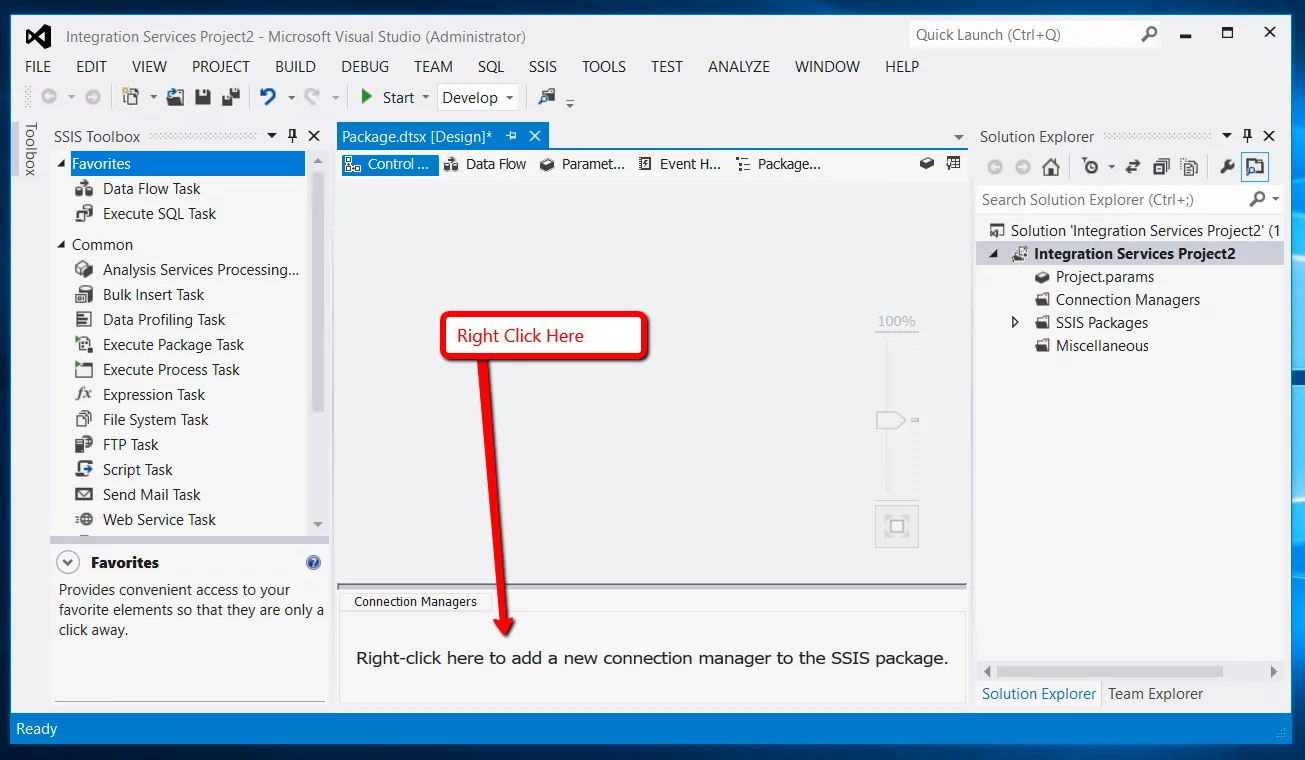
Next, we want to create a CRM connection that we want our project to have. Please follow the instructions on the image below to create your first SSIS integration data flow task.
Next, we want to click on this Data Flow Task element displayed.
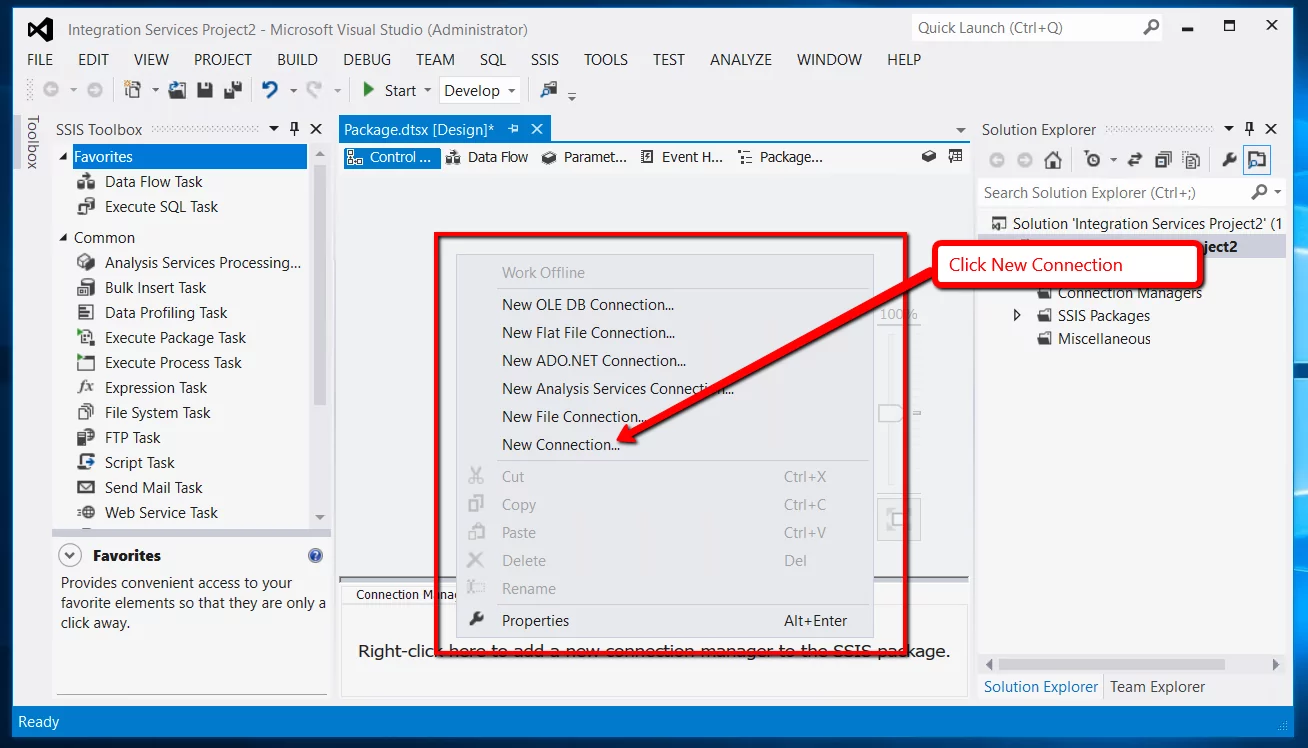
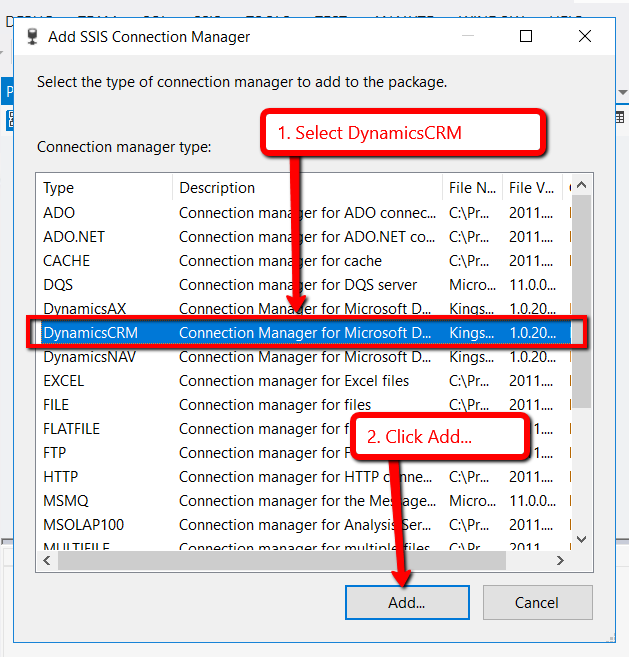
Now you should see a window pop up called ‘Add SSIS Connection Manager’.
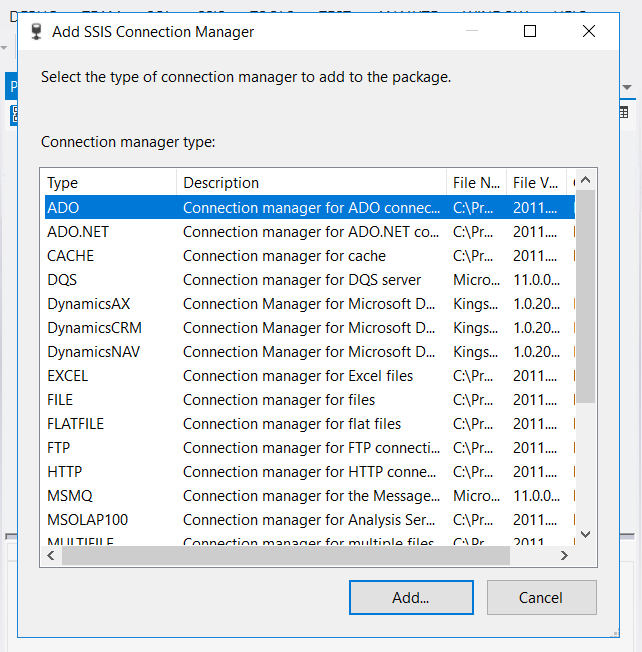
Find and Select ‘DynamicsCRM’ in the list and click the ‘Add…’ button in the lower left hand of the window.
You should see the following window now:
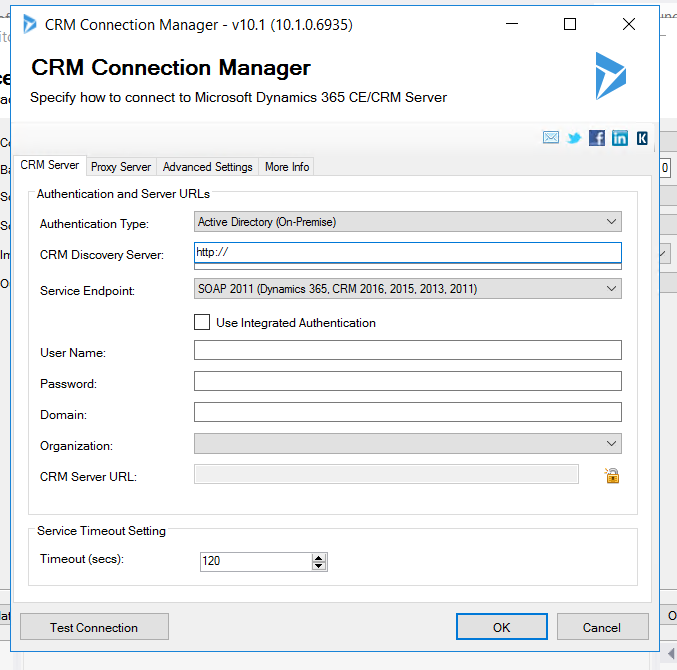
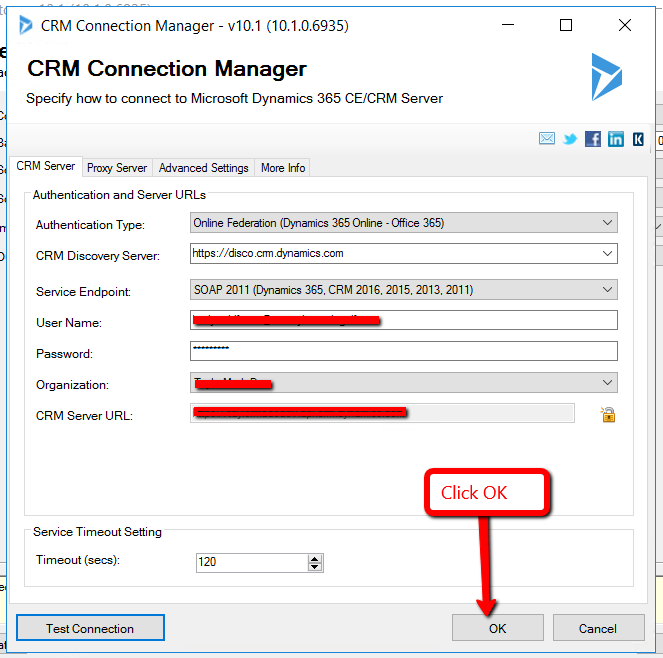
This is where you will establish a connection to your instance of CRM. Please fill in the related information in relation to your specific CRM Instance. Please follow the steps below to fill out all the information to be able to connect.
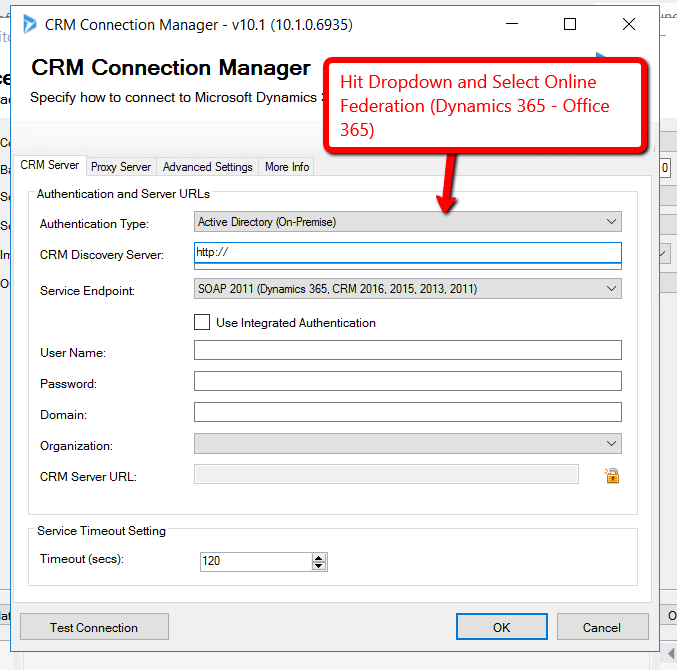
Find and select the Dropdown called ‘Authentication Type’. This is where you designate your CRM Instance; On-Prem versus Cloud Based.
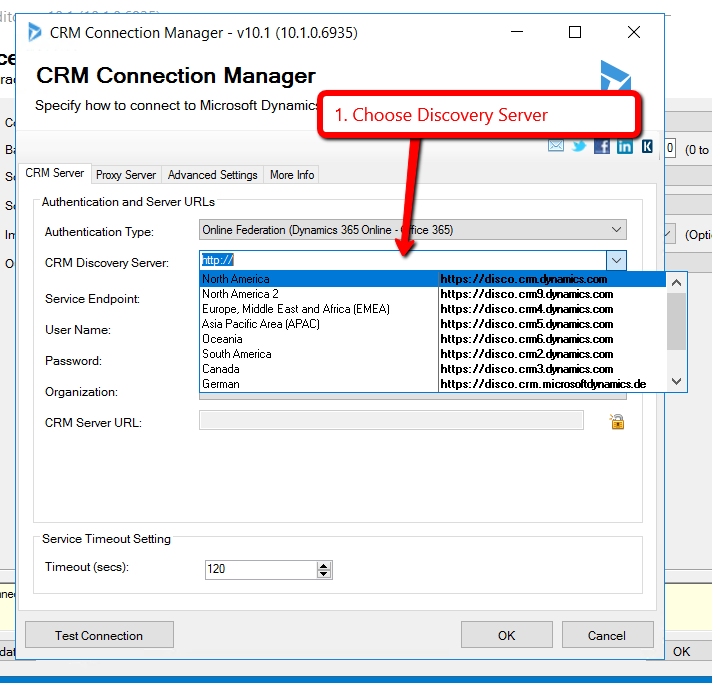
Find and select the Dropdown called ‘CRM Discovery Server’ and select the region where your CRM is located.
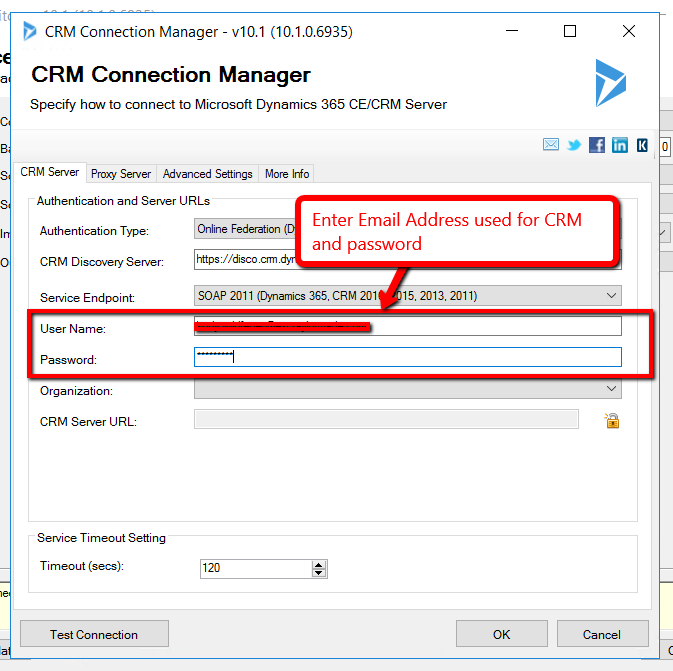
Next, enter your credentials to connect to your CRM instance.
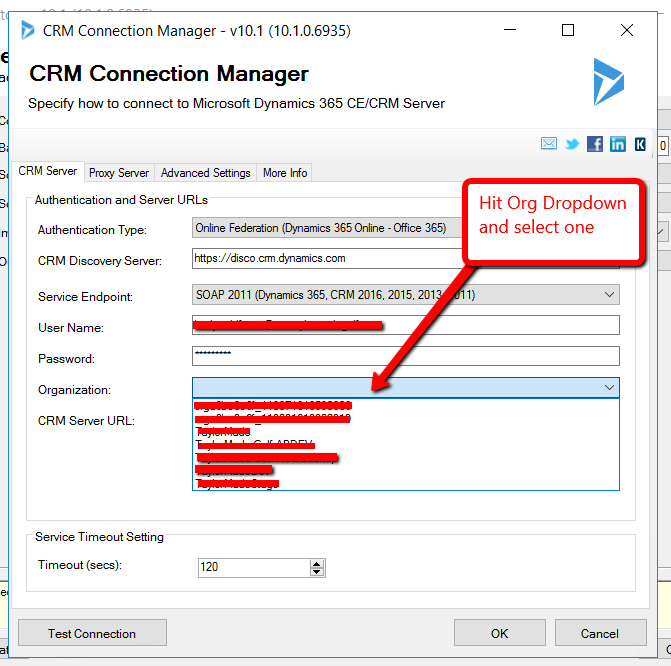
Next, hit the Dropdown labeled ‘Organization’. This will allow you to select your specific instance that you would like your SSIS integration project to interact with. For now, to be on a safe side, I would select a sandbox instance. You can always change to production once your code is tested and verified.
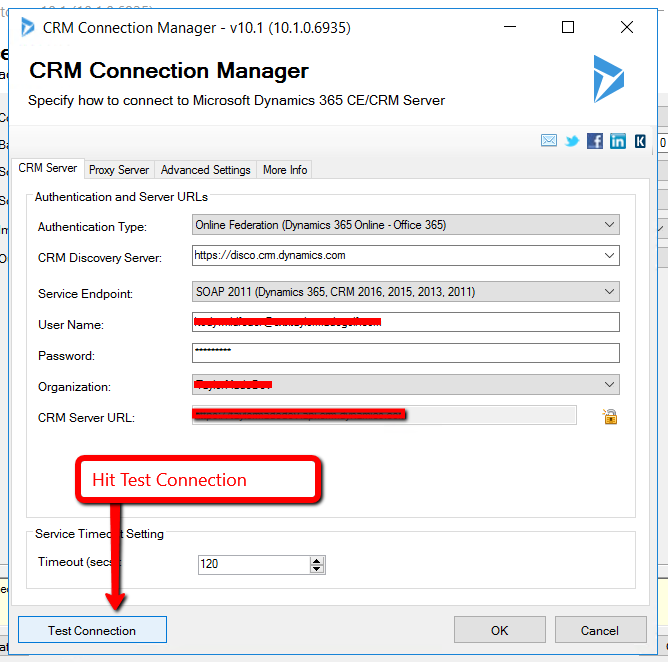
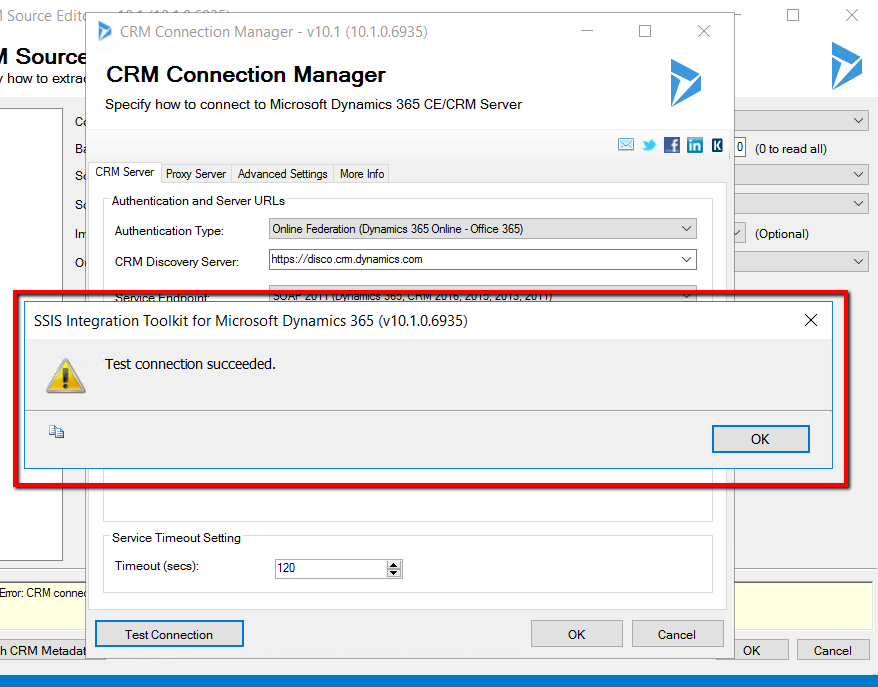
Once all of this is filled in to test out the connection, hit ‘Test Connection’ on the bottom left hand of the window.
If you have successfully put in the correct information you should see a dialog box like the one shown below saying that you are successfully connected.
Now Hit ‘OK’ on the bottom left of the CRM Connection Manager window.
You should now see that your connection to CRM has been established and saved into the project. This will be used by all of the projects CRM components.
You are now able to connect to your specific instance of Dynamics and you are ready to move forward with your Dynamics CRM SSIS data integration project.
On the next step to this guide, I will go in depth on how to retrieve and update data using Kingswaysoft. If you have any question or queries, do not hesitate to reach out to us!
Stay tuned!

how to connect using OAuth authentication type?