Document Management implementation using Content Types in SharePoint – Part 1

alphabold
What is Document Management System?
Document management in SharePoint is used not only to create document libraries and folder structures but to also tag and categorize documents for improved accessibility. This provides users the ability to search and find documents more efficiently using tags. In this series of blogs, we are going to learn how to implement a metadata-based document management system.
Part 1: Creating Metadata Columns and Content Types
What is Metadata: Metadata is just additional information about an item, e.g. searching for an item based on size, color or other attributes.
Below are the features and functionalities which we will use to implement document management system:
- SharePoint Metadata (to tag documents)
- SharePoint Content Types (to categories documents)
- Metadata Navigation (to find documents)
Lets’ review with an example.
We will determine various Human Resource documents in step 1.
Step 1: Determine Type of Documents
- Offer Letter
- Resignation Letter
- Termination Letter
- Notice Period Policy
- Insurance Policy
- Medical Policy
- Current Employee Record
- Alumni Employee Record
Step 2: Determine Categories of Documents
- Templates
- Policies
- Employee Record
Step 3: Define Metadata for Each Content Type
1. Template:
- Offer Letter
- Resignation Letter
- Termination Letter
2. Policy:
- Notice Period Policy
- Insurance Policy
- Medical Policy
3. Employee Record:
- Current Employee Record
- Alumni Employee Record
Step 4: Create Metadata Columns
In this step, we will create metadata columns and types of the column e.g. choice/drop-down, text field, date, number etc.
How to Create Metadata Column in SharePoint?
We will create site level columns, so we could reuse these columns in other sites and libraries as well.
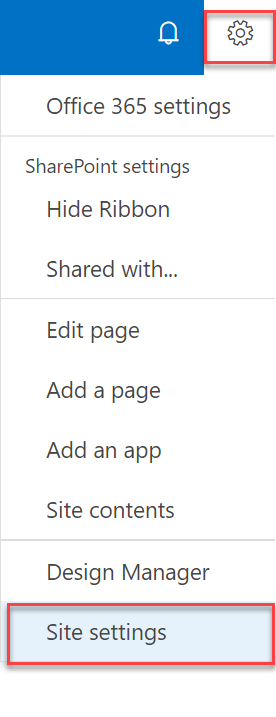
- To create site columns, go to site gear icon
- Go to site settings
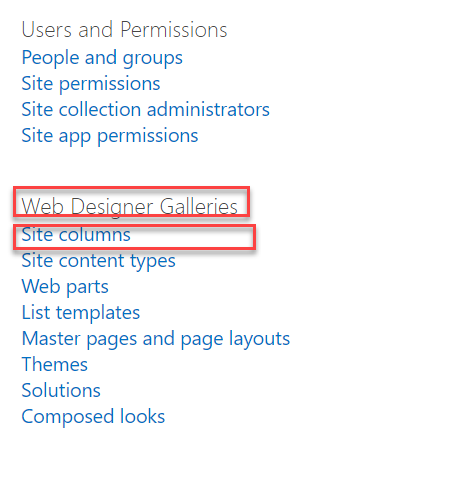
- Under Web designer galleries, go to site columns.
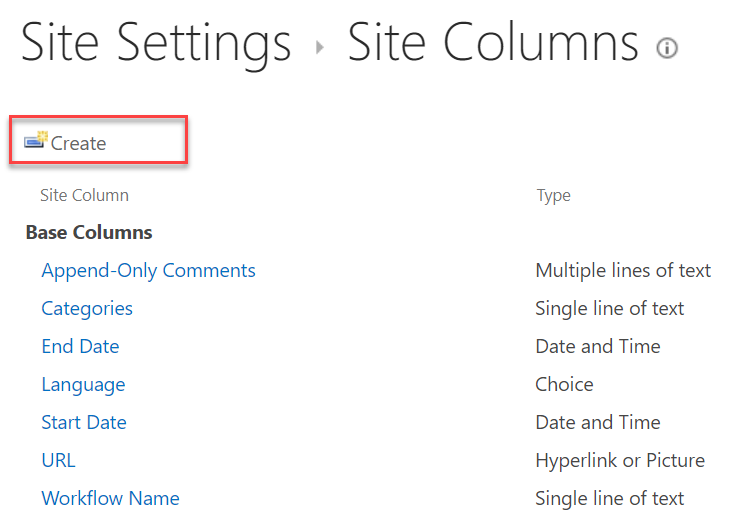
- Click on create
- Enter column Name, from step 3 according to information we gathered, choose radio button under “The type of information in this column is:” that you want to assign to this column.
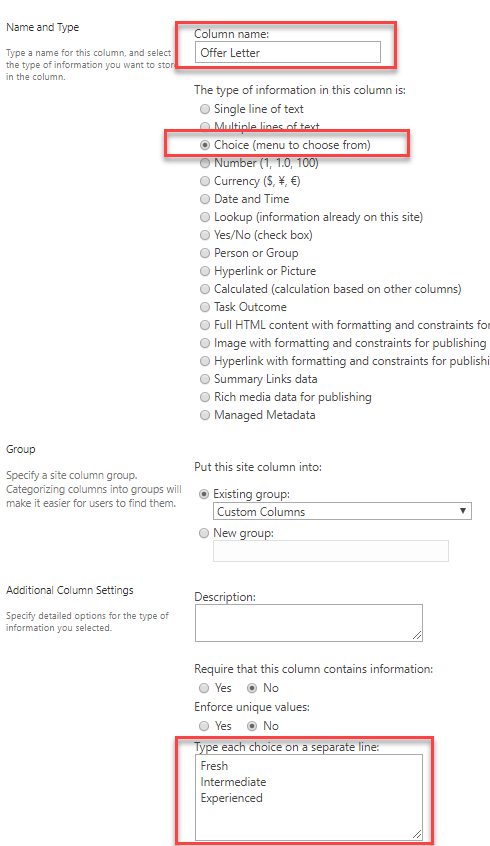
- Click OK.
- Repeat this step for all columns we have identified.
Step 5: Create Content Types (categories for documents) and Associate Custom Metadata Columns
How to Create Content Types?
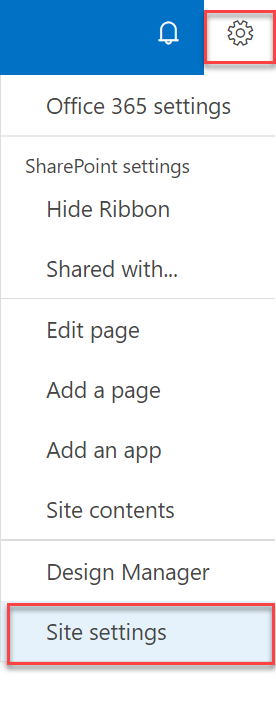
- To create content types, go to site gear icon
- Go to site settings
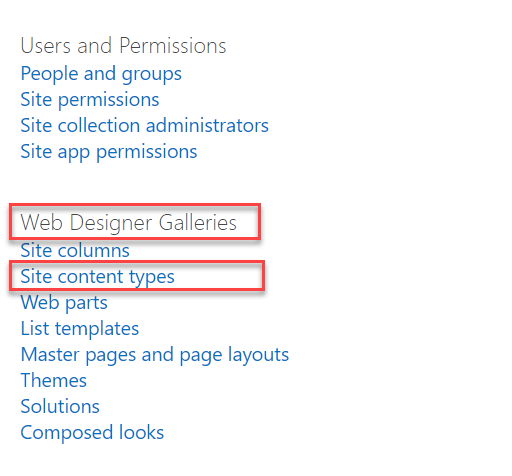
- Under Web designer galleries, go to site content types.
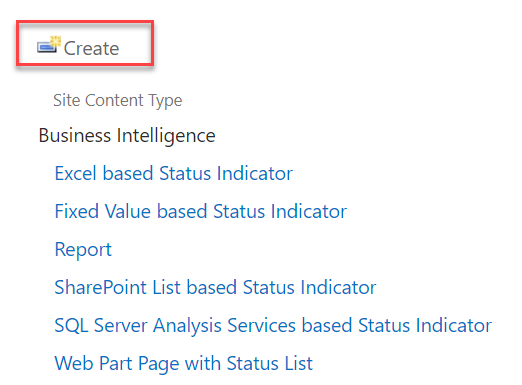
- Click on Create
2nd Part Read Here: Document Management implementation using Content Types in SharePoint Part 2
- Enter content type name which we have identified in step 2
- Locate Parent content type in middle of screen, select “Document Content types” and “Documents” from Parent Content Type drop-down.Make new Group for this content and use this group for all other content types in this post by selecting new Group radio button and enter name for your content type group.
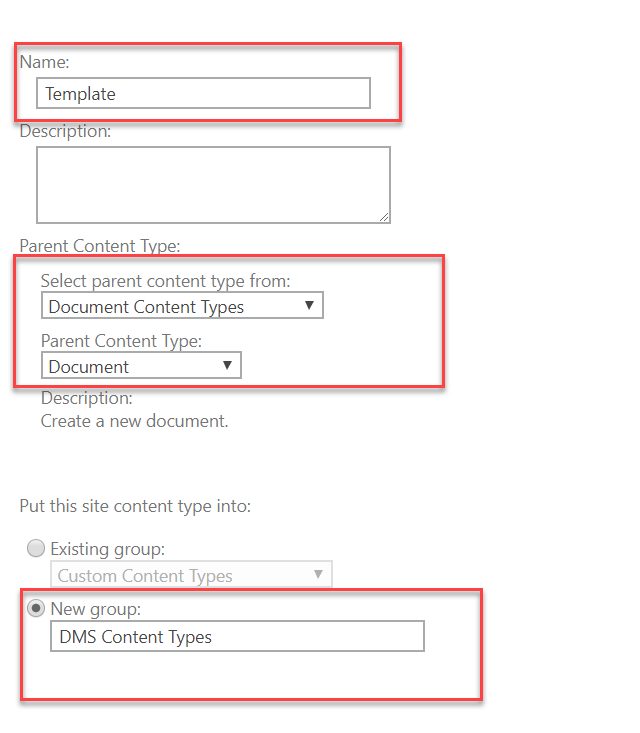
- Repeat this step for all content types we have identified in step 2.
Conclusion
In the next Part we will associate created metadata columns with content types and associate content types with our Document Library.
If you have any question or queries, do not hesitate to reach out to us!
Unify your Data Landscape, Gain Actionable Insights, and Optimize your Marketing Strategy!
Request a free demo of Salesforce Marketing Cloud Intelligence and experience the power of data-driven marketing! Request a free demo to get started.
Request a DemoExplore Recent Blog Posts


