Introduction
This blog will help you set up your Dockerized WordPress website with full automation of the deployment process on Amazon Web Services (AWS). The idea is to depict the difference between the process of buying the website from providers like GoDaddy and of creating your own environment for hosting a WordPress website. The WordPress files or directories will be stored in the AWS EFS filesystem, and its databases will be saved in AWS RDS.
Here are the Following Essentials you Need for AWS:
- VPC
- EC2 Instance
- Security Groups
- RDS – Databases
- EFS – File System
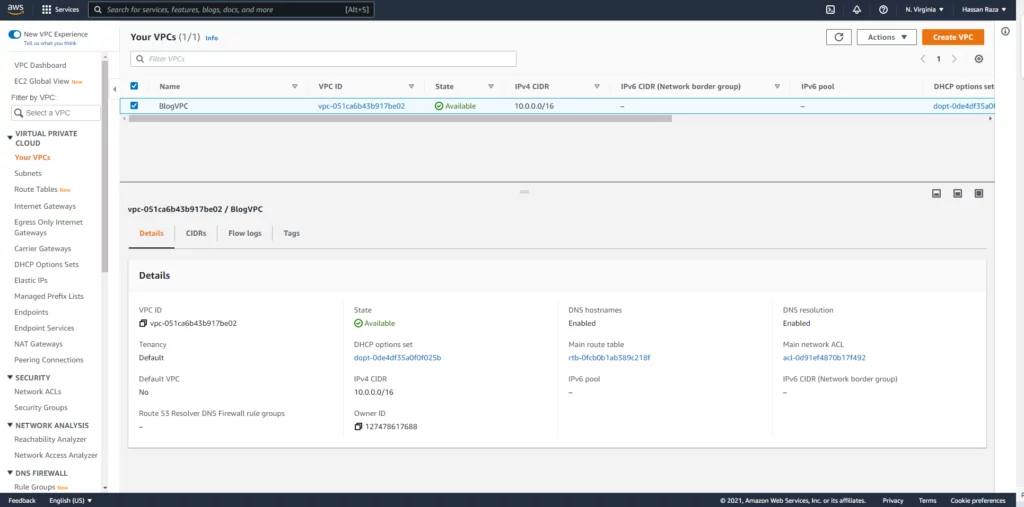
Let’s start with the VPC (Virtual Private Cloud).
VPC is just like a wall, which protects your resources from anonymous traffic. So, VPC is created with the subnets, the internet gateway, and the routing tables.
EC2 Instance
The second thing required for AWS is the EC2 Instance.
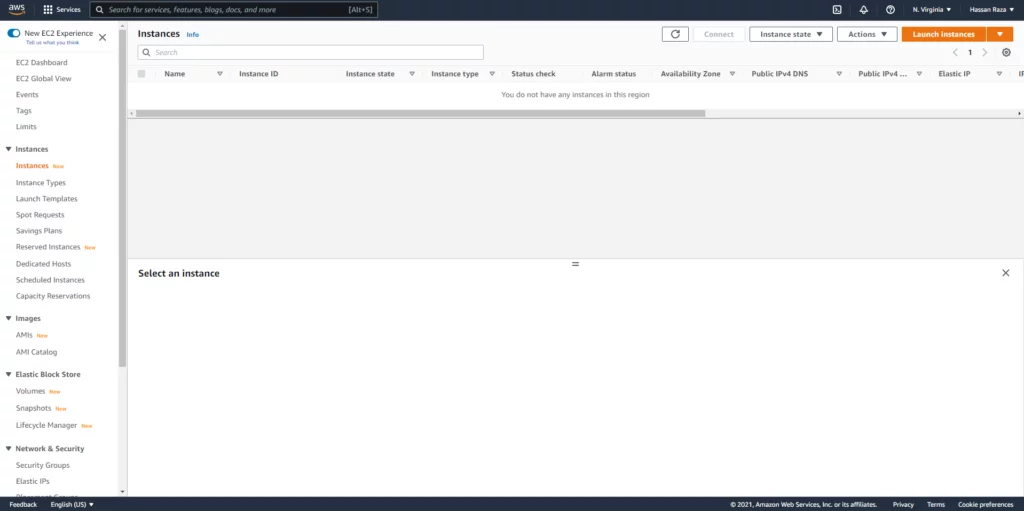
By following the steps given below, you can create EC2 instance. However, since we do not have the EC2 instance yet, we will need to click the launch instance button to get started.
After that, we will select Amazon Linux.
Note: You can choose any Linux image you want to use in your deployment.
In instance type, t2 micro is available for free tier eligible, select and proceed to the configuration parameters.
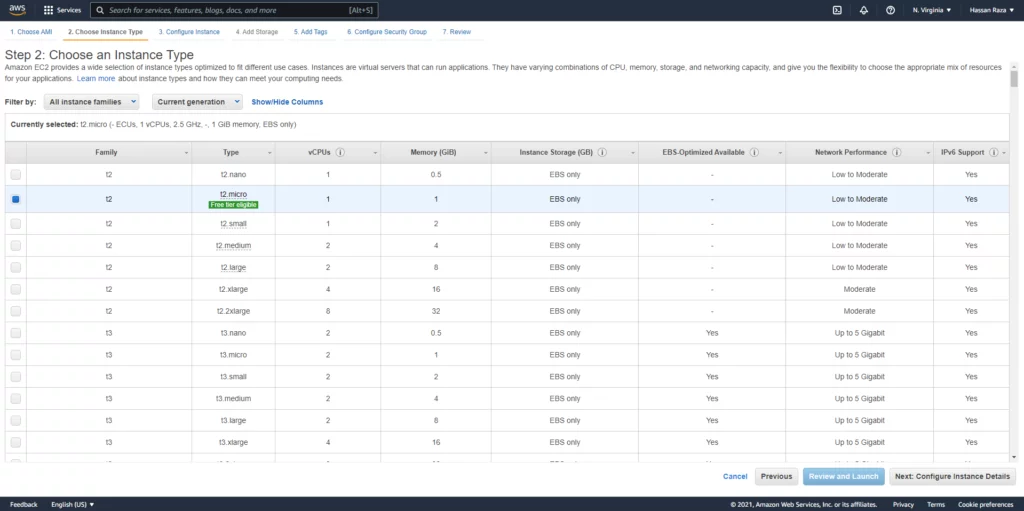
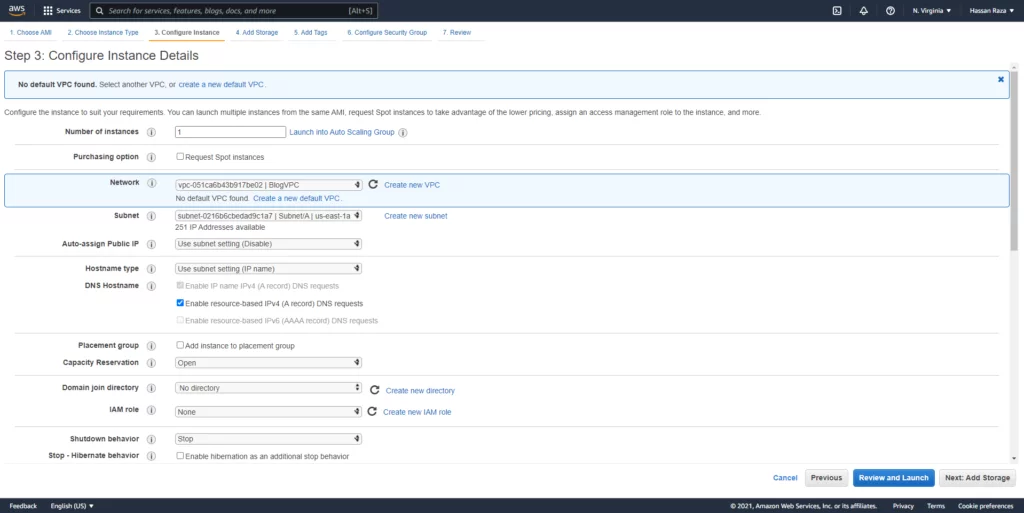
This page will show you some options to configure your instance.
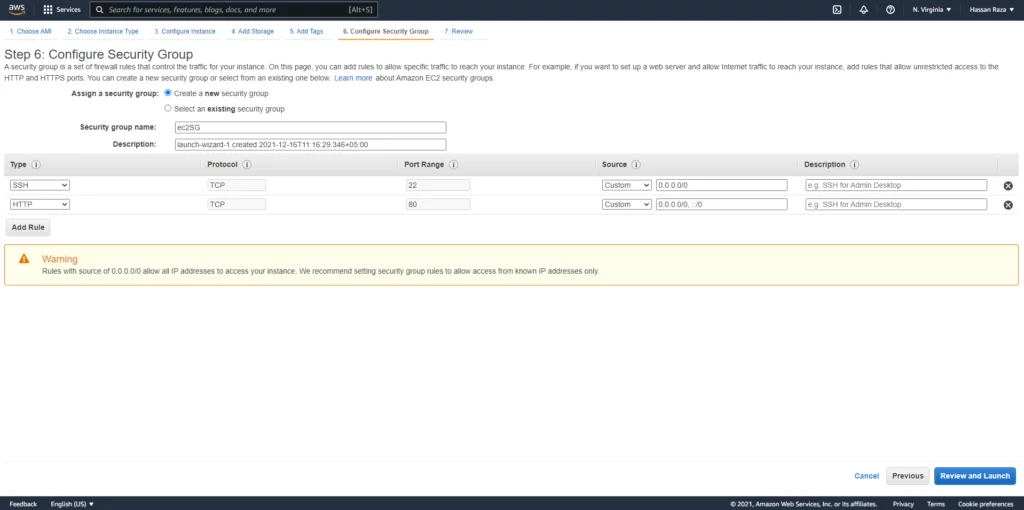
Configure a security group – A security group is like your instance’s firewall. Here you need to open the ports you will use, for example if you want to have a web server you need to open port 80.let us in our case, the WordPress website will run on the instance IP address. Due to this, we need to allow port 80 and for Secure Shell (SSH) port 22 to remain open.
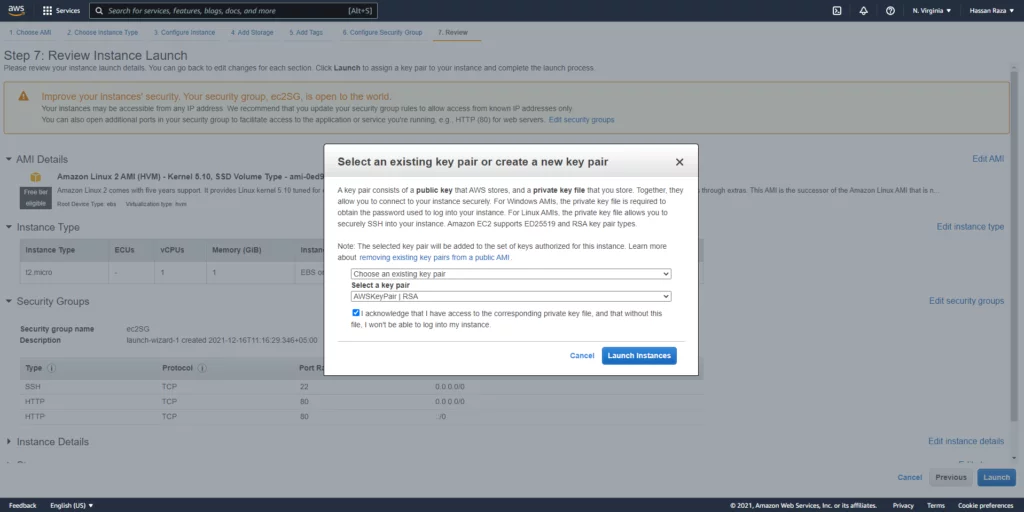
To access your instance, you will need a key. Name your key pair and download it to ensure that it is safely stored.
AWS does not store the keys, so if a key pair is lost, you will lose access to your instance.
Read More about WordPress Deployment: Deployment Of Serverless Containerized WordPress Through AWS Fargate
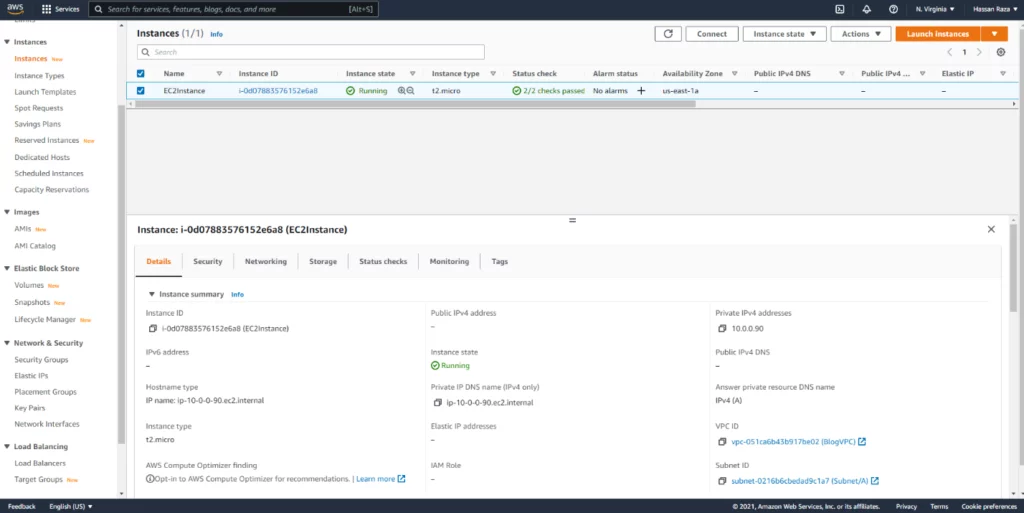
Security Groups
We have created security groups for our databases (RDS) and for the file system (EFS).
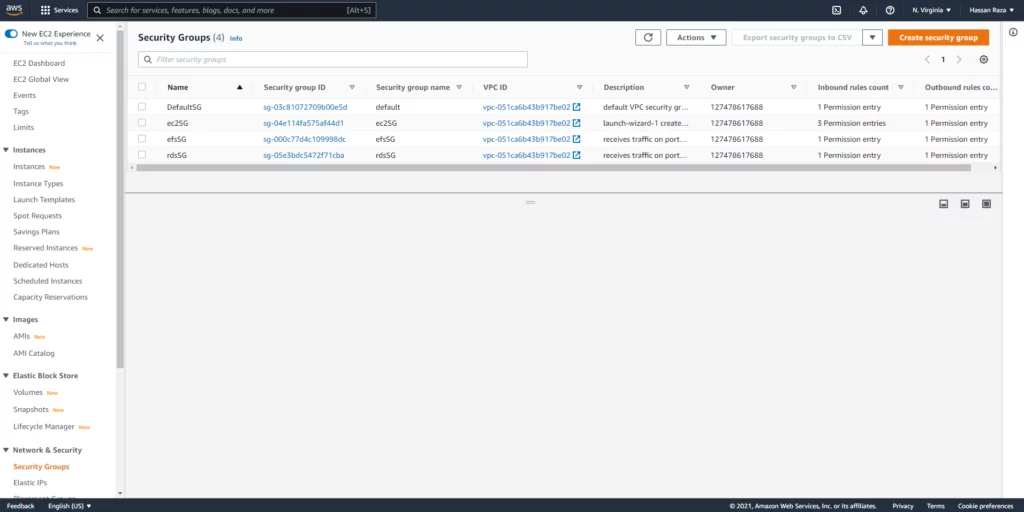
AWS RDS – Databases
To create the database, we will select MySQL as the engine type. Please make sure to use a strong username and password for your Provisioning WordPress website. In the connectivity settings, select the same VPC that was used previously. Select the rdsSG security group to allow inbound traffic on port 3306 and then create the databases. The database will take some time to create.
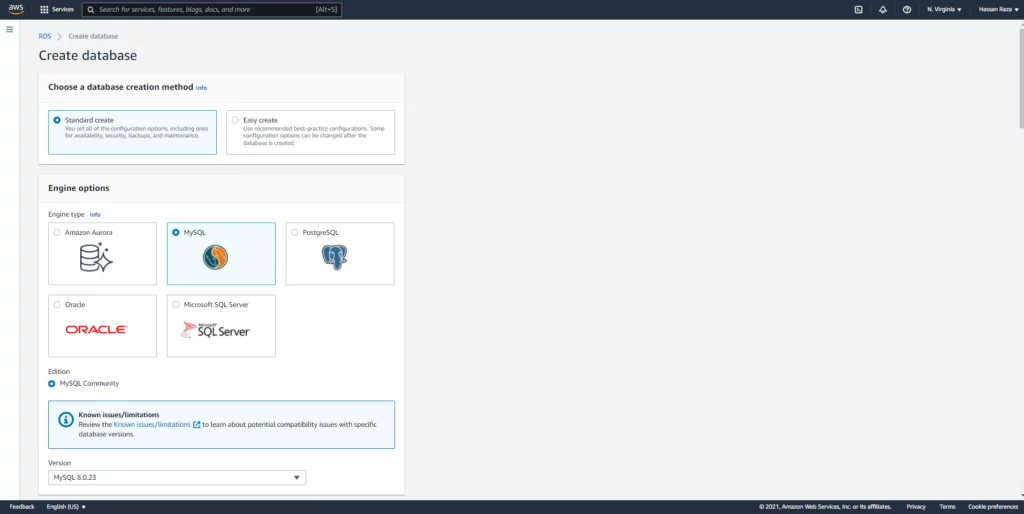
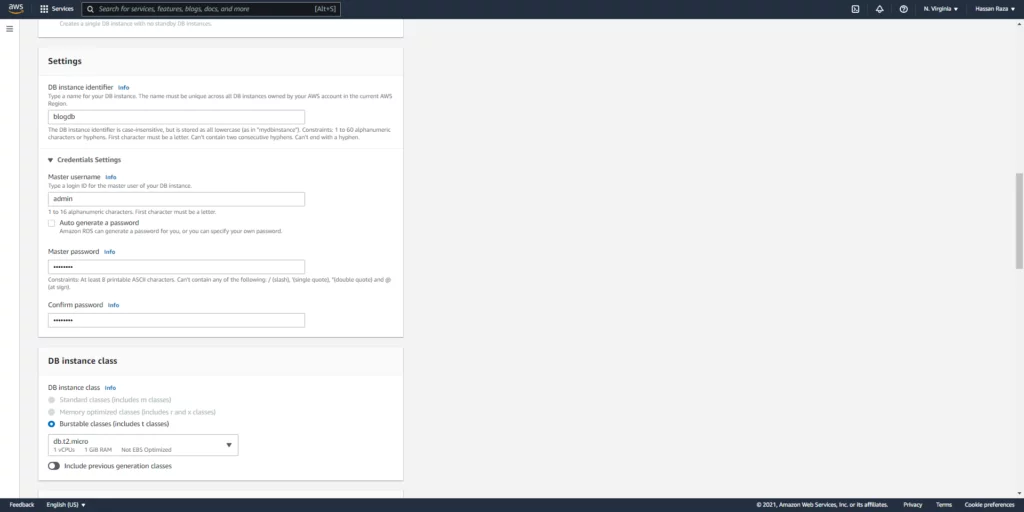
Please note that public access must be enabled for the databases.
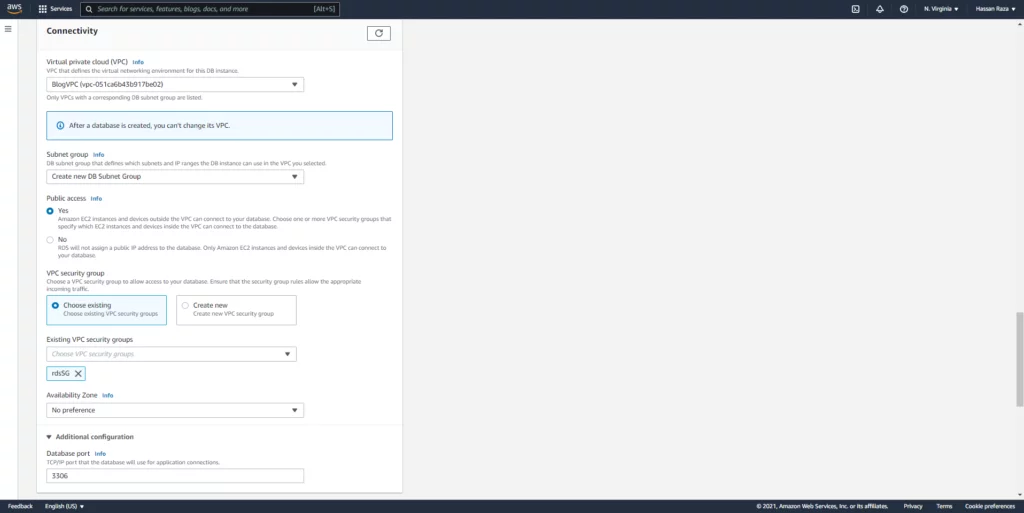
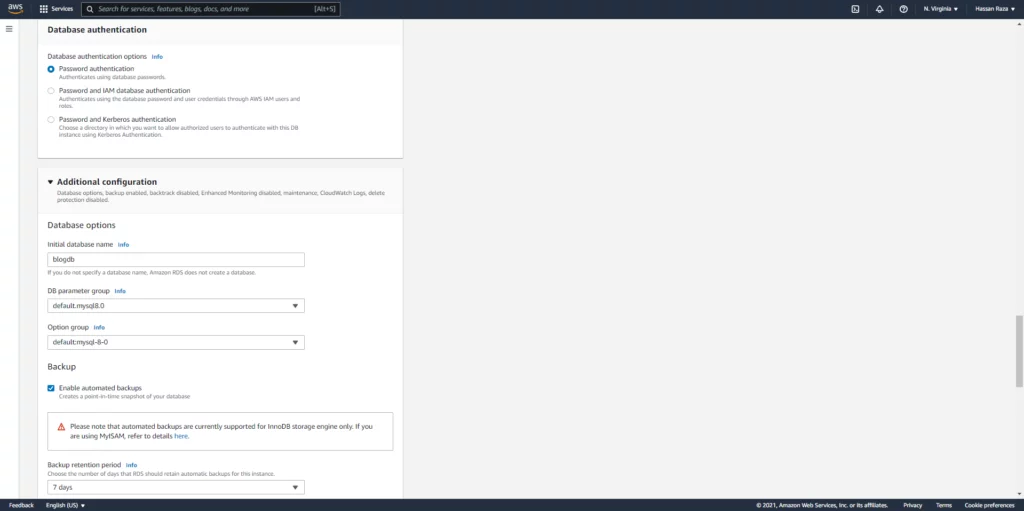
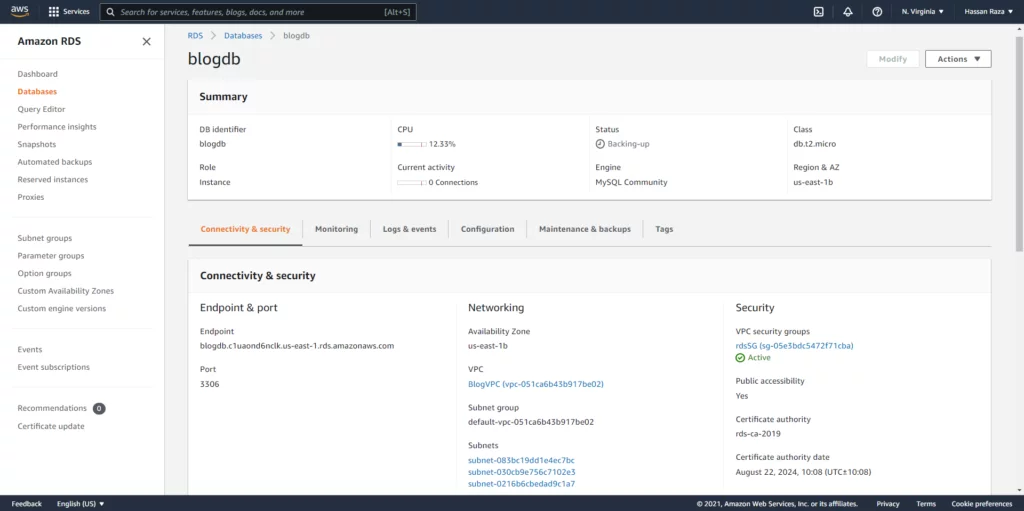
At this point, the database will be ready. We have finished creating our RDS. We will use the database endpoint as the database host, its username, password, and database name in WordPress config file.
Note: this instance does not have an IP, but the ENDPOINT performs the same function for the connection.
AWS EFS – File System
Amazon EFS creation and configuration is required to share the WordPress configuration files without the need for continuous syncs.
In this step, we will create the file system by naming and selecting the VPC. We will then add the efsSG security group.
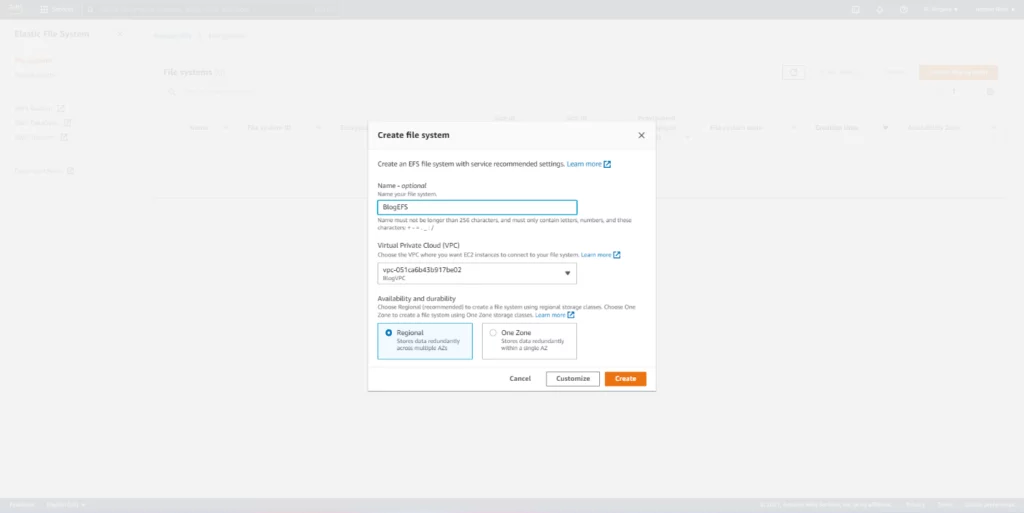
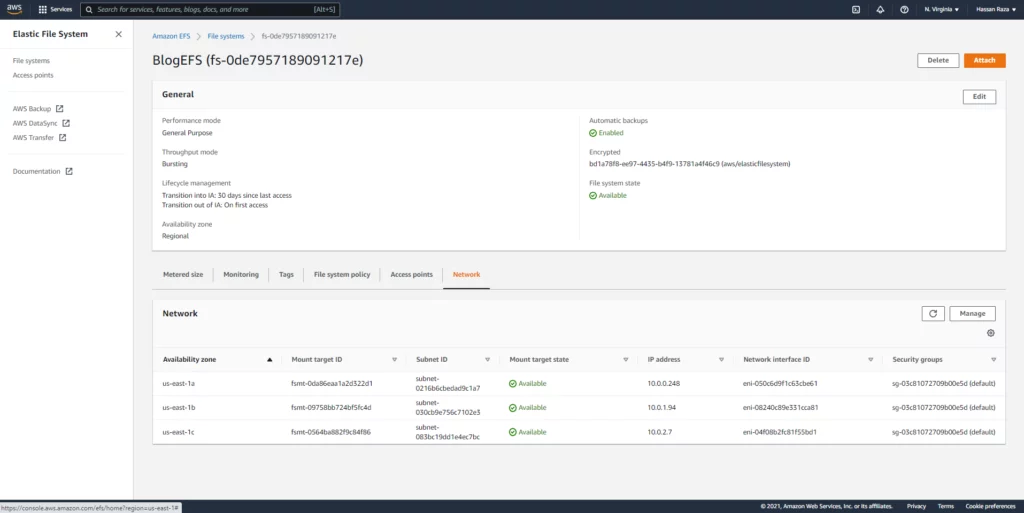
After this, we will click on the network, then on manage to select the default security group. We will select the efsSG security group to allow inbound traffic on port 2049.
By default, the NFS uses port 2049.
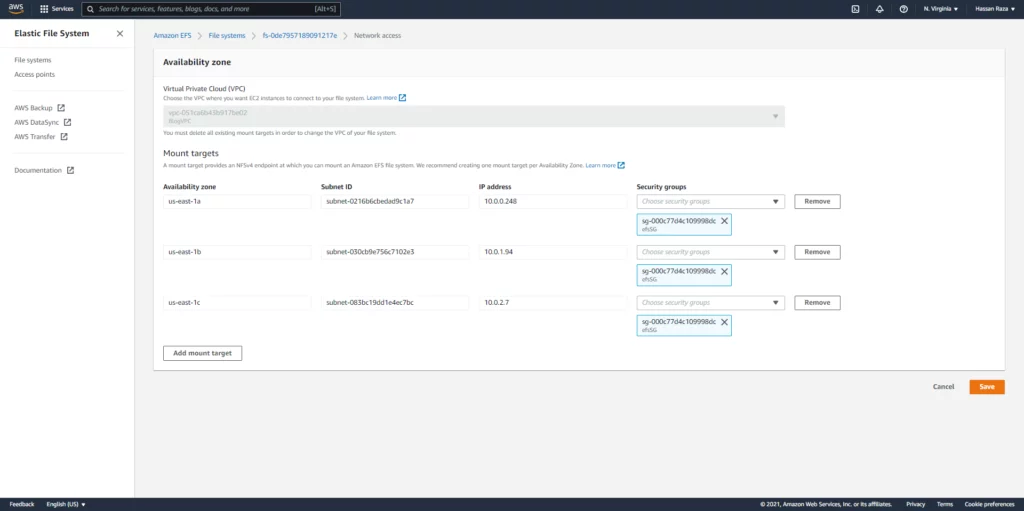
After this is done, it is time to go to the instance and log in for further configuration.
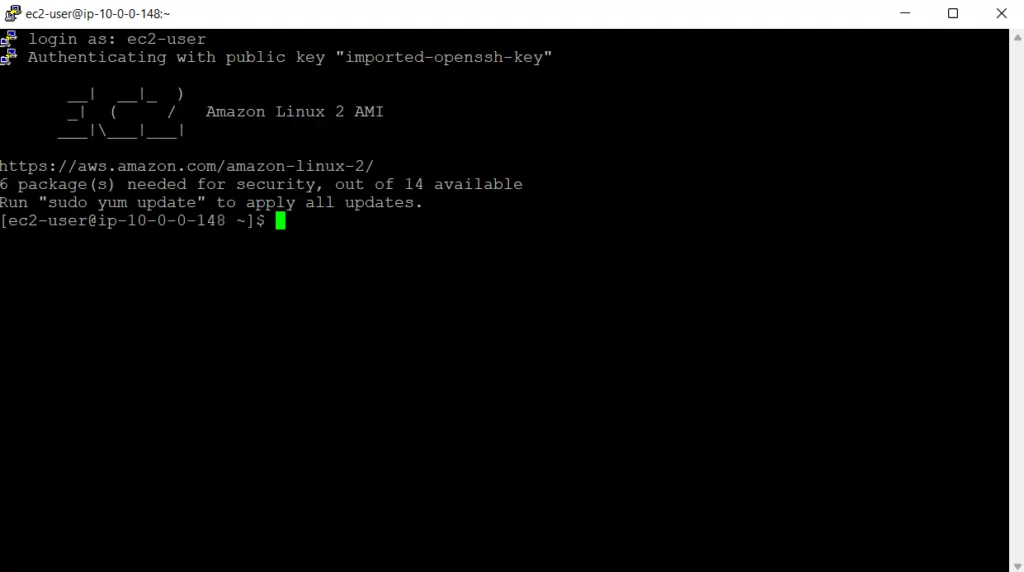
To continue with the configurations, we will switch to the root user.
First, we will install Docker and Docker compose via the related commands on the official Docker webpage.
Once Docker is successfully installed, we will search for containers by running the command “docker ps”,. (we have no running containers at the moment so none are shown in the image below).

Here the Docker compose is installed successfully.
Optimize Your WordPress Setup with AlphaBOLD!
Looking to streamline your WordPress deployment on AWS? Leverage AlphaBOLD's development services for a Dockerized setup with AWS RDS and AWS EFS. Enhance your website's performance
Request a ConsultationThe next step for installing WordPress is to mount our EFS file system to store WordPress directories.
Steps To Follow
Install nfs-utils in our instance, by following the command below.
Create the EFS folder in the root directory and assign the + rwx permission to the folder, we will mount the filesystem in this EFS folder.
Now, the Amazon portal, where we created the EFS, has the instructions for assembling EFS in the instance, and we can mount the file system from the public DNS of EFS

Copy and paste into the instance, like this:

For verification, run the command “df h” and here you can see the results, our EFS file system was mounted in our instance. Now in the EFS folder we can view the WordPress website files or directories which will be stored later.

Return to the Docker compose, let us create a docker-compose.yml file and write the configurations for WordPress website to be built.
Your docker-compose.yml file looks like:
- Image: define the WordPress image
- Volume: we map our WordPress files and directories in the efs filesystem folder
- Port: website will run on port 80, you can customize your port as (8000:80)
- Restart mode: If the container stops working for some reason, configure it to restart. If the server restarts, the container restarts automatically.
- Environment: Database credentials here, we will enter our previously created AWS RDS credentials.
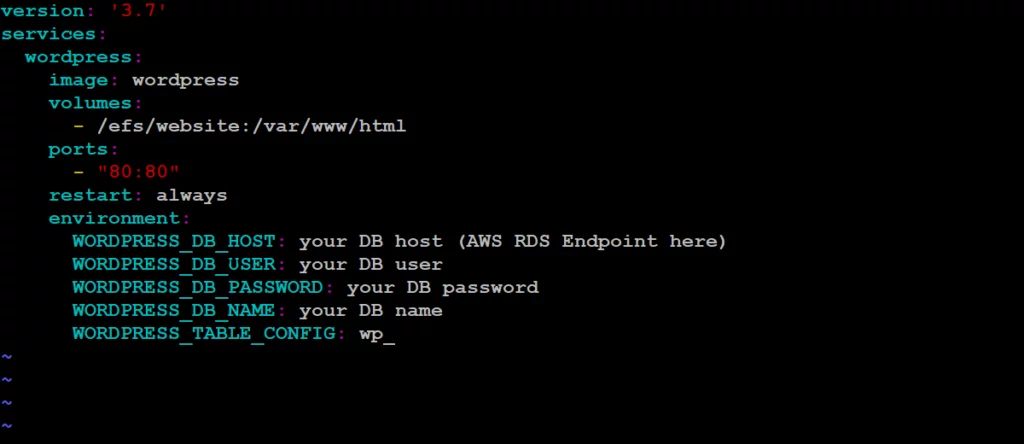
The YAML file is ready to initialize the defined Docker container. Run the following command to define this container:
Now your WordPress is installed, and the WordPress container is up and running. Let’s check the EFS filesystem, go to the EFS folder and here is the “website” directory created.
Go to the website directory.
Here you can see the installed WordPress and its files and directories stored or mounted in our AWS EFS file system.
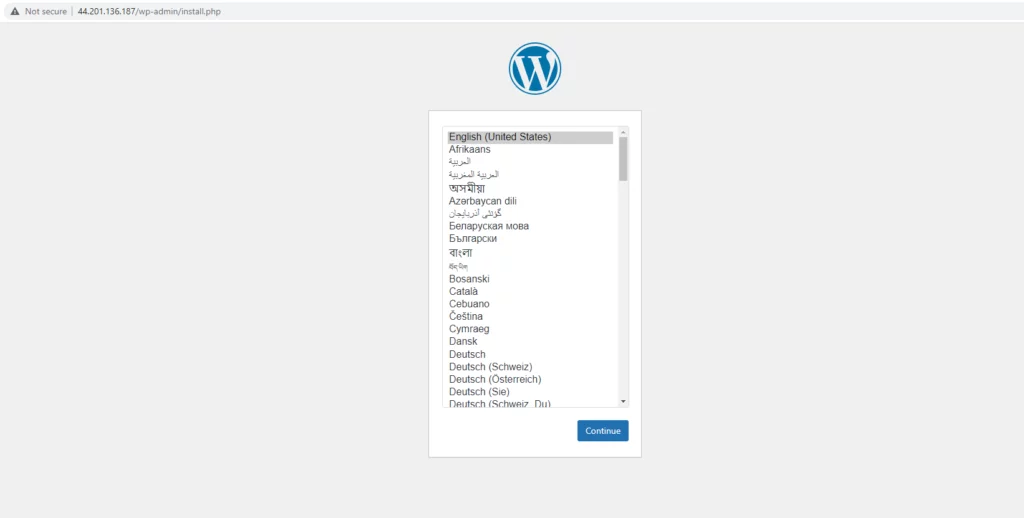
To confirm if the WordPress site is working, open the IP address of our instance in the browser. This will launch the normal WordPress wizard.
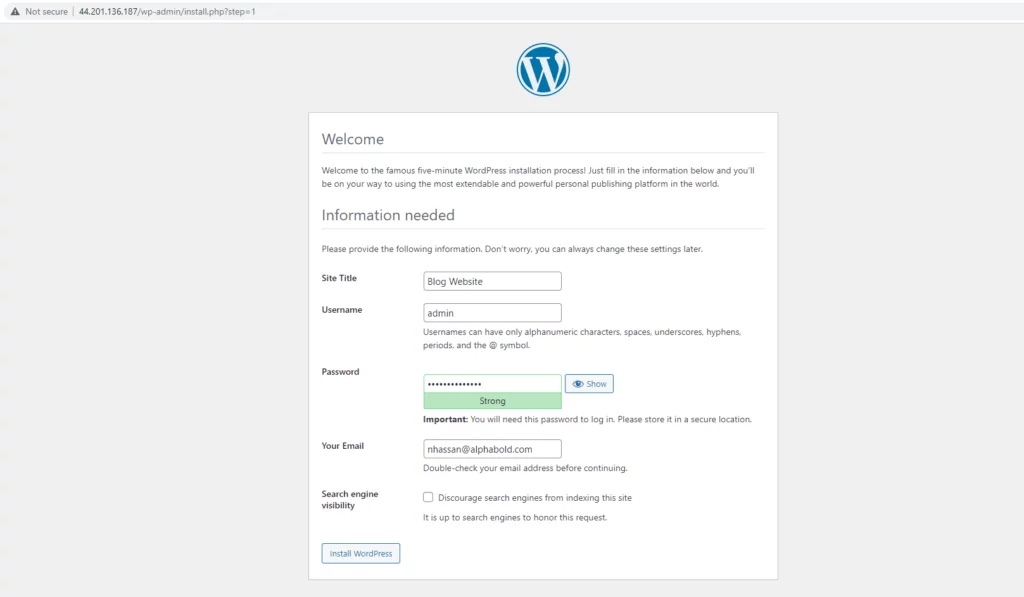
Continue to the next step, provide the WordPress admin information to install WordPress.
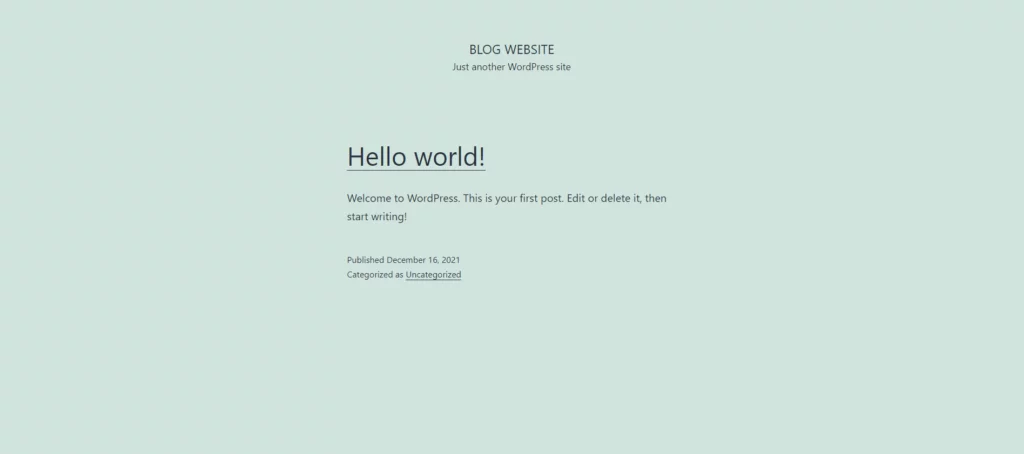
Our Dockerized WordPress website is installed.
Revolutionize Your WordPress Deployment!
Ready to deploy a Dockerized WordPress with AWS RDS and AWS EFS? Transform your hosting strategy with AlphaBOLD's custom development services. Contact us for seamless deployment and optimization.
Request a ConsultationConclusion
This is how simple it is to have a Dockerized WordPress site. The interesting thing is that our WordPress website databases and files are in the cloud. AWS offers scalability, elasticity, and self-service on demand. In this blog we displayed how to use the AWS EFS and RDS services to host our WordPress website. You can also use this method to carry out WordPress testing before releasing it to the public.
Explore Recent Blog Posts


