Introduction
NuGet is one of the most powerful tools to package and ship your code to different teams and resources across multiple organizations. These packages can be downloaded through Visual Studio through the package manager console or “Manage NuGet Packages.” There are several NuGet packages available on NuGet.org. It is an open-source platform with access to thousands of packaged libraries that people can use on the Internet.
You can create and install a NuGet package from your local computer, GitHub, or NuGet. If your package is utilized internally by your development team, you can upload this package to your internal dev ops repository. If you want to contribute to this as an open-source library, you can upload it to NuGet to help the development community.
For example, a Power Apps PCF controls library is available on NuGet for Power Apps developers to utilize this package for PCF development. This blog article will walk you through creating your first NuGet package and show you how to deploy it using Visual Studio.
Read more: Creating Custom Controls with PCF (Step-By-Step Guide)
Now, let us go ahead and see how we can create and publish a NuGet package.
Create a NuGet Package
- Create a new visual project, add a class file
- Build the project. This will generate a dll file in the bin folder
- Download the latest NuGet.exe file from nuget.org. The latest version is recommended
- Put this exe file in the project root folder that we built in step#2
- For example, if your project name is ConsoleApplicaton1 and your local folder is C:/user/your user/ ApplicationInsightsLogKeyVault-> Place the NuGet.exe file in this folder
- Open command prompt (Ctr+R) -> type cmd. In the command prompt, navigate to the folder where you have the NuGet.exe file. For example, cd C:/user/your user/ ApplicationInsightsLogKeyVault
- Type the following command to create a Nuget spec file nuget spec
- This will create an ApplicationInsightsLogKeyVault.nuspec file in the root folder of the project.
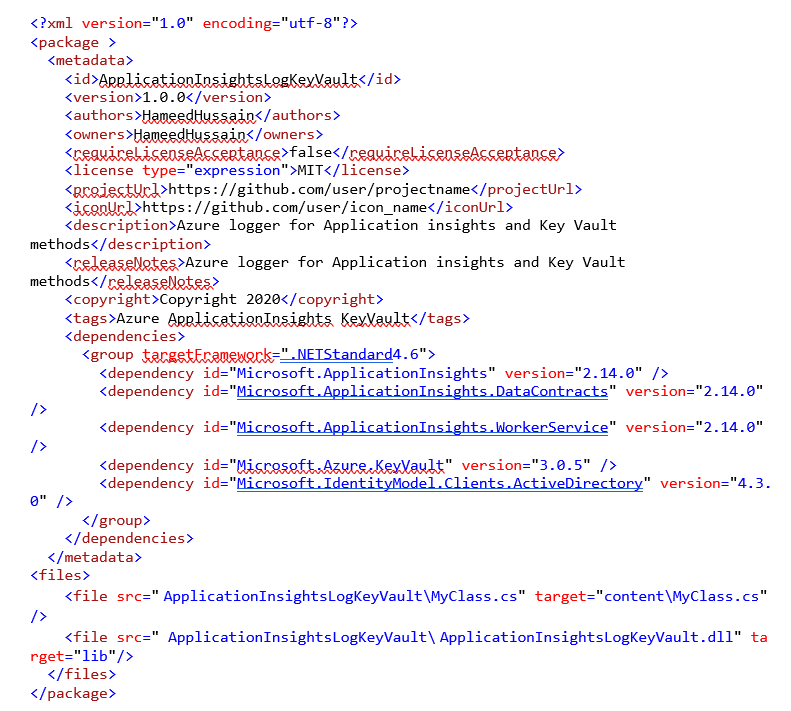
The .nuspec file contains configuration xml elements of your NuGet package. You can specify the details of your package, such as ID, Version number, Authors, Owners, Project URL, Icon URL, Description, Release Notes, etc.
A .nuspec file will look like this:

Innovate and Build with our Custom Development Services!
Let our custom development services guide you through advanced techniques and tools that will master your development process. Elevate your software projects with our expert team.
Request a ConsultationThe dependencies section is important. The dependencies tell the NuGet package to look for all the dependency packages and install them. Additionally, you can add the files to your project in the file sections. The src field indicates the file that needs to be copied, and the target path indicates the location of this file in your project folder. This contentMyClass.cs will add a file to your root folder. If you want to add this file to a specific folder, you may specify the folder name Example – contentAppMyCalss.cs. This will create a new folder, “App,” in your target project, and the file “MyClass.cs” will be added under that folder.
Similarly, for a class library file, you must specify the source as the class library and target the “lib” folder.
For example, if your dll file is in bin/Debug/ folder, your src will look like this:
<file src=”ConsoleApp1binDebugMyClass.dll” target=”lib”/>
Publish the NuGet package:
Run the following command on the command line:
NuGet pack ConsoleApp1.nuspec
This will create a ConsoleApp1.1.0.0.nupkg.
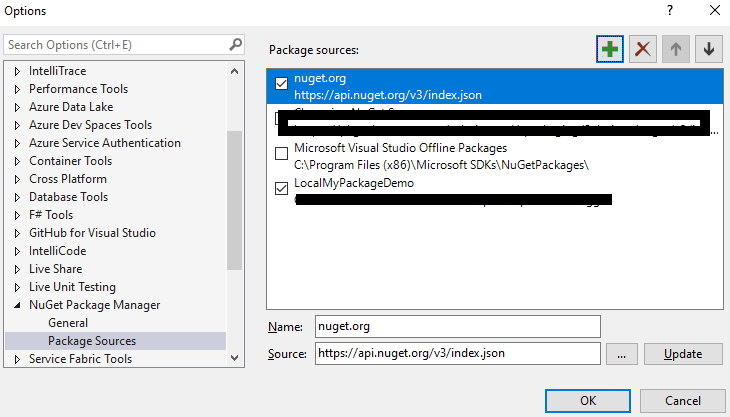
To publish this package from your local machine, go to Visual Studio target project –> Tools -> Options -> Add.

Browse to the local folder where you have the nupkg file.

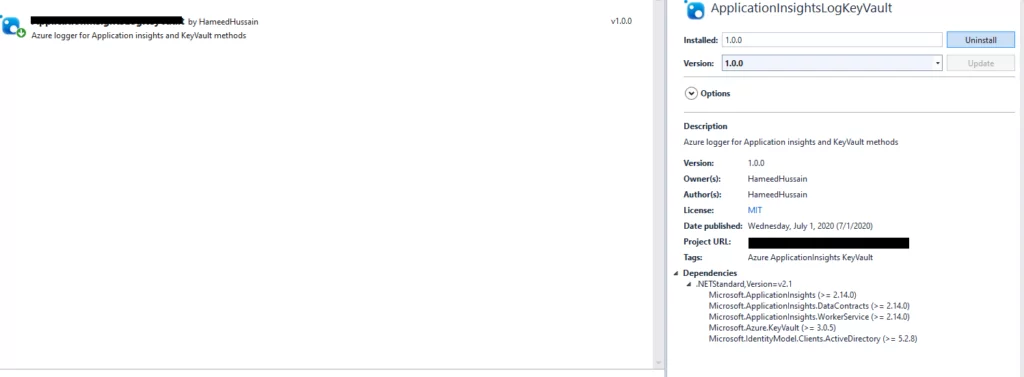
This will allow you to browse the package. Install the package from here.
Publish your NuGet package on NuGet.org:
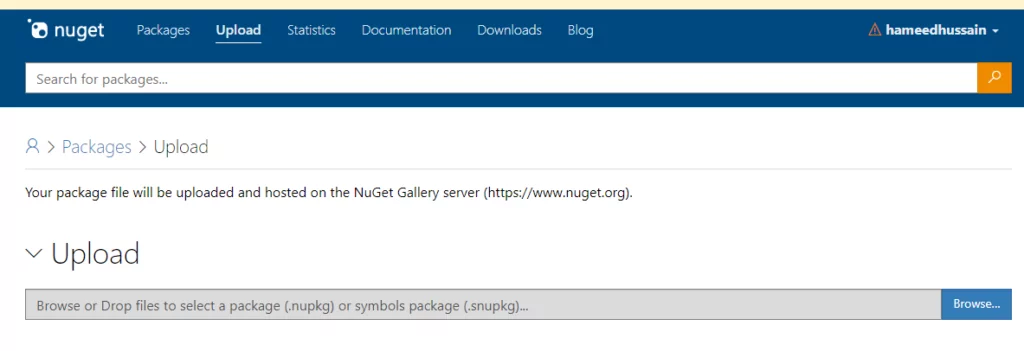
- Go to nuget.org.
- Sign in if you have an account. Register if you don’t have one already.
- Go to the upload tab.

- Upload your .nupkg file.
- Click Upload.
Your package is now published and live on NuGet.
Read more: Expanding ERP Systems with Microsoft Power Apps
I hope this blog has helped you understand how to publish a NuGet package.
Elevate your Software Solutions with our Expertise!
With AlphaBOLD, discover custom development services designed to enhance your productivity and innovation. From package management to full-scale development, we've got you covered. Start transforming your workflow today.
Request a ConsultationExplore Recent Blog Posts


