There is no denying the fact that bots can really help businesses increase sales by providing a better customer experience. Bot technology is hot and trending these days, and new tools have been emerging to ease the process of making a bot.
Microsoft has recently announced a tool called “Power Virtual Agent” that lets you build bots through an easy to use interface. With the Power Virtual Agent, you can build a chatbot for your customer support, integrate your bot with Dynamics 365 using Microsoft flow, and deploy that on your website or Dynamics 365 web portal. The best thing about this tool is that you can achieve all this without writing a single line of code.
Learn more about Dynamics 365 Services!
With Power Virtual Agents, conversational AI is also available to everyone.
Using Power Virtual Agent, you can:
- Empower teams
- Teams can easily create bot themselves
- Does not require coding or AI expertise
- Reduce costs
- Automation of common inquiries
- Reduces labor costs and the likelihood of human error
- Increase Customer satisfaction
- Customers can find the solution to their problem on their own
- Resolve issues faster
- 24/7 service available for the customer
You can read more about the Power Virtual Agent on the official documentation here:
https://docs.microsoft.com/en-us/power-virtual-agents/fundamentals-what-is-power-virtual-agents
Moving on, let’s look at how can a bot is created for Dynamics 365 and used for end-users.
In this blog post, I am going to create a Bot for D365 Products availability.
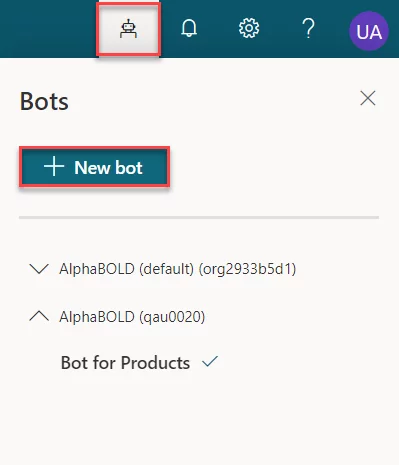
1. Go to Power Virtual Agent
Create your account on Power Virtual Agent, or sign in to your existing accounts to create a bot for Dynamics 365.
Go to the link: https://powervirtualagents.microsoft.com/en-us/
After signing in, the “Create A New Bot” window will appear, or you can click on the Bot Panel and select the “New bot” option to create a new one.
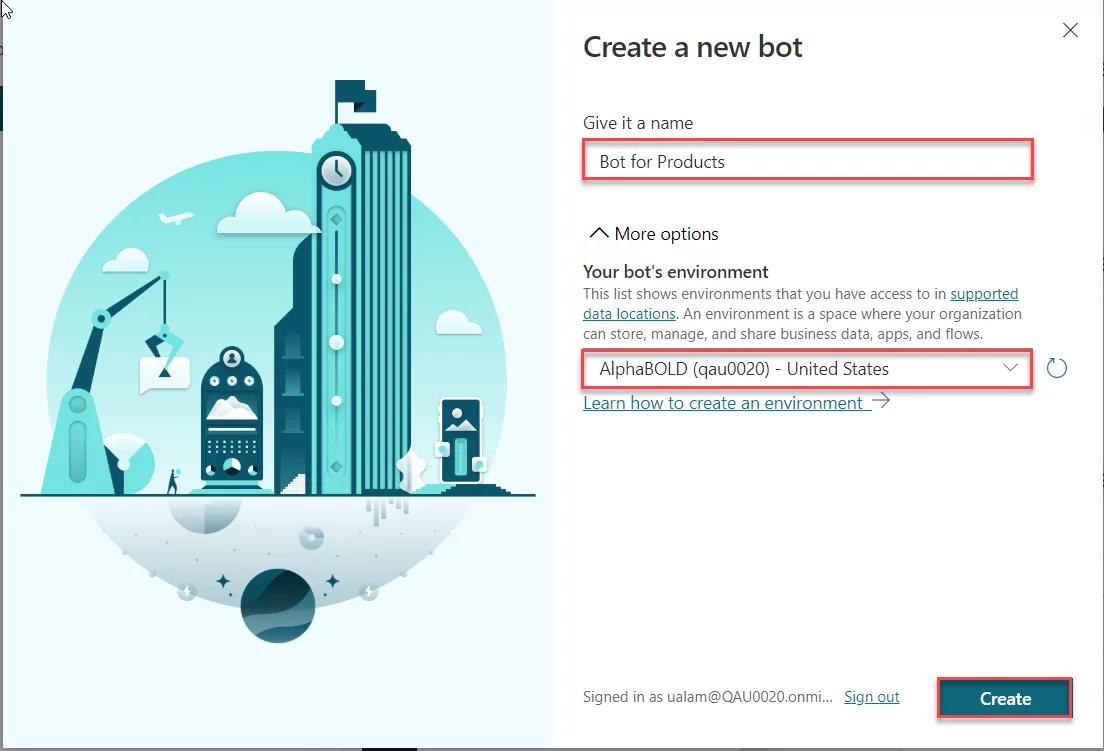
2. Create a Bot
Name your bot and choose your environment for which you want to create a bot. In the drop-down, you can see all the available environments for your organization. After giving it a name and choosing the environment, click on the create button to create a bot for you. The process may take some time for configuration.
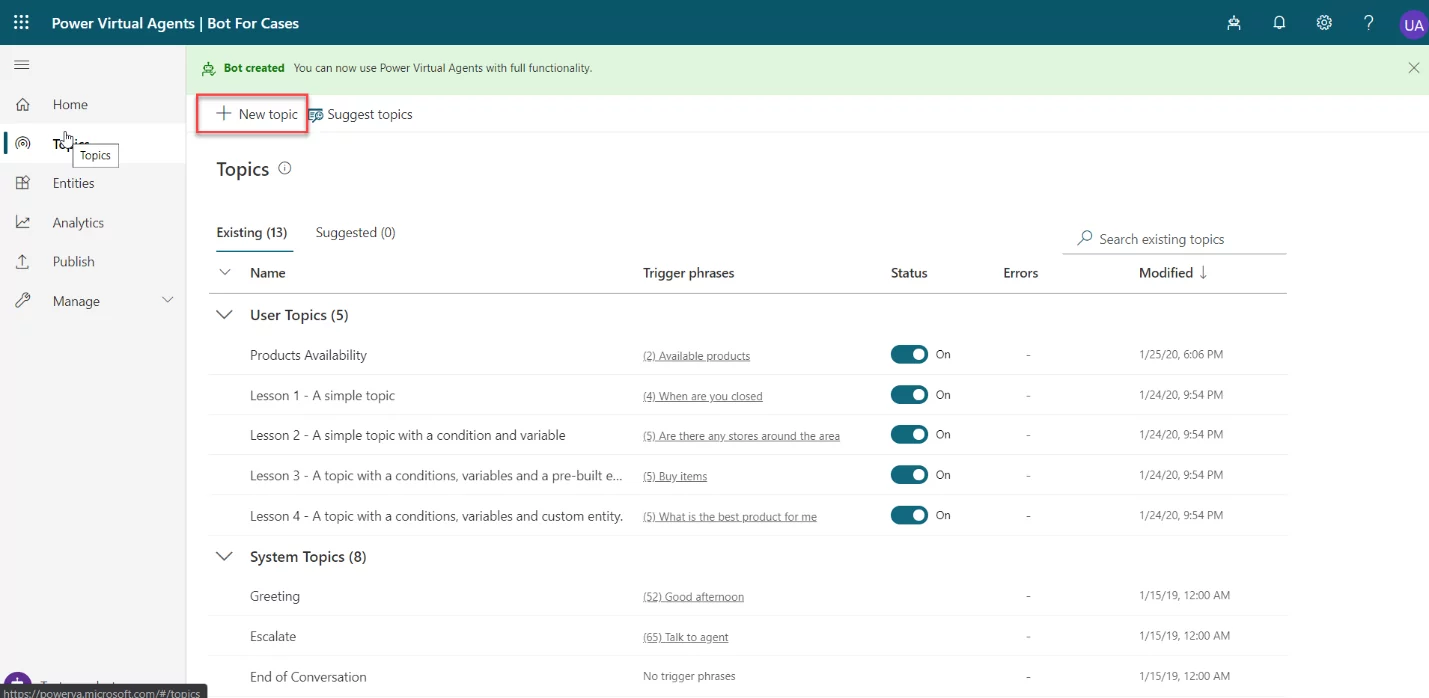
3. Create a Topic
After the Bot is created, you can build different topics for the Bot. There are many existing topics available in the bot system, which can be used, or a new topic can be created specific to your product/service.
Click on the “New topic” button to create a new one.
To add a new topic, you can specify the Name and Description of the topic, along with the Trigger Phrase. A trigger phrase is what your topic will prompt when a user enters the related words.
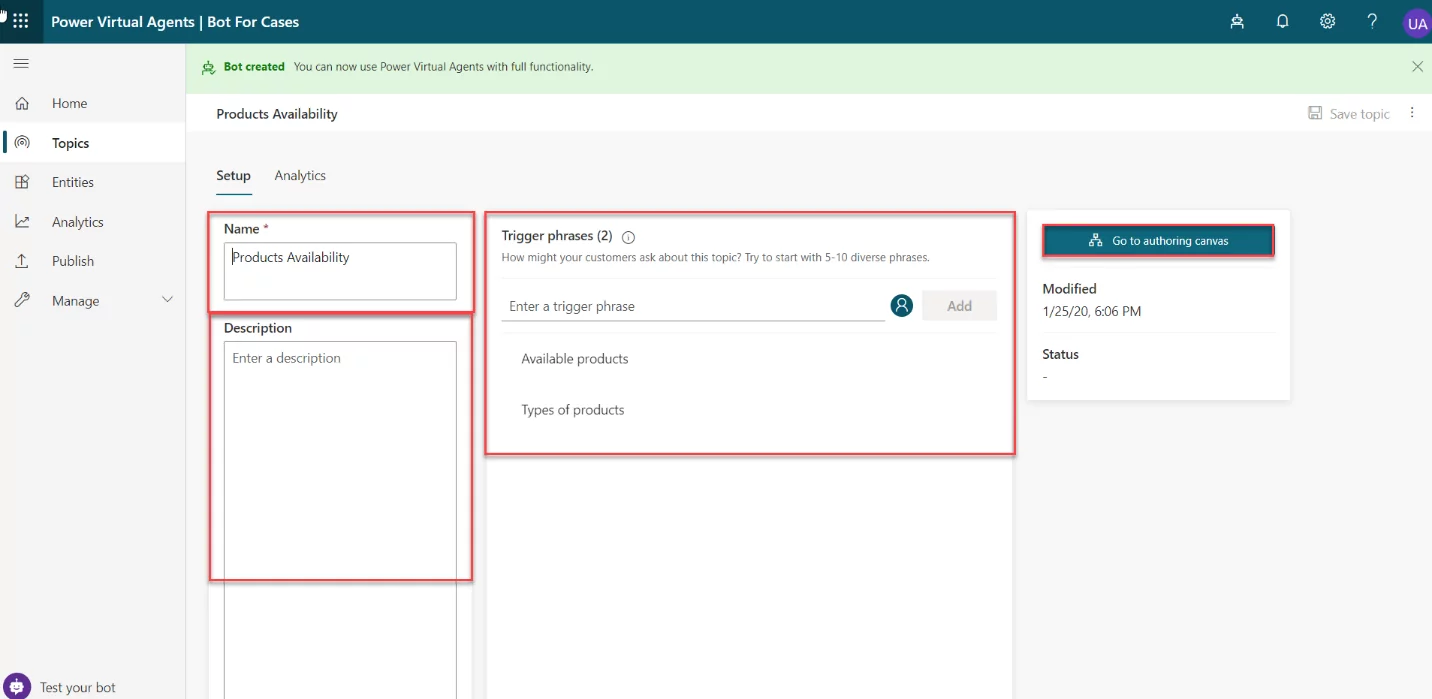
After adding the trigger phrases, click on the “Go to authoring canvas” button. It will open a new screen where you will add Messages, Questions, Actions, Conditions, and perform many other steps to configure the bot according to your requirements.
4. Configuring a Bot Flow
On the Authoring Canvas Screen, you will be able to see the trigger phrases you previously added, and by clicking the + button, you will see the additional steps which you may add in the Bot Flow based on your own preference.
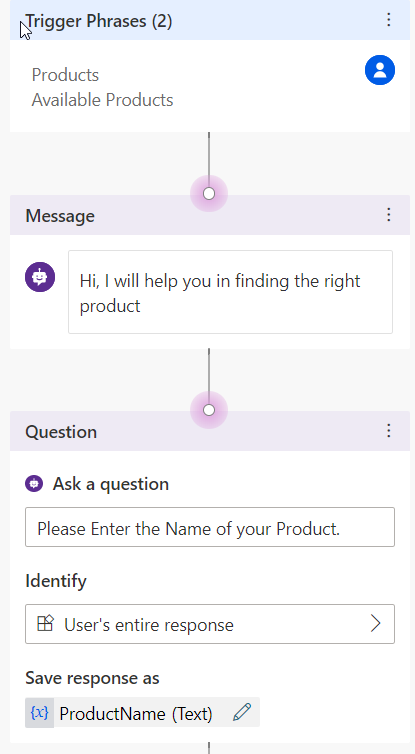
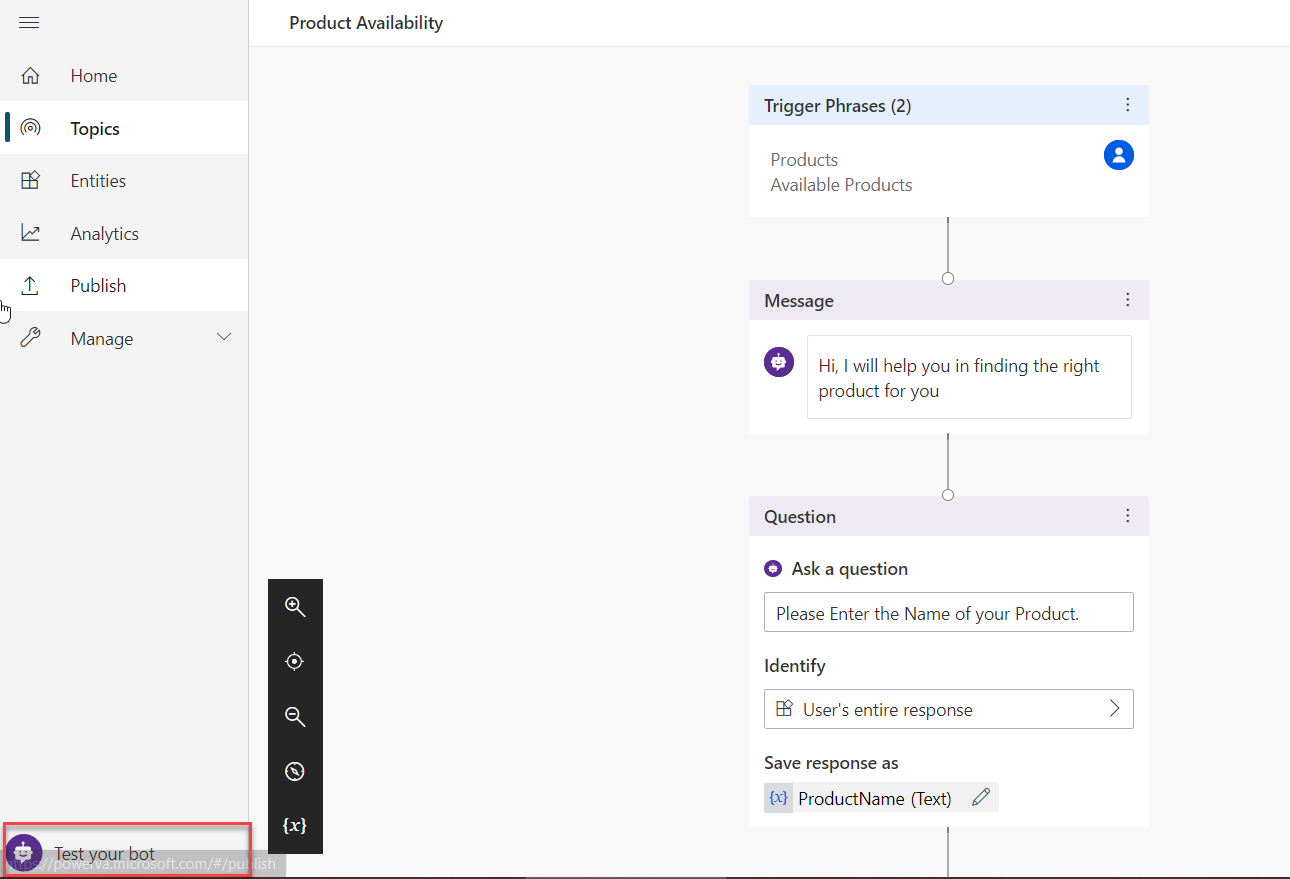
Select the Message option after clicking on the + button and Specify your message under the trigger phrases. After adding the message, add a Question, and save the result in a variable to use this in the next steps.
Your Bot Flow should look like this:
Now use that variable’s value to find the product’s information in the D365 or Common Data Service. To do this, click on + icon and select the “Call an Action” option. In this step, you will need a Microsoft Flow to retrieve the information on the product.
Construct an MS Flow
Go to: https://us.flow.microsoft.com/en-us/
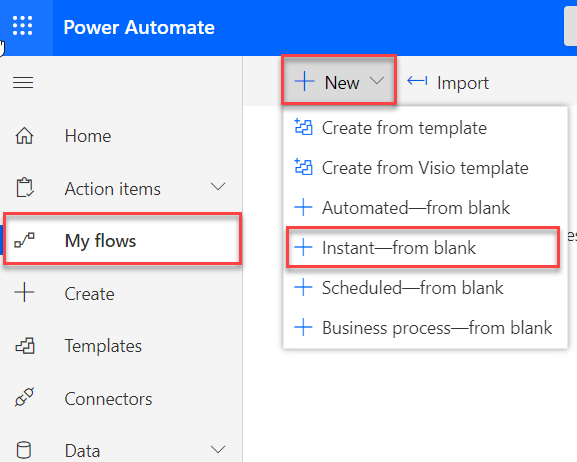
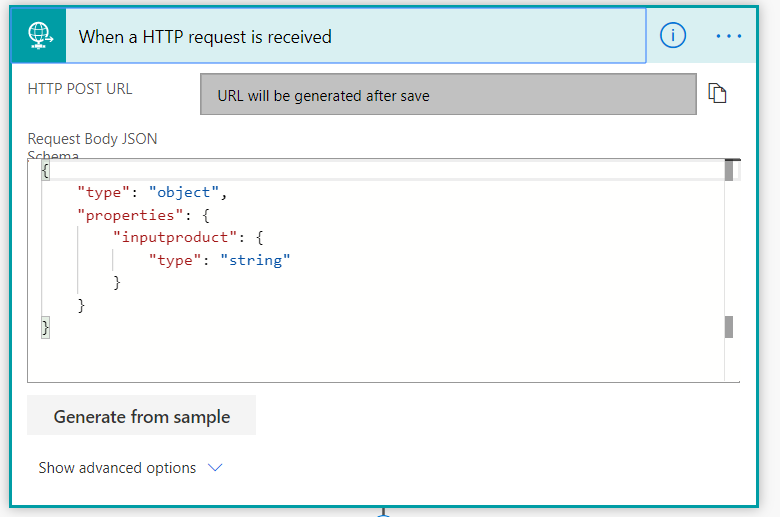
Click on “New” and then select the “Instant – from blank” option to create a flow. After that, choose the flow’s trigger “when an HTTP request is received” with the requested body to bring the Product Name as an input from the user.
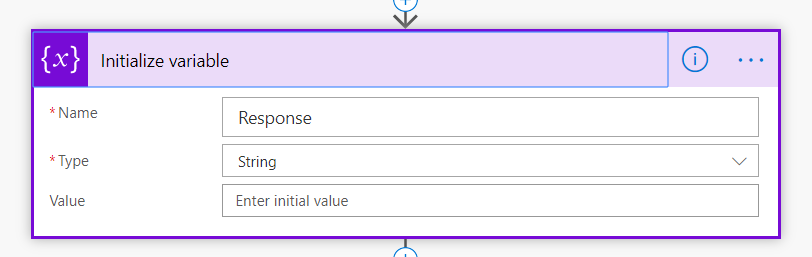
Now initialize a variable to store the input response and use this as the input to find out the related product’s information.
After initializing the variable, add List Records to filter the Query.
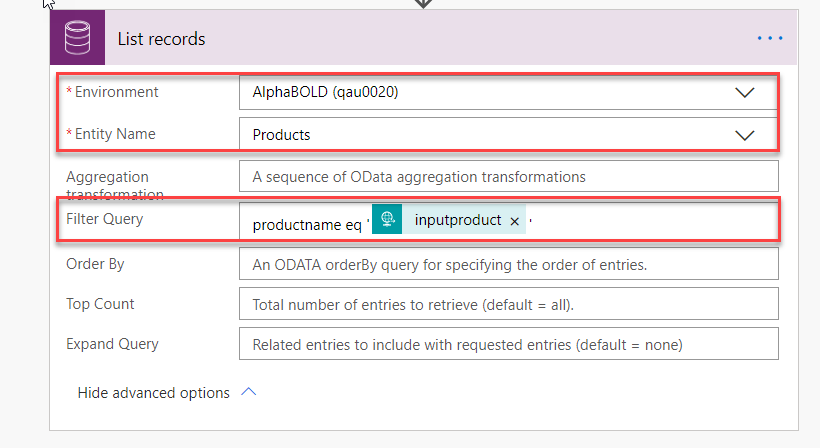
Select the Environment and the Entity, which you are using for the Bot and specify the Query and leave the remaining steps as it is.
Now add a condition, select choose value, and click on Expression to add an expression.

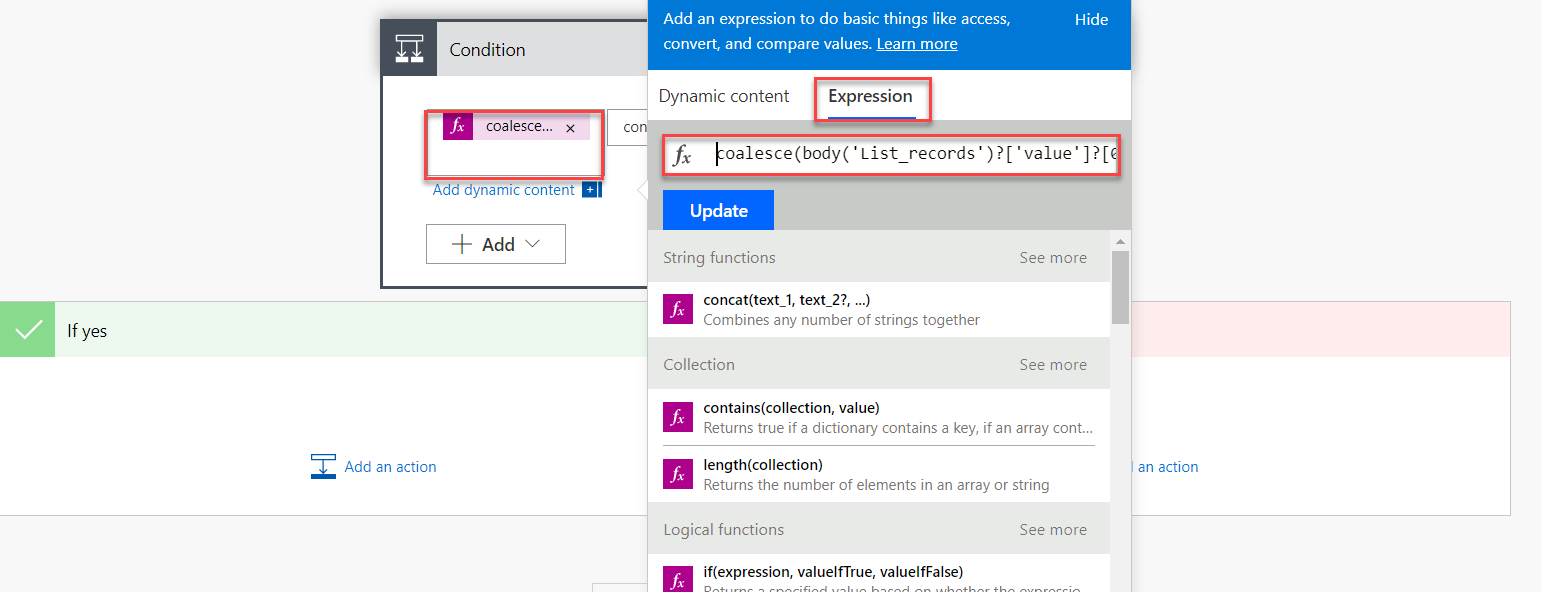
In the YES part of the condition, assign the value of the result to the variable, which is going to return to that Bot Flow. Select the variable which you have declared in the previous step and add the expression. This time the Expression will be:

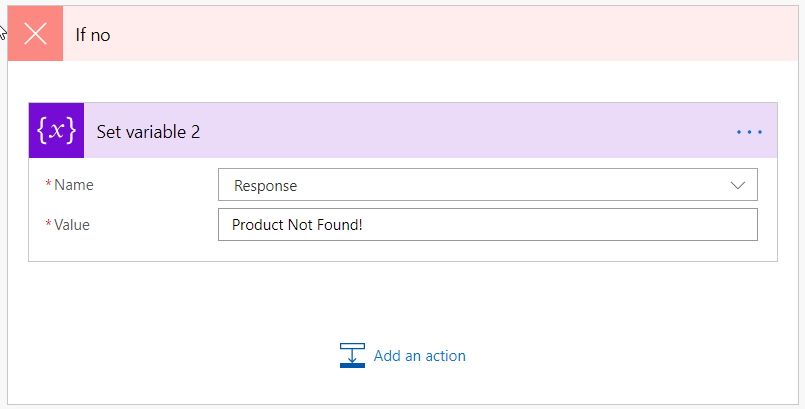
In the NO part of the condition, simply assign the value of the variable as “Not Found” or anything else based on your own preference.
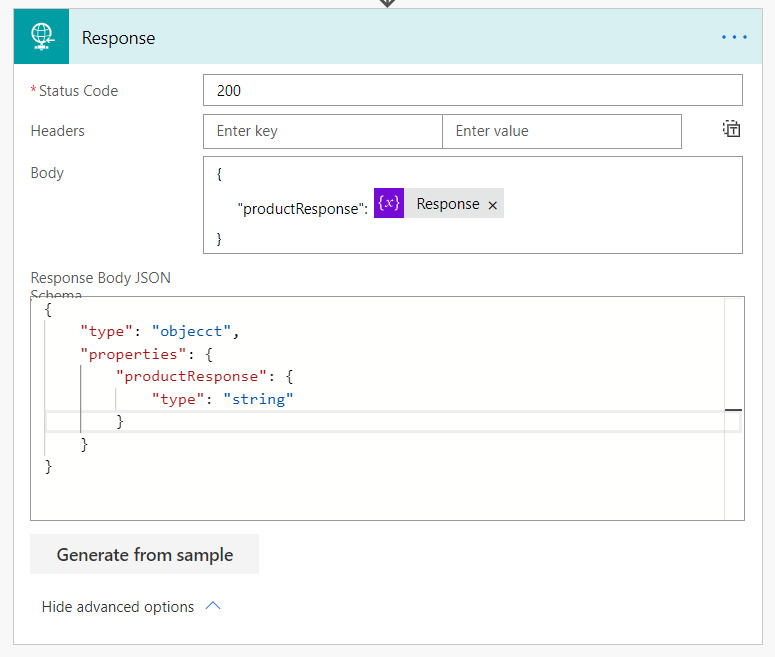
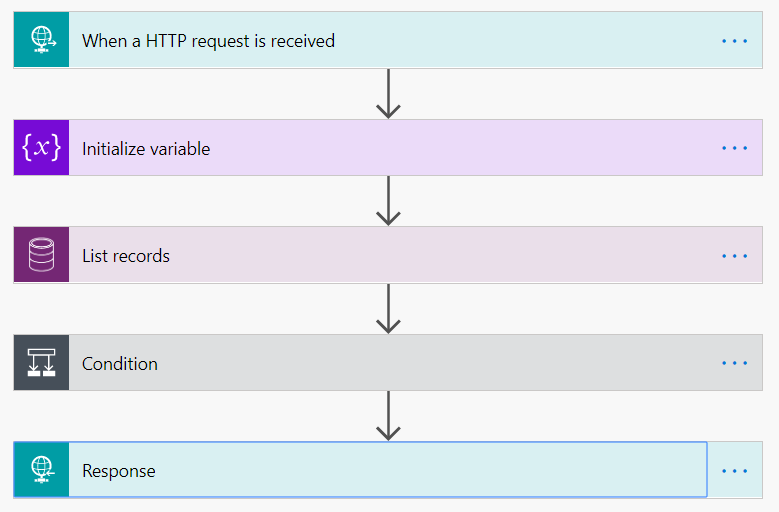
At the end of the Flow, add a Response step with the JSON response to return whatever is received from D365.
Your complete Flow will look like this:
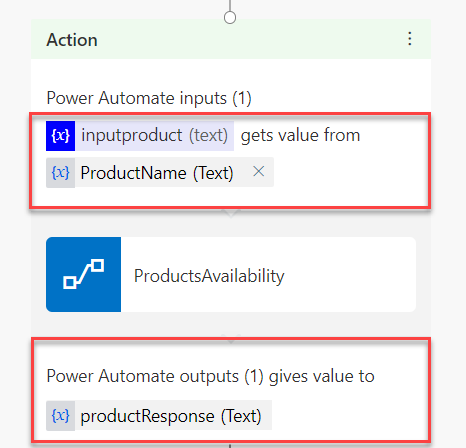
Now go back to the Authoring Canvas window to complete the Bot Flow, add a new step of “Call Action,” and select the MS Flow which you have created.
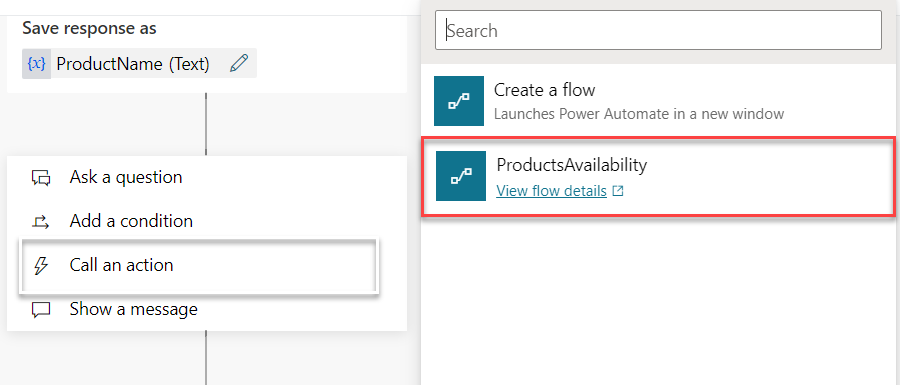
After adding the MS Flow in your action, specify the variables to store the result from MS Flow.
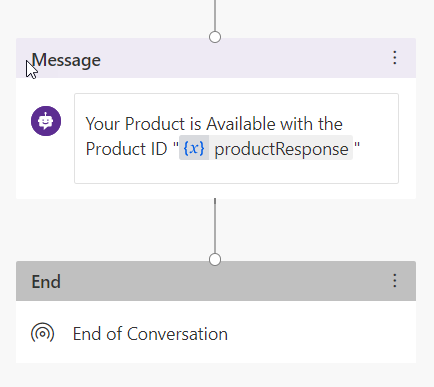
You can now add the result in the Message and end the conversation with a survey like this:
With this step, your Bot Flow will complete. You can save the flow and test the Bot. By clicking on the Test Bot, a test Bot will appear.
You can trigger your Bot by typing in the same phrase, which you have added in the first step of creating topics.
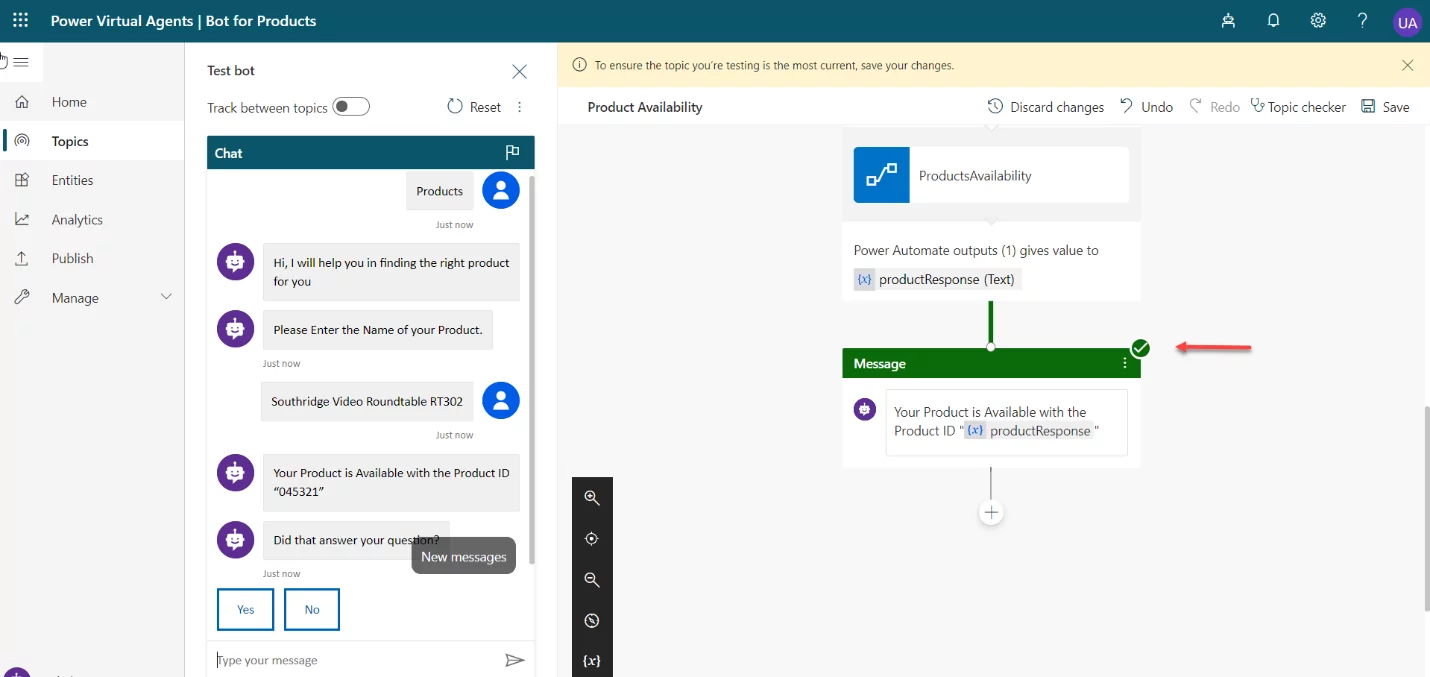
In the above screenshot, you can see the response from the Bot, and you can see the status of the steps which would show as green if it passed successfully.
Explore Dynamics 365 Services!
In conclusion, this is how you can simply create a Bot and then integrate with your website or Dynamics Portal. I hope after reading this blog, you understand the capabilities offered by Microsoft Power Virtual Agent, and how can you use this tool to enhance your customer experience.
We at AlphaBOLD provide consultancy and solutions related to Dynamics 365 and would love to hear and solve your business problem. You can contact us using the comment box below!
If you have any question or queries, do not hesitate to reach out to us!