Introduction
As we know, Azure IaaS is a consumption-based service, efficient utilization of the Cloud resources can help us significantly save cost. Today we will see how we can schedule Start/Stop Azure VM to save the cost as there is no out- of- the- box feature available to start the VM’s at any specific schedule. Most of the time, we do not need the Compute resources during off-hours or weekends, and keeping the VM’s running during off-hours can contribute to the cost. We can use Azure Automation runbooks to schedule VM start/stop to manage the cloud IaaS resources more efficiently and save cost.
Read More: Automate Azure Synapse Analytics Using Azure Automation!
What is Azure Automation
Azure Automation helps us automate the manual, long-running, repetitive tasks consistently using runbooks. For more information, please go through the Microsoft Docs.
Scenarios:
In this blog, we will be covering the following scenarios:
- Start/Stop VM’s on schedule.
- Auto Stop VM’s based on the CPU Usage.
- Start/Stop VM’s in ascending order based on tags.
Step 1 Create Automation Account:
Let’s get started and see how to enable this process.
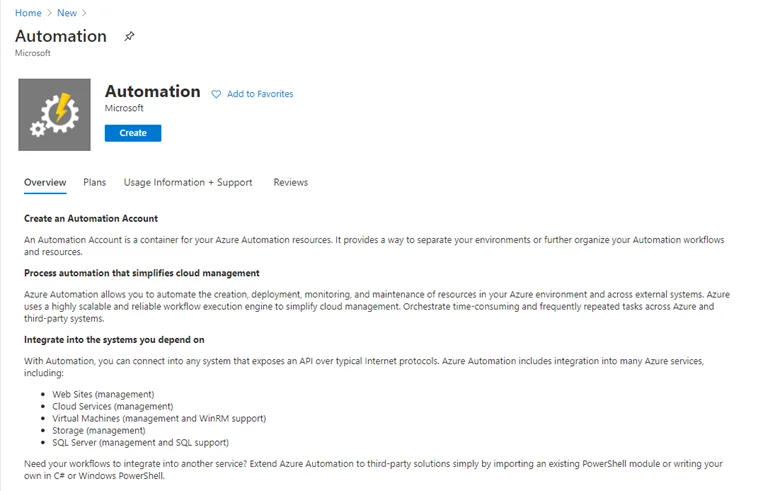
- Login to Azure Portal and click on “Create a resource,” and select Automation to create Automation Account.
- Enter Name, Subscription, Resource Group Name, Location, and select Create Azure run as account.
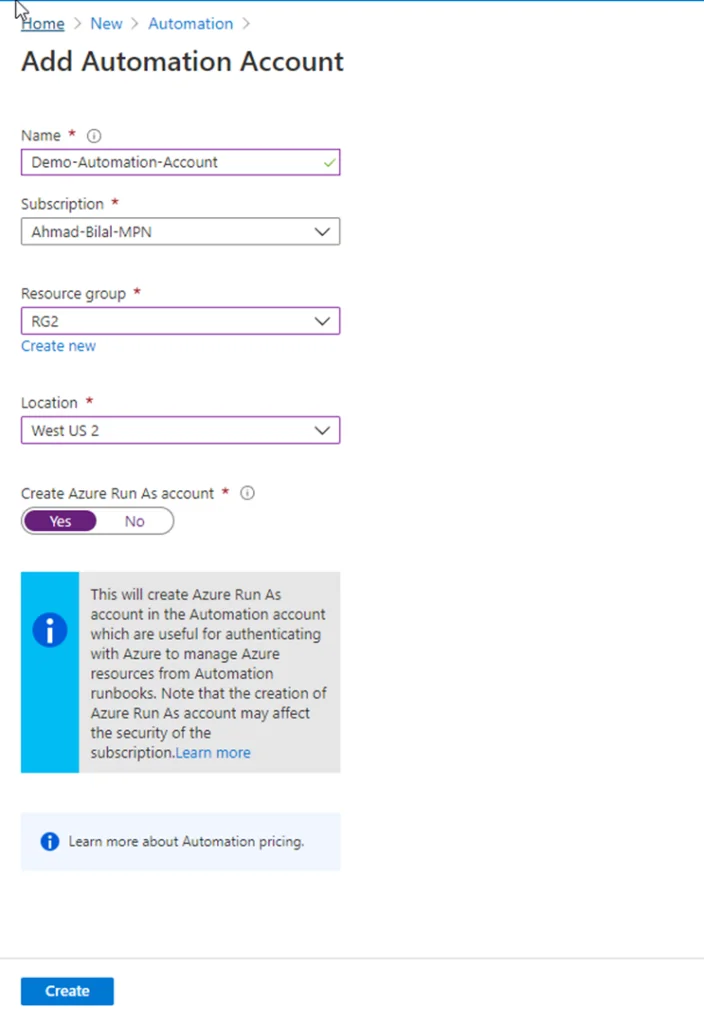
- Click Create and wait for a couple of minutes to finish the process.
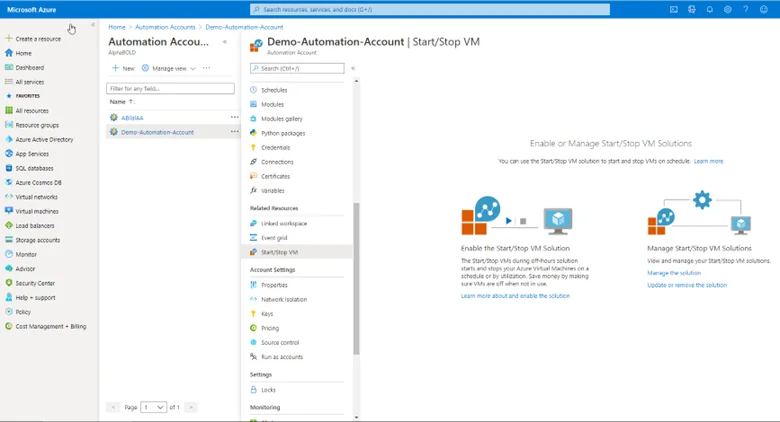
- Click on Start/Stop VM and manage Solution and click Create Solution.
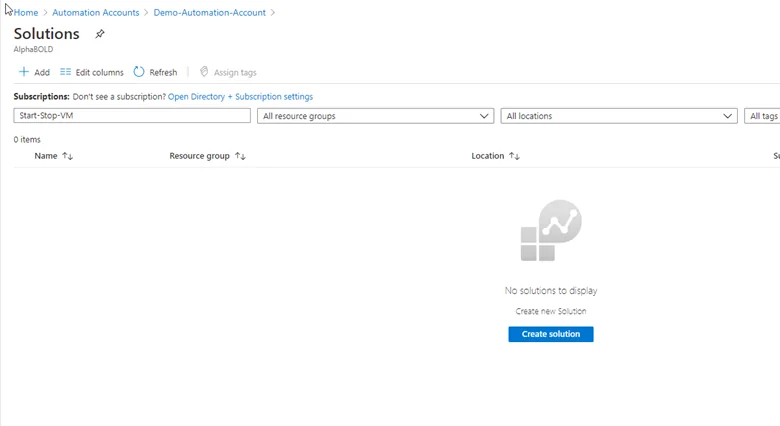
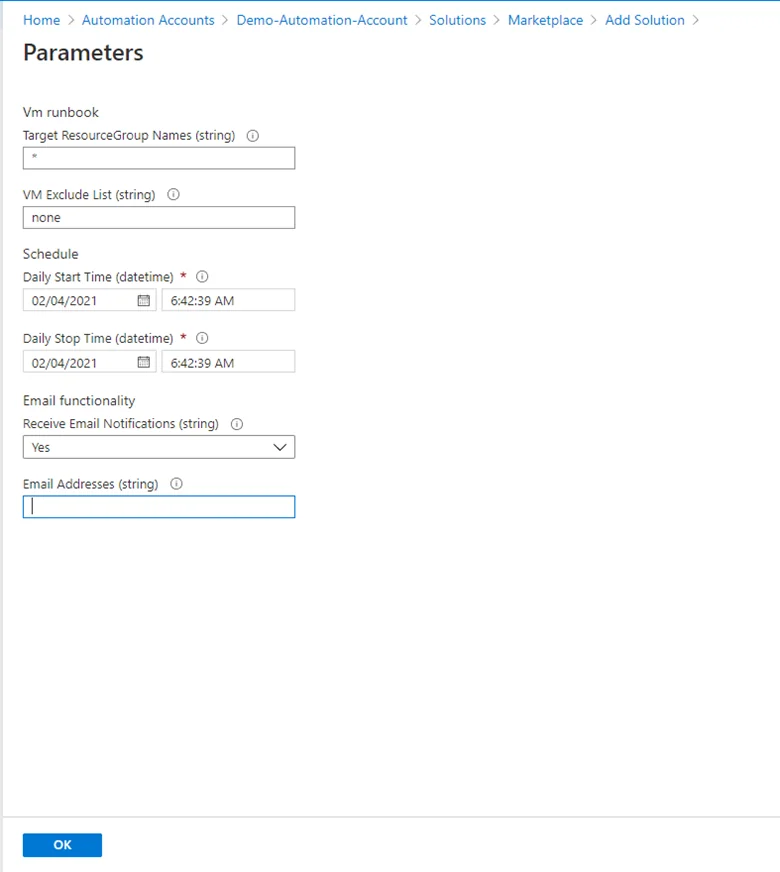
- In the search bar, enter Start/Stop VMs during off-hours and click Create to add the Solution in Automation Account. This requires the following information:
- Log Analytics Workspace.
- Automation Account linked to the log analytics workspace.
- Target Resource group Names containing the VM’s we are looking to manage. We can enter the comma-separated names of multiple resource groups or use the wildcard to include all the subscription resource groups.
- VM exclude list (if you want to exclude any VM).
- Schedule Start and Stop time.
- Email notification and list of email addresses.
Wait for a few minutes to complete the deployment of the Solution.
Optimize Operations - Consult with AlphaBOLD's Azure Specialists
Looking to streamline and enhance your operations with Azure Automation? Consult with AlphaBOLD's Azure specialists for tailored solutions. Let's streamline your operations!
Request a ConsultationStart/Stop VM's on Schedule:
In the scenario, we will be setting up a specific schedule to start and stop the targeted VM’s.
- Navigate to the Automation account and select Schedule to view/update or enable/disable the Start/Stop schedule settings.
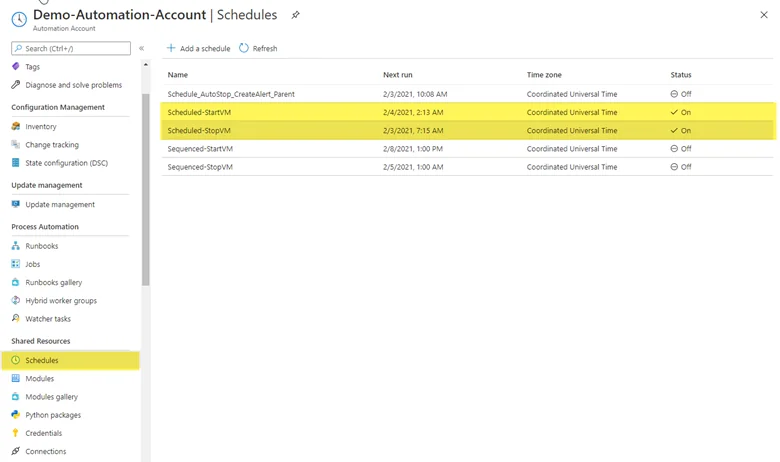
You can update the schedule according to your requirements. Or enable disable these schedule rules.
Start/Stop VMS in Sequence By Using Tags:
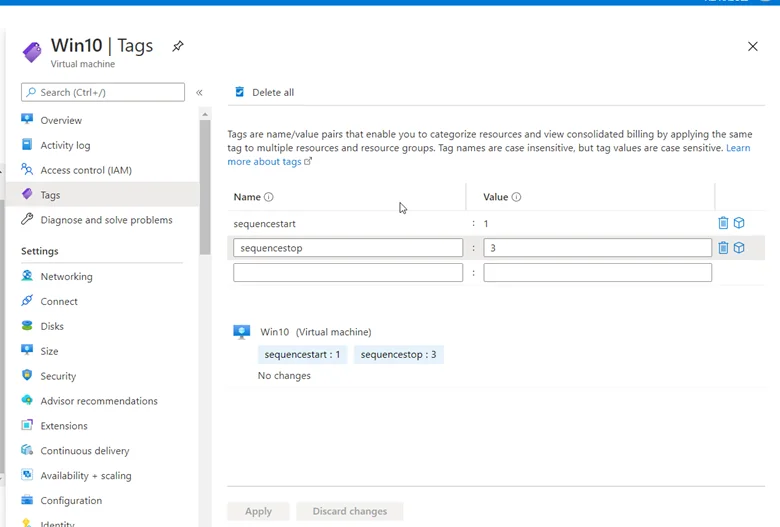
We can also Start/Stop VM’s in a specific sequence. This is quite helpful where different application components are running on multiple VM’s and VM’s need to be started or stopped in a sequence to start the application successfully.
- To achieve this, we need to add Tags to all the targeted VM’s as shown below.
- Now enable and adjust the schedule from the Automation Account schedules page.
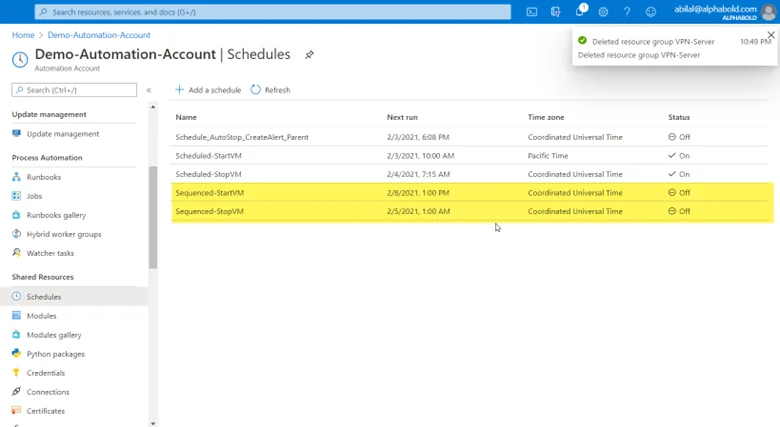
In this example, this Window 10 VM will be started 1st and stopped at 3rd position.
Start or Stop Automatically Based on CPU Utilization:
This can help save cost where we usually do not know the specific time to schedule to stop the VM’s due to several reasons, so we can enable this runbook to shut down the VM’s when CPU usage is less than the specified Percentage.
By default, the feature is pre-configured to evaluate the percentage CPU metric to see if the average utilization is 5 percent or less. This scenario is managed by the following variables and can be improved if the default values do not match your requirements:
External_AutoStop_MetricName
External_AutoStop_Threshold
External_AutoStop_TimeAggregationOperator
External_AutoStop_TimeWindow
External_AutoStop_Frequency
External_AutoStop_Severity
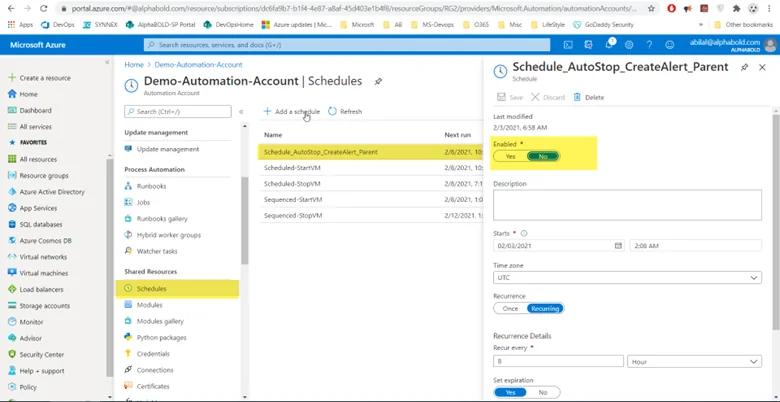
To enable the feature, navigate to Automation Account -> Schedules -> and enable the “Schedule_AutoStop_CreateAlert_Parent”. Enable and schedule this runbook according to your requirements.
Explore more about Azure Automation: Automate ML Models Deployment With Azure Services
Transform Your Workflows - Explore Azure Automation with AlphaBOLD
Ready to revolutionize your workflows with Azure Automation? Explore AlphaBOLD's Azure services for strategic insights and implementation support.
Request a ConsultationConclusion
Azure Automation comprises process automation, configuration management, update management, shared capabilities, and heterogeneous features.
Automating your deployments and repetitive cloud operations gives you significant flexibility and control to efficiently manage your azure cloud workload, ultimately helping you reduce the cost and time.
If you would like to know more about AlphaBOLD’s Manage cloud services, please visit our Managed IT services page.
Explore Recent Blog Posts


